I wanted to make Ramen Egg long ago. But the moment I thought of making Ramen Egg, I tell myself "What about Ramen? I don't know how to make them. Especially the noodle!"
I couldn't bear to eat Ramen Egg just like that. I insist to eat them together with Ramen. So, I bought a pack of instant Ramen from Meidi-Ya last week. This pack of Ramen serves two. It cost me about S$3.80 I think. I forgotten the exact price. But I would say, this noodle taste decent. Nothing to gaga about. I think fresh Tonkotsu broth is still the best.
Friday, March 30, 2012
Stir-Fried Cabbage with Bacon
I forgotten when I cook this. But that's okay.
I love Cabbages. They are sweet, crunchy, nutritious, not expensive and most importantly, it can store longer in my fridge. I will always keep a head of cabbage at home when I knew I have busy schedule in a week ahead. It can keep very well up to a week. But I try not to keep them for that long.
Savoy, green and red cabbage are popular in Western countries. But in Asia, the most general and cheaper one is the green cabbage that we commonly see in the market. Cabbages can be rounded, flattened or pointed. I personally like flattened type. Usually comes from Cameron Highland, Malaysia. They taste sweeter. And Cabbages does best in a cooler climate. Those mini sized round Cabbages that we usually see in NTUC comes from China, and they labelled it as Beijing Cabbage. They taste mild bitter, which I don't buy it often. But still, I will grab one once in a blue moon, when the Cabbages imported from Malaysia is out of stock.
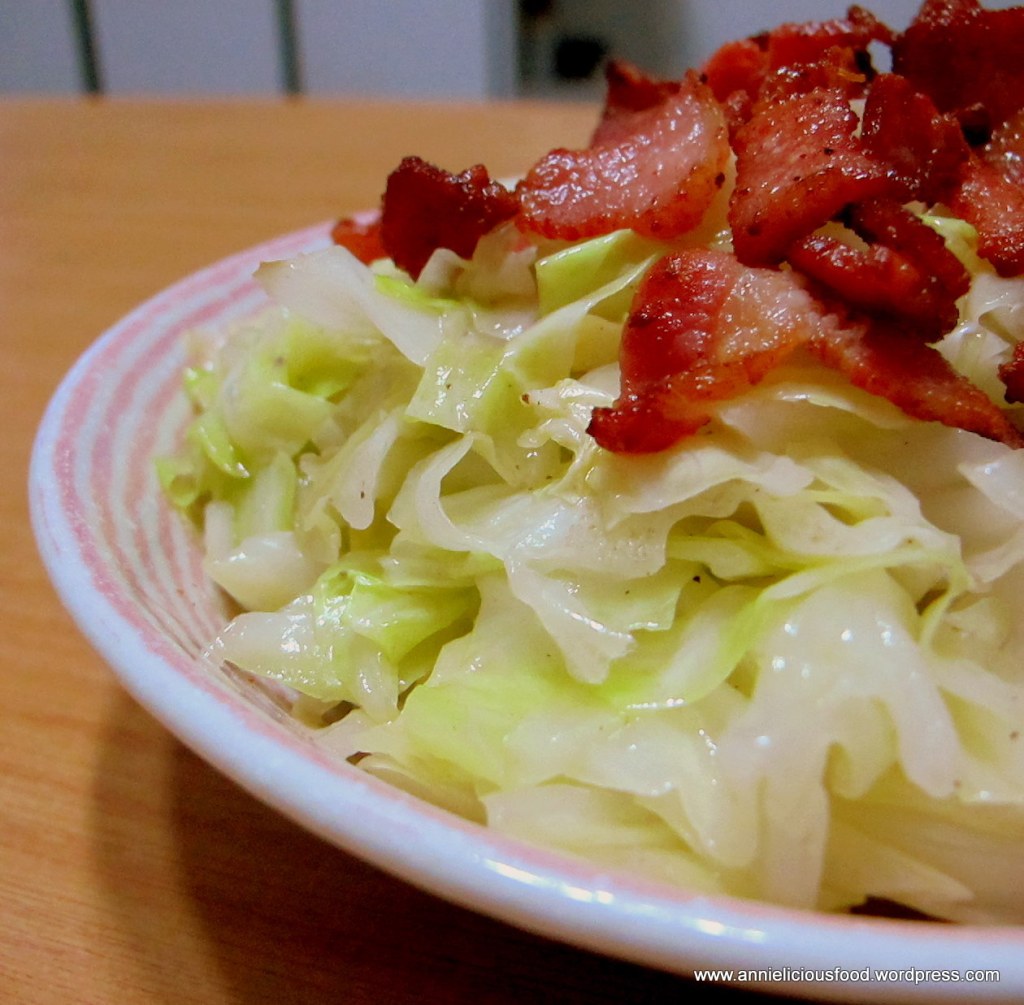
I'm just lovin' it :)
I love Cabbages. They are sweet, crunchy, nutritious, not expensive and most importantly, it can store longer in my fridge. I will always keep a head of cabbage at home when I knew I have busy schedule in a week ahead. It can keep very well up to a week. But I try not to keep them for that long.
Savoy, green and red cabbage are popular in Western countries. But in Asia, the most general and cheaper one is the green cabbage that we commonly see in the market. Cabbages can be rounded, flattened or pointed. I personally like flattened type. Usually comes from Cameron Highland, Malaysia. They taste sweeter. And Cabbages does best in a cooler climate. Those mini sized round Cabbages that we usually see in NTUC comes from China, and they labelled it as Beijing Cabbage. They taste mild bitter, which I don't buy it often. But still, I will grab one once in a blue moon, when the Cabbages imported from Malaysia is out of stock.
Stir Fried Cabbage. The simplest stir fried vegetable that I could think of.
Ingredient
400 grams of Cabbage
2 streaks of Bacon, cut into small pieces
1 tbsp oil
1 clove garlic, chopped
2 slices ginger, julienned
a dash of fish sauce (It's good to have. However, it's optional)
a dash of pepper
a tablespoons of Shao Xing Wine (Chinese Cooking Wine)
salt to taste (may omit salt if you choose to use fish sauce)
Method
1. Heat oil in a wok, fry the bacon bits till crunchy, but not charred. Dish up. Set aside. Leave the oil in the wok. Those are flavors that we wanted.
2. Garlic & ginger into the wok, fry till fragrant. Add in cabbages, stir until the cabbages are coated with oils & flavors. Cover the wok, cook for awhile. Add salt and pepper. Stir well, cook for 1 or 2 minutes. It should be tender by now.
3. Stir in Shao Xing Wine. Give it a quick toss. Heat off, dish up. Sprinkle Bacon bits on top and serve.
If you don't want your dish to looks too dry, splash abit of water while stir frying. It will gives you abit of broth that goes very well with your rice.

I'm just lovin' it :)
Tuesday, March 27, 2012
Deep Fried Dumplings (炸水饺)
Much as I love to have a Air Fryer at home, so as to make my deep-frying food more stress-free in a way. When I'm frazzled, I firmly believe that putting generous amount of oil in the pan is the safest way to go.
Fried dumplings and fried wanton is Max favorite. Infact, it's alot of people's favorite. People eat fried dumplings for breakfast, brunch, lunch, hi-tea, dinner and even supper. There's no restriction here. It can be part of your main course, or finger food. It's up to you.
I made this fried dumplings once about 2 years back. Max had been looking at the fried dumplings picture uploaded on my facebook for several times, complaining to me why I haven't been making this for him. Last night, I did it for him. And I really could see a happy smile on his face.
Before anything else, please pardon me with my lousy photo that makes my fried dumpling looks so unappetizing.

I don't really have a specific ingredient that taste like shop-bought fried dumpling here. I just use whatever I have, and whatever I feel that it would work fine. It's home cooked food anyway. And at home, in my kitchen, I choose to cook what suits me. Yes, I want to please my loved ones, but I can't do that if I'm making my own life hell. Right?
Fried dumplings and fried wanton is Max favorite. Infact, it's alot of people's favorite. People eat fried dumplings for breakfast, brunch, lunch, hi-tea, dinner and even supper. There's no restriction here. It can be part of your main course, or finger food. It's up to you.
I made this fried dumplings once about 2 years back. Max had been looking at the fried dumplings picture uploaded on my facebook for several times, complaining to me why I haven't been making this for him. Last night, I did it for him. And I really could see a happy smile on his face.
Before anything else, please pardon me with my lousy photo that makes my fried dumpling looks so unappetizing.

I don't really have a specific ingredient that taste like shop-bought fried dumpling here. I just use whatever I have, and whatever I feel that it would work fine. It's home cooked food anyway. And at home, in my kitchen, I choose to cook what suits me. Yes, I want to please my loved ones, but I can't do that if I'm making my own life hell. Right?
Stir Fried Chicken with Mushroom & Chinese Sausages
Fabulous feel-god food to make life less complicated and more pleasurable. This is what I always want to achieve.
If you were to cook this, I can assure you - one dish is enough.
This chicken supposed to be the commonly known 盅仔饭 dish. They should called it as Steamed Chicken Rice in Stewing Mugs. Stewing Mugs filled with rice, topped with 70% cooked stir fried chicken dish, and steam it again under high heat.
I should start by saying that my version this "盅仔饭" chicken dish is different from those shop-bought that is normally not so flavorful. Well, it would be different, wouldn't it? It's not that I haven't tried to replicate the shop-bought version recipe, taste less flavorful, less thick sauce and pale in color, but it hasn't felt right to me.
I don't have Stewing Mugs at home, obviously. So, I don't bother. I just cook the chicken and eat with a bowl of piping hot steamed rice. It's equally delicious without that stewing mug. And I think you will have to agree with me for this.

Chocolate Chiffon Cake
Oh! I did Chiffon again last night. This time round, I used Valrhona Chocolate powder. It's upon Max request for Chocolate flavor. So, I did it.
Monday, March 26, 2012
Orange Chiffon Cake
It takes me 3 failure in total, and this time is the 4th time. Finally, my Chiffon comes to a success. It's indeed a shame. The 1st time, I didn't even know how to define stiff meringue. The 2nd time, I used cold eggs. The 3rd time, I used cold eggs AGAIN~!!!
I'm so dead!
Something is really wrong with me. Why the hell am I so out of my mind, using cold eggs for cake baking?! The epic part is that, after the 2nd failure, I didn't even know where went wrong. I only realize it after my 3rd failure. After I had a chat with food blogger Wendy, my colleague Irene and watched youtube on chiffon cake tutorial, then, I realized that I'm really... I feel like banging my head to the wall.
Anyway, I shall let go the past.
Now let's look at my successful Orange Chiffon now....
Annielicious Food has moved!
Dear Readers,
I hereby announce that with immediate effect, my blog http://www.annieliciousfood.wordpress.com/ will be transferred over to blogspot. And this is what you are reading.
It is a real pain in my ass to do all these change over. But for the good of it, I think I shall do it.
Do visit us often for new updates! Don't forget to subscribe! :D
Love,
Annie
Sunday, March 25, 2012
Quick Meal : Baby Whitebaits Omelette
I supposed to blog this a week ago. But I totally forgotten about it. I cook this for myself over the weekend for a quick lunch. As usual, I would rather eat something plain and simple at home than going out for a meal that is complicated and expensive food.
Sometimes when I taste the food selling at coffee shops or hawker centre, especially economical rice stall, I really wonder how long had they kept those meat in the freezer before they cook it. Or, sometimes I can't help thinking that I'm actually eating unwashed veggies. But it is really unavoidable. When we are busy, we will still eat out even tho we know the fact that the food that they serve is no good.
This time round I didn't add prawns in there. Just pure whitebaits. A generous amount of whitebaits for my omelette. Yumms!!!

This takes me only 5mins. It's super quick.
Sometimes when I taste the food selling at coffee shops or hawker centre, especially economical rice stall, I really wonder how long had they kept those meat in the freezer before they cook it. Or, sometimes I can't help thinking that I'm actually eating unwashed veggies. But it is really unavoidable. When we are busy, we will still eat out even tho we know the fact that the food that they serve is no good.
This time round I didn't add prawns in there. Just pure whitebaits. A generous amount of whitebaits for my omelette. Yumms!!!

This takes me only 5mins. It's super quick.
Review : My Zojirushi NP-HBQ10 Rice Cooker (Part 2) - GABA Rice
I've given my 1st review on my rice cooker not long ago. Tested the review about cooking white rice using normal white rice function. The result was really good. I cooked brown rice two weeks ago, but I don't have the time to post it. So, now here it is.
Because of the Zojirushi Rice Cooker that I wanted to buy has a function named GABA. Before I buy the rice cooker, I tell myself that I really wanted to know what the hell is all about. I read alot about rice and I did some research. I wanted to make sure that the price that I'm paying for such good technology rice cooker is worthwhile. As I mentioned, the rice cooker has GABA setting that not all rice cooker have.
Before anything else, I'm gonna side track abit and talk about the rice, just to give you a clearer picture. I come to realize that the GABA is actually related to Hatsuga genmai (発芽玄米 germinated brown rice). It is one of the most nutritious rice promoting in Japan. Basically, it is unpolished brown Japanese rice that we are talking about.
A week before I buy my rice cooker, I went Isetan Orchard to hunt for Germinated Brown Rice, and I've got this pack of 2kg Japanese Germinated Brown Rice. Cost me S$19.90. Mad expensive. And all the instruction manual is not surprisingly... Japanese. Duh!

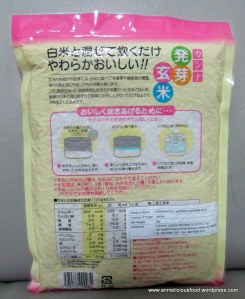
It is said that this rice has a softer texture than brown rice and a pleasant fragrance, yet retains the health benefits of brown rice and is marketed in Japan as a health food product. This rice is produced by soaking washed brown rice in warm water for dunno certain degree for 3 days or something. This cannot be done at home. So, they do it, and sell it to the market at such a damn expensive price.
Take a close look at the germinated rice. It's been germinated by a special process, but still retain it's brown in color. The bran of the rice has been removed, the germ remain.

For the 1st time I cook this, I didn't mix it with white rice, and it was a disastrous! Until I carefully see the picture of that packaging (I can't read Japanese!!). Then I came to realize that I need to add white rice to cook together with it using regular white rice function. The 2nd time, it was much better because I cooked it correctly. So, I conclude, this pack of rice is meant for people who own basic rice cooker at home, but wanted to enjoy germinated brown rice. So, for those who do not have a higher end rice cooker with GABA setting, buy this. I have to be frank, it's delicious.
This is part of the reason why my rice cooker is so expensive. It has GABA function! Wuahahahaha!!!
This GABA setting on the menu activates brown rice for increased nutritional value. Well, since I've got GABA function on my mighty rice cooker, I've get myself a pack of medium grain brown rice and give it a try then!
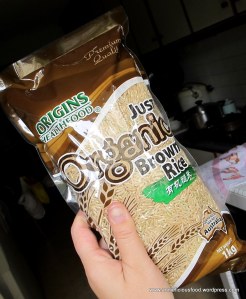
Cooked a cup normal white rice using Quick cooking setting, it takes me about 20 to 25mins. While I'm still using my old basic cooker for brown rice cooking, I will normally pre-soak my brown rice for 1 hour and then take another 25-30mins to cook it. Little did I know that by doing that, I actually spent 1 hour 30 minutes hour to get my brown rice cooked. Insane, right? But I can tell you, it pays to eat good rice. Because apparently, it’s the same way with this new one, taking anywhere from 1 hour 30 minutes to 1 hour 45 minutes to cook brown rice.
As if that wasn’t crazy enough, the GABA setting on my mighty rice cooker will take at minimum 3 hours and 15 minutes to cook! According to the instruction manual, the rice cooker will begin activating the brown rice, after which will start cooking automatically. During the brown rice activation process, the temperature in the Inner Cooking Pan is kept at about 40 degree Celsius for 2 hours. Insane!
Still, I cooked a batch of brown rice using the GABA setting. I do it over the weekend.

I was sold totally when it is said that by activating brown rice, GABA (gamma-aminobutyric acid), a naturally occurring nutrient in brown rice, increases to 150% of the amount contained in non-activated brown rice. This process also makes brown rice softer, thus making it readily edible. So, you still don't know what is GABA? It is actually a type of amino acid said to lower blood pressure, relieve stress & many other health benefit. Replenishing GABA to the body can also help fight insomnia, depression and other neurological conditions. Researches also found that a regular intake of GABA helps improve kidney function, lower blood pressure and reduce sleeplessness. MIGHTY RICE!!! :D
So, are you sold by now? Hehe...
The rice was nice, fluffy, tender and not at all like the horrible brown rice you get served all along. Eating brown rice cooked with GABA setting is really a great way to eat a little healthier while avoiding the full blast grainy texture that people usually hate about brown rice. Seriously, I never liked brown rice like the one I'm having now.
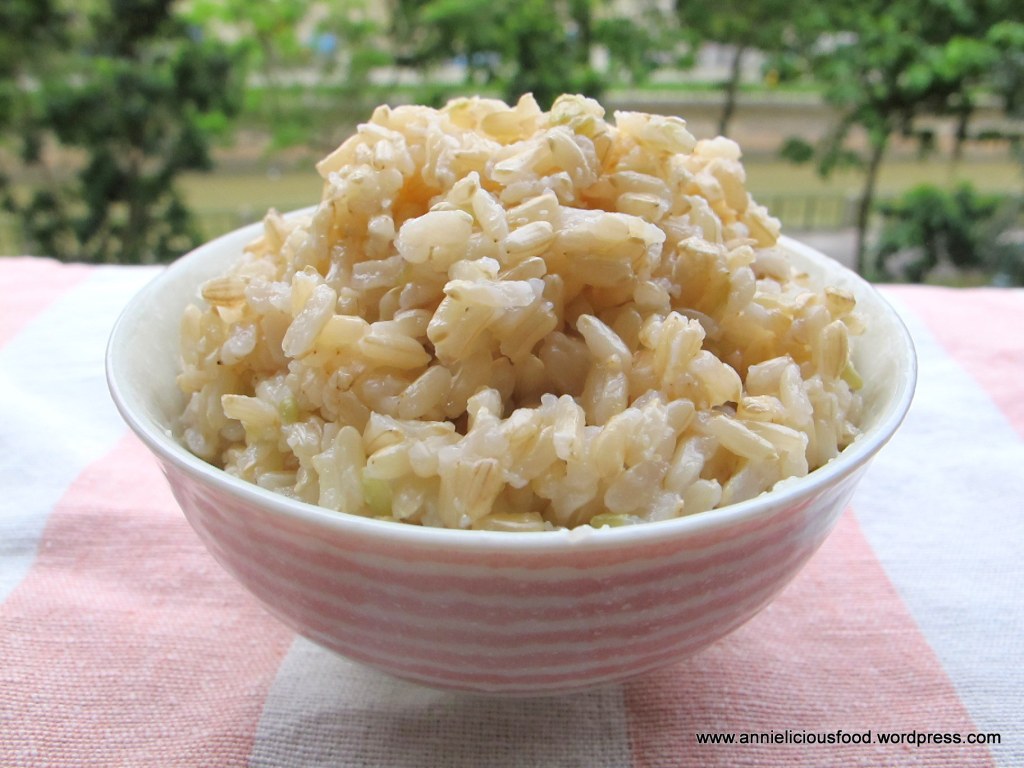
Although this rice is stickier than the normal rice. But if you look carefully, you can see how loose & fluff the kernels of rice are.
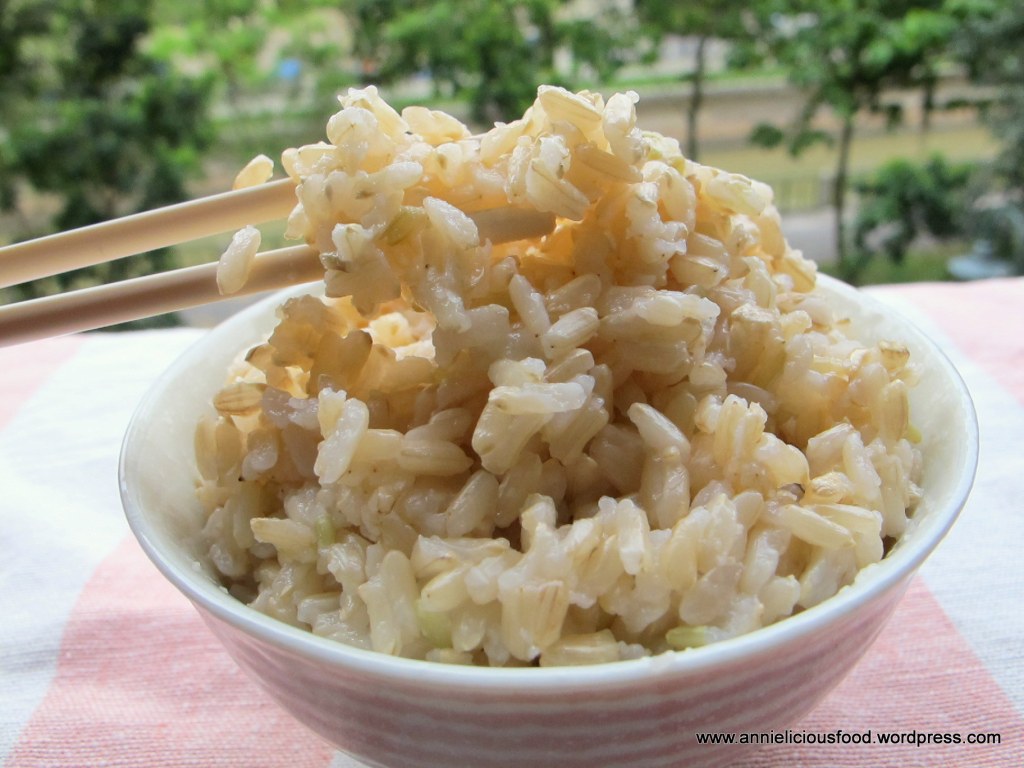
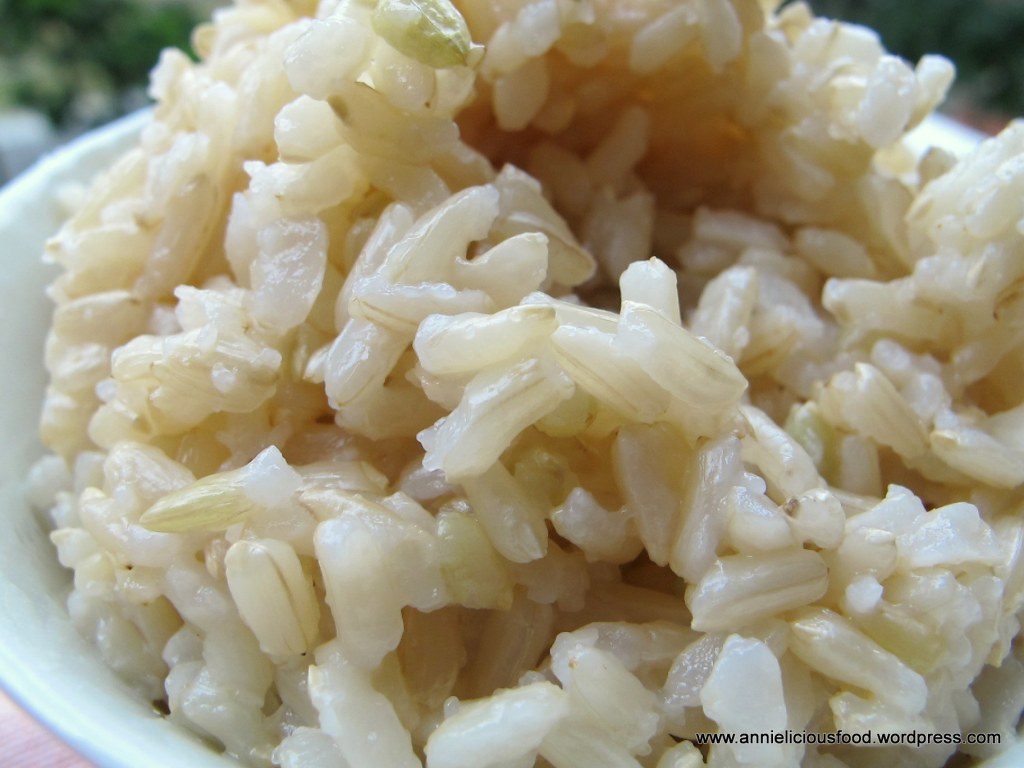
Take a close look. Did you see the rice has a brown line on every grain, and there's a tiny germ kinda thing stick at the end of the grain?

I’ve eaten exceptionally good rice before at high end Japanese restaurant in Singapore. The rice that made me want to eat another bowl. There was a definite difference!
This GABA rice is the rice that really makes me wanna eat one bowl after another. 3 hours and 15 minutes cooking time, I would say, it's worth the wait.
I love my rice cooker! :D
Next time, I will get myself a pack of Japanese short grain brown rice instead. Stay tuned!
Do make sure you read up my Part 1 and Part 3 review too.
Because of the Zojirushi Rice Cooker that I wanted to buy has a function named GABA. Before I buy the rice cooker, I tell myself that I really wanted to know what the hell is all about. I read alot about rice and I did some research. I wanted to make sure that the price that I'm paying for such good technology rice cooker is worthwhile. As I mentioned, the rice cooker has GABA setting that not all rice cooker have.
Before anything else, I'm gonna side track abit and talk about the rice, just to give you a clearer picture. I come to realize that the GABA is actually related to Hatsuga genmai (発芽玄米 germinated brown rice). It is one of the most nutritious rice promoting in Japan. Basically, it is unpolished brown Japanese rice that we are talking about.
A week before I buy my rice cooker, I went Isetan Orchard to hunt for Germinated Brown Rice, and I've got this pack of 2kg Japanese Germinated Brown Rice. Cost me S$19.90. Mad expensive. And all the instruction manual is not surprisingly... Japanese. Duh!


It is said that this rice has a softer texture than brown rice and a pleasant fragrance, yet retains the health benefits of brown rice and is marketed in Japan as a health food product. This rice is produced by soaking washed brown rice in warm water for dunno certain degree for 3 days or something. This cannot be done at home. So, they do it, and sell it to the market at such a damn expensive price.
Take a close look at the germinated rice. It's been germinated by a special process, but still retain it's brown in color. The bran of the rice has been removed, the germ remain.

For the 1st time I cook this, I didn't mix it with white rice, and it was a disastrous! Until I carefully see the picture of that packaging (I can't read Japanese!!). Then I came to realize that I need to add white rice to cook together with it using regular white rice function. The 2nd time, it was much better because I cooked it correctly. So, I conclude, this pack of rice is meant for people who own basic rice cooker at home, but wanted to enjoy germinated brown rice. So, for those who do not have a higher end rice cooker with GABA setting, buy this. I have to be frank, it's delicious.
This is part of the reason why my rice cooker is so expensive. It has GABA function! Wuahahahaha!!!
This GABA setting on the menu activates brown rice for increased nutritional value. Well, since I've got GABA function on my mighty rice cooker, I've get myself a pack of medium grain brown rice and give it a try then!

Cooked a cup normal white rice using Quick cooking setting, it takes me about 20 to 25mins. While I'm still using my old basic cooker for brown rice cooking, I will normally pre-soak my brown rice for 1 hour and then take another 25-30mins to cook it. Little did I know that by doing that, I actually spent 1 hour 30 minutes hour to get my brown rice cooked. Insane, right? But I can tell you, it pays to eat good rice. Because apparently, it’s the same way with this new one, taking anywhere from 1 hour 30 minutes to 1 hour 45 minutes to cook brown rice.
As if that wasn’t crazy enough, the GABA setting on my mighty rice cooker will take at minimum 3 hours and 15 minutes to cook! According to the instruction manual, the rice cooker will begin activating the brown rice, after which will start cooking automatically. During the brown rice activation process, the temperature in the Inner Cooking Pan is kept at about 40 degree Celsius for 2 hours. Insane!
Still, I cooked a batch of brown rice using the GABA setting. I do it over the weekend.

I was sold totally when it is said that by activating brown rice, GABA (gamma-aminobutyric acid), a naturally occurring nutrient in brown rice, increases to 150% of the amount contained in non-activated brown rice. This process also makes brown rice softer, thus making it readily edible. So, you still don't know what is GABA? It is actually a type of amino acid said to lower blood pressure, relieve stress & many other health benefit. Replenishing GABA to the body can also help fight insomnia, depression and other neurological conditions. Researches also found that a regular intake of GABA helps improve kidney function, lower blood pressure and reduce sleeplessness. MIGHTY RICE!!! :D
So, are you sold by now? Hehe...
The rice was nice, fluffy, tender and not at all like the horrible brown rice you get served all along. Eating brown rice cooked with GABA setting is really a great way to eat a little healthier while avoiding the full blast grainy texture that people usually hate about brown rice. Seriously, I never liked brown rice like the one I'm having now.

Although this rice is stickier than the normal rice. But if you look carefully, you can see how loose & fluff the kernels of rice are.

Take a close look. Did you see the rice has a brown line on every grain, and there's a tiny germ kinda thing stick at the end of the grain?


I’ve eaten exceptionally good rice before at high end Japanese restaurant in Singapore. The rice that made me want to eat another bowl. There was a definite difference!
This GABA rice is the rice that really makes me wanna eat one bowl after another. 3 hours and 15 minutes cooking time, I would say, it's worth the wait.
I love my rice cooker! :D
Next time, I will get myself a pack of Japanese short grain brown rice instead. Stay tuned!
Do make sure you read up my Part 1 and Part 3 review too.
Long Bean Flavorful Mixed Rice (豆角有味饭)
This cooked long bean rice is full of flavor. Some of you must be asking what is 豆角 (dou jiao). 豆角 is literally long bean in Cantonese. We usually called this 长豆 in Singapore.
This is a ONE POT dish that my grandma used to cook for me during my childhood time. This pot of flavorful rice can serve the whole family with little effort, and it is really good if your cooking need to be done way in advance, because this can be well kept in your rice cooker up to 2 hours or longer if you want. It is not a quick meal. Because you need some effort when it comes to preparation. I would say, it's more on a quick-quick-slow meal. Like Tango dance :)
It's a busy Saturday today. Max went Bintan for company trip. I've got to send my car to the garage to get it serviced, drive to the market and get some fresh ingredients. Reached home around 1pm, and start to do all my cooking preparation. I choose to cook this mixed rice today because I've got some errand run around later at 4pm, and need to fetch Max from the ferry terminal at 5pm, which this timing supposed to be my dinner preparation time. I don't want him to reach home without dinner being served after his long day. So... here it is.
The ingredient that I'm gonna use here is common ingredient that you could easily get from the market. This recipe could easily feed 4 to 5 adult.

Ingredient A - (Rice)
Ingredient B - (Long Bean Mixture)
Method
1. RICE - Rinse and soak rice in water for 30mins. Drained and set aside.
2. ROASTED PORK - Heat up wok, a tbsp oil, chopped garlic, fry till fragrance. Add in roasted pork, give it a quick toss under high heat. The pork will release some oil during stir frying. And this is what we want. The oil! Add in sugar & soy sauce, fry till the pork looks brownish and caramelized. Heat off, dish up. And by now, your kitchen is full of stir fried roasted pork aroma, that makes you wants to put one into your mouth immediately... Cantonese called this method of stir-frying roasted pork as 爆烧肉 (bao-siu-yuk). It's simply enhancing the flavor of the roasted pork.
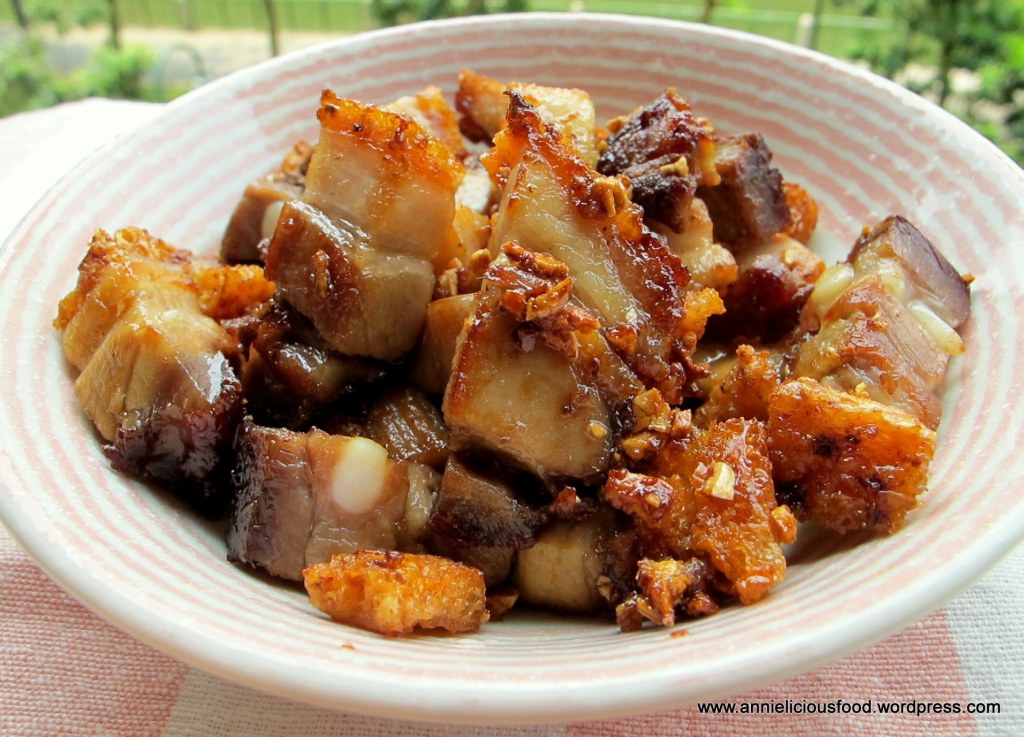
3. LONG BEAN MIXTURE - Heat 2 tbsp of oil in wok, fry shallots till golden brown, add ginger and fry till fragrant. Add in the rest of the ingredients - Chinese sausages, dried prawns, long bean. Sizzle in Shao-Xing wine, give it a quick toss. Add in seasoning - salt. sugar. pepper, sesame oil. Heat off, dish up, set aside. You don't need to thoroughly cook this. What you need is just kinda combine all of them and make sure that they are evenly coated with flavors & fragrance.
4. RICE - Heat 1 tbsp of oil in a wok, fry garlic till fragrant. Reduce to low heat, sizzle in seasoning for rice - light soy sauce, add rice, dark soy sauce and oyster sauce. Fry evenly at high heat for awhile. Off the heat. Transfer fried rice and add 500ml water into rice cooker. Switch on and cook for about 13 to 15 minutes. Using time to time yourself is always the best choice.
5. When the water almost dried up, add in fried long beans mixture, and roasted pork.
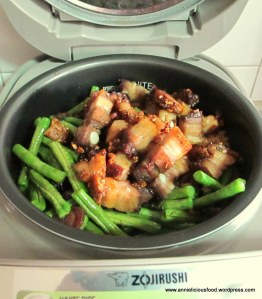
6. Cover it, continue to cook until the rice cooker automatically turn to "Keep Warm" mode. Leave it there for another 5 to 10 mins. Stir well - But I would prefer to use the word "Messed it up". LOL!

8. And serve!

I couldn't tell you how delicious this pot of mixed rice is. But the fact is that, my dear father-in-law ate HALF POT of the rice on his own. Scroll up the picture and see the rice in the rice cooker once again. The rice in my rice cooker is almost full. The space is juuuuuust nice when i shut the rice cooker cover.
When we return home, and I open my rice cooker. Wanted to serve Max some rice, I rubbed my eyes twice when I saw my pot of rice left with half pot only. If I knewthis mice my father-in-law could eat so much, I would have cooked more.
So, you want a bowl?

Max loves it too. He ate two bowls :)
This is a ONE POT dish that my grandma used to cook for me during my childhood time. This pot of flavorful rice can serve the whole family with little effort, and it is really good if your cooking need to be done way in advance, because this can be well kept in your rice cooker up to 2 hours or longer if you want. It is not a quick meal. Because you need some effort when it comes to preparation. I would say, it's more on a quick-quick-slow meal. Like Tango dance :)
It's a busy Saturday today. Max went Bintan for company trip. I've got to send my car to the garage to get it serviced, drive to the market and get some fresh ingredients. Reached home around 1pm, and start to do all my cooking preparation. I choose to cook this mixed rice today because I've got some errand run around later at 4pm, and need to fetch Max from the ferry terminal at 5pm, which this timing supposed to be my dinner preparation time. I don't want him to reach home without dinner being served after his long day. So... here it is.
The ingredient that I'm gonna use here is common ingredient that you could easily get from the market. This recipe could easily feed 4 to 5 adult.

Ingredient A - (Rice)
- 3 cups of Jasmine Rice (the ordinary chinese rice that you have at home)
- 500ml water
- 2 cloves garlic - peeled, washed, chopped
- 1 tbsp light soy sauce
- 1 tsp dark soy sauce
- 1 tbsp oyster sauce
Ingredient B - (Long Bean Mixture)
- 3 tbsp oil
- 4 shallots - Peeled, washed, and sliced.
- 3 slices of ginger - Julienned
- 3 tbsp dried shrimps - Washed, soaked till soft, drained.
- 1 pair Chinese sausage (腊肠)- Washed with hot water, drained, remove skin, sliced.
- 10 long beans - washed, cut into 1 inch length.
- 1 tbsp Shao-Xing Wine (Chinese cooking wine)
- 1/2 tsp salt
- 1 tsp sugar
- a dash of pepper
- a dash of sesame oil
- 1 tbsp oil
- 1 clove garlic - finely chopped
- 200g Roasted Pork (烧肉) - chopped into bite size
- 1 tbsp sugar
- 2 tbsp soy sauce
Method
1. RICE - Rinse and soak rice in water for 30mins. Drained and set aside.
2. ROASTED PORK - Heat up wok, a tbsp oil, chopped garlic, fry till fragrance. Add in roasted pork, give it a quick toss under high heat. The pork will release some oil during stir frying. And this is what we want. The oil! Add in sugar & soy sauce, fry till the pork looks brownish and caramelized. Heat off, dish up. And by now, your kitchen is full of stir fried roasted pork aroma, that makes you wants to put one into your mouth immediately... Cantonese called this method of stir-frying roasted pork as 爆烧肉 (bao-siu-yuk). It's simply enhancing the flavor of the roasted pork.

3. LONG BEAN MIXTURE - Heat 2 tbsp of oil in wok, fry shallots till golden brown, add ginger and fry till fragrant. Add in the rest of the ingredients - Chinese sausages, dried prawns, long bean. Sizzle in Shao-Xing wine, give it a quick toss. Add in seasoning - salt. sugar. pepper, sesame oil. Heat off, dish up, set aside. You don't need to thoroughly cook this. What you need is just kinda combine all of them and make sure that they are evenly coated with flavors & fragrance.
4. RICE - Heat 1 tbsp of oil in a wok, fry garlic till fragrant. Reduce to low heat, sizzle in seasoning for rice - light soy sauce, add rice, dark soy sauce and oyster sauce. Fry evenly at high heat for awhile. Off the heat. Transfer fried rice and add 500ml water into rice cooker. Switch on and cook for about 13 to 15 minutes. Using time to time yourself is always the best choice.
5. When the water almost dried up, add in fried long beans mixture, and roasted pork.

6. Cover it, continue to cook until the rice cooker automatically turn to "Keep Warm" mode. Leave it there for another 5 to 10 mins. Stir well - But I would prefer to use the word "Messed it up". LOL!

8. And serve!

I couldn't tell you how delicious this pot of mixed rice is. But the fact is that, my dear father-in-law ate HALF POT of the rice on his own. Scroll up the picture and see the rice in the rice cooker once again. The rice in my rice cooker is almost full. The space is juuuuuust nice when i shut the rice cooker cover.
When we return home, and I open my rice cooker. Wanted to serve Max some rice, I rubbed my eyes twice when I saw my pot of rice left with half pot only. If I knew
So, you want a bowl?

Max loves it too. He ate two bowls :)
Arrowroot Soup (粉葛湯)
Arrowroot is a huge root vegetable that many people may not heard before nor sounds familiar to them. Especially younger generation nowadays. But if any of the Chinese family who usually cook at home, I think most of them cook this soup before. If you don't even know what is Arrowroot, then, maybe 粉葛湯 (fěn gé tāng) sounds more familiar to you?
Arrowroot is very much like a big sweet potato. I crave for this soup. The very last time I had this soup was during Chinese New Year, brewed by my mother. Ahhh... I missed the taste of my mother's soup so much! And so, I bought arrowroot today. Like all root vegetables, it is best slow boiled with pork ribs, red dates, dried octopus / cuttlefish to make a nice and simple soup.
This piece of 450 grams of arrowroot 450 grams cost S$1.20. Got it from the market.

The arrowroot is harder in texture and it is extensively starchy than potato. When it is cut up, it has patterns on surface that looks like the ages of a tree trunk.
And this is what I've prepared....

Yes! You didn't see it wrongly. I've got some lotus root there. I did it on purpose. But you could opt it out if you wanted to. My mother told me that arrowroot has a mild cooling effect. A very mild one. By adding some lotus root in the soup. it will kinda neutralize the soup and the soup will be more nutritious.
Ingredients (Serve 4 to 6 pax)
This soup is high in protein and fiber. It is a very neutral soup and requires little effort to make it. I could proudly promise you that this soup is really sweet and tasty. Just like usual way of cooking a good old pot of soup, adding in seafood ingredients such as dried scallops and dried octopus is unavoidable. This makes the soup so refreshing sweet with the natural sweetness from dried seafood. You can omit if you don’t like seafood, just add in more pork ribs or pork bones. But I personally don't advise that.
Method
1. Rinse pork ribs, scald in boiling water for awhile, remove and rinse. (Refer to this if you are unsure on how to prepare the ribs)
2. Wash scallops, red dates, dried octopus. Prepare lotus root & arrowroot accordingly.
4. In a soup pot, put everything in (except salt). Bring to a boil, then reduce heat and simmer the soup over low heat for 2 hours. And if you have more time, make it 3 hours.
5. Did I ever mentioned to you before that your soup will have the Umph! after 3 hours? Remember to sprinkle some salt to taste before serve.

This soup is high in fiber and is ideal for children as it is very natural and neutral. It strengthens Chi (气) and could boosts immune system.

This delicious soup with ingredients which have been softened through long hours of brewing. I'm sure your family will love this heart-warming pot of soup.
I hope you like it :)
Arrowroot is very much like a big sweet potato. I crave for this soup. The very last time I had this soup was during Chinese New Year, brewed by my mother. Ahhh... I missed the taste of my mother's soup so much! And so, I bought arrowroot today. Like all root vegetables, it is best slow boiled with pork ribs, red dates, dried octopus / cuttlefish to make a nice and simple soup.
This piece of 450 grams of arrowroot 450 grams cost S$1.20. Got it from the market.

The arrowroot is harder in texture and it is extensively starchy than potato. When it is cut up, it has patterns on surface that looks like the ages of a tree trunk.
And this is what I've prepared....

Yes! You didn't see it wrongly. I've got some lotus root there. I did it on purpose. But you could opt it out if you wanted to. My mother told me that arrowroot has a mild cooling effect. A very mild one. By adding some lotus root in the soup. it will kinda neutralize the soup and the soup will be more nutritious.
Ingredients (Serve 4 to 6 pax)
- 450 grams of Arrowroot, scrubbed cleaned and sliced.
- 250 grams of Lotus Root, cleaned, peeled and sliced. (Optional)
- 300 grams of Pork Ribs, scalded (I want the soup more meaty taste this time)
- 5 to 6 red dates.
- 4 to 5 dried scallops
- 1/2 of a foot long dried octopus. Snipped into small pieces.
- 3000ml water
- sea salt to taste
This soup is high in protein and fiber. It is a very neutral soup and requires little effort to make it. I could proudly promise you that this soup is really sweet and tasty. Just like usual way of cooking a good old pot of soup, adding in seafood ingredients such as dried scallops and dried octopus is unavoidable. This makes the soup so refreshing sweet with the natural sweetness from dried seafood. You can omit if you don’t like seafood, just add in more pork ribs or pork bones. But I personally don't advise that.
Method
1. Rinse pork ribs, scald in boiling water for awhile, remove and rinse. (Refer to this if you are unsure on how to prepare the ribs)
2. Wash scallops, red dates, dried octopus. Prepare lotus root & arrowroot accordingly.
4. In a soup pot, put everything in (except salt). Bring to a boil, then reduce heat and simmer the soup over low heat for 2 hours. And if you have more time, make it 3 hours.
5. Did I ever mentioned to you before that your soup will have the Umph! after 3 hours? Remember to sprinkle some salt to taste before serve.

This soup is high in fiber and is ideal for children as it is very natural and neutral. It strengthens Chi (气) and could boosts immune system.

This delicious soup with ingredients which have been softened through long hours of brewing. I'm sure your family will love this heart-warming pot of soup.
I hope you like it :)
Friday, March 23, 2012
Huge Sandwich for Breakfast
I used to wake up 30mins earlier just to prepare breakfast for Max last time. That was last time lah. So... I'm very happy if he didn't ask why I stopped doing that now. Ha! You won't understand. Cuddling under my comforter for another 10mins before I wake up is something really priceless. *Shhh...*
We went Marche Restaurant for dinner last night, and and when we were queueing to foot our bill, we saw varieties of french loafs displayed there, and we were eyeing on the one with a tag mentioned "Light Bread". And so, Max suggest me to grab one for breakfast. After buying the bread, we walk to Cold Storage to pick some ham to go with it.
So, I wake up earlier this morning and prepared this...

This is for him. A real huge one.
Let's see what we have in there...

Ingredient (Serves 3)
Method
1. Pan-fry eggs, set aside.
2. Give the ham a quick pan fry. It's like a quick heat-up. I prefer this way. But you could opt out if you feel lazy. It can be eaten just like that.
3. Assemble everything - Bread, Rosemary Ham, Honey Ham, Fried Eggs, a dash of pepper, squeeze in some ketchup, cheese and Bread.
4. Using HappyCall Pan (or oven), lightly toast it, to let the cheese melt.
5. Sandwich Butterhead / lettuce in-between and serve.
I prepared 4 servings actually. 1 for myself, 1 for Max, 1 for my Mother In Law, and another one for Kuan Lok (our good friend cum tenant). With the situation of bread shortage, as the loaf that I bought only good enough for 3 servings, I serve Kuan Lok Gardenia Wholemeal bread instead. I hope he's happy with it.
But I have to confess that the bread that we bought from Marche is a lil' too hard in texture. It's really tiring to chew, and I was like, kinda messy after I finished the whole bread. Lots of bread crumbs dropped all over when I bite on it. I would prefer softer bread tho. Maybe Ciabatta or Focaccia would be good.
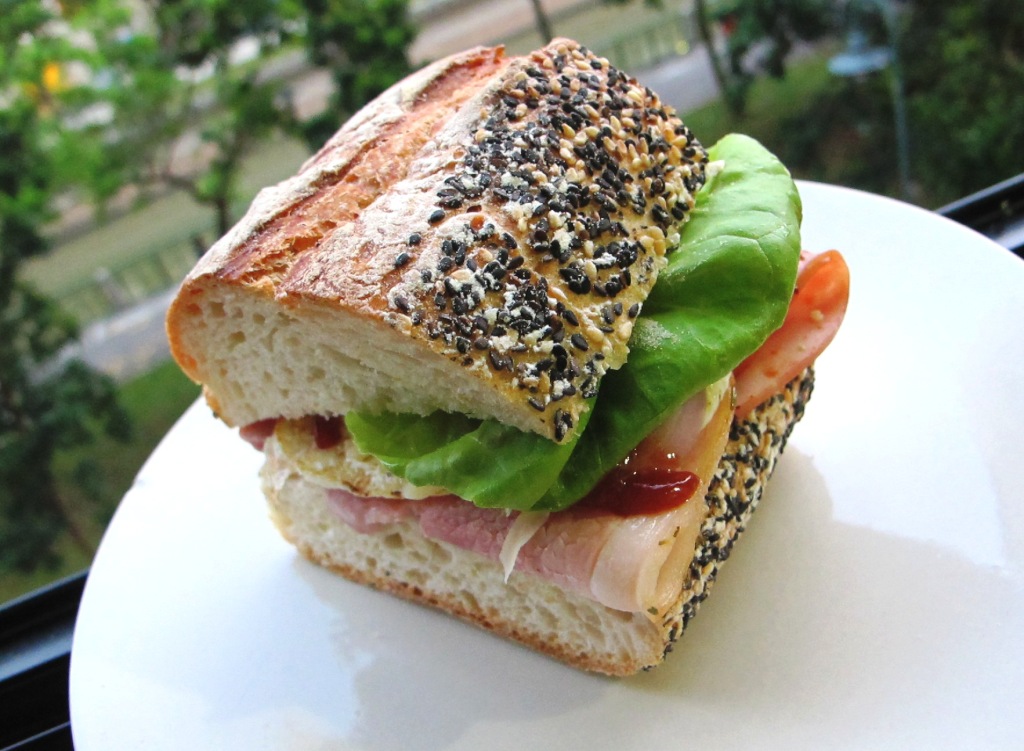
Okay.. Take a look at the picture again, the layers of ingredients and the beautiful loaf with sesame on it.
Lovely!
To me, breakfast must be something fast, not messy, and convenient. So, this need to be wrapped, and packed nicely...
And it's ready to go now :)
We went Marche Restaurant for dinner last night, and and when we were queueing to foot our bill, we saw varieties of french loafs displayed there, and we were eyeing on the one with a tag mentioned "Light Bread". And so, Max suggest me to grab one for breakfast. After buying the bread, we walk to Cold Storage to pick some ham to go with it.
So, I wake up earlier this morning and prepared this...

This is for him. A real huge one.
Let's see what we have in there...

Ingredient (Serves 3)
- 1 loaf of shop-bought french bread. You just choose your preference. With this 10 inch loaf, I prepared 3 shares.
- 3 slices of Rosemary half-bonned Ham
- 3 slices of Honey Baked Ham
- 3 eggs (Pan-fried eggs)
- a handful of Mozarella Cheese for every serving. You can use cheddar.
- Some butterhead. Or you can use lettuce. It's up to you.
- a dash of pepper on every serving
- some Tomato Ketchup for finishing
Method
1. Pan-fry eggs, set aside.
2. Give the ham a quick pan fry. It's like a quick heat-up. I prefer this way. But you could opt out if you feel lazy. It can be eaten just like that.
3. Assemble everything - Bread, Rosemary Ham, Honey Ham, Fried Eggs, a dash of pepper, squeeze in some ketchup, cheese and Bread.
4. Using HappyCall Pan (or oven), lightly toast it, to let the cheese melt.
5. Sandwich Butterhead / lettuce in-between and serve.
I prepared 4 servings actually. 1 for myself, 1 for Max, 1 for my Mother In Law, and another one for Kuan Lok (our good friend cum tenant). With the situation of bread shortage, as the loaf that I bought only good enough for 3 servings, I serve Kuan Lok Gardenia Wholemeal bread instead. I hope he's happy with it.
But I have to confess that the bread that we bought from Marche is a lil' too hard in texture. It's really tiring to chew, and I was like, kinda messy after I finished the whole bread. Lots of bread crumbs dropped all over when I bite on it. I would prefer softer bread tho. Maybe Ciabatta or Focaccia would be good.
Okay.. Take a look at the picture again, the layers of ingredients and the beautiful loaf with sesame on it.

Lovely!
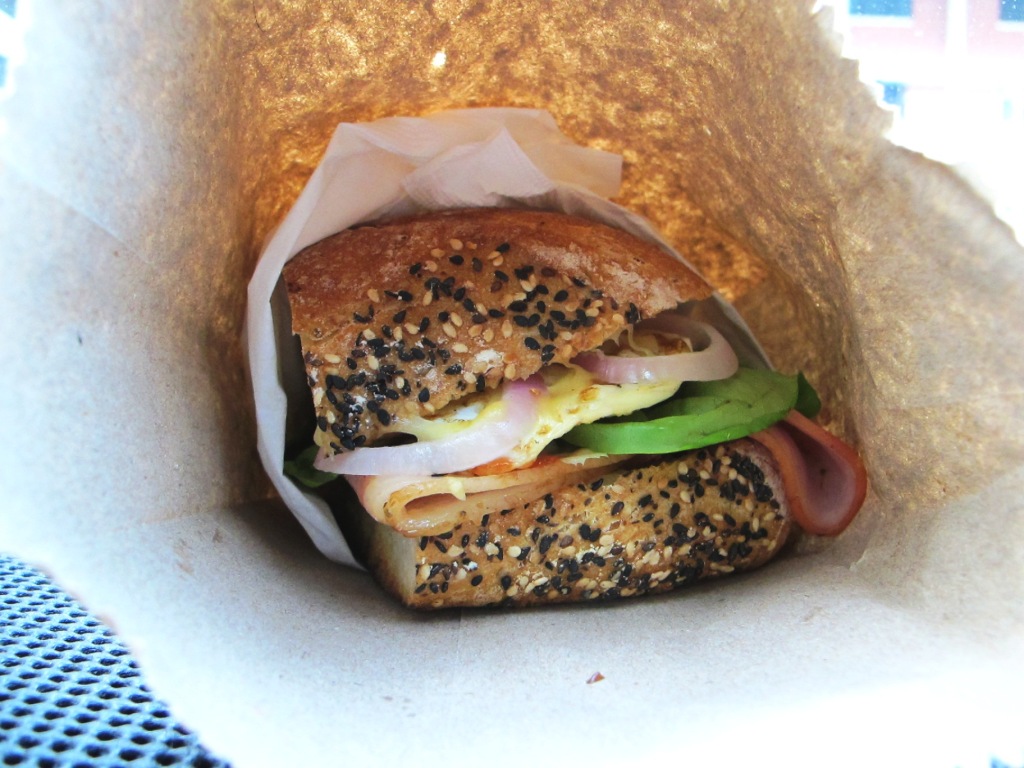
To me, breakfast must be something fast, not messy, and convenient. So, this need to be wrapped, and packed nicely...

And it's ready to go now :)
Thursday, March 22, 2012
Quick Meal : Sweet & Sour Tuna Fillet
I have the habit of keeping some frozen fish fillet in the freezer. Just incase I don't have the time to do marketing or incase that hungry man my dear husband suddenly wanna eat dinner when I'm very not prepared. This is what two days ago. I planned to take a break and eat out. But he wanted a dinner at home. So... I'm gonna cook a ONE DISH meal.
I've got two beautiful frozen Tuna Steak in the fridge. Imported from UK. Good stuff! :D
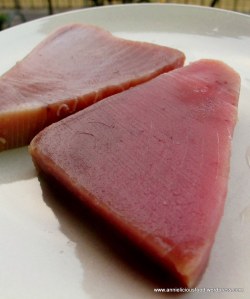
I don't know what to do with it except lightly pan-fried it and give abit of soy sauce and put some garnishing. That's the most plain way of cooking fish, which can be quite boring at times.
Just a simple dinner for two, I don't wanna cook two dishes. Sometimes, I just settle with only one dish with rich flavor, serve with steamed rice. That's it. But the dish must be balanced also. Since I've got fish, and rice. The next thing I need is veggies.
So, here.. I planned to cook sweet & sour fish! With all the ingredients here...
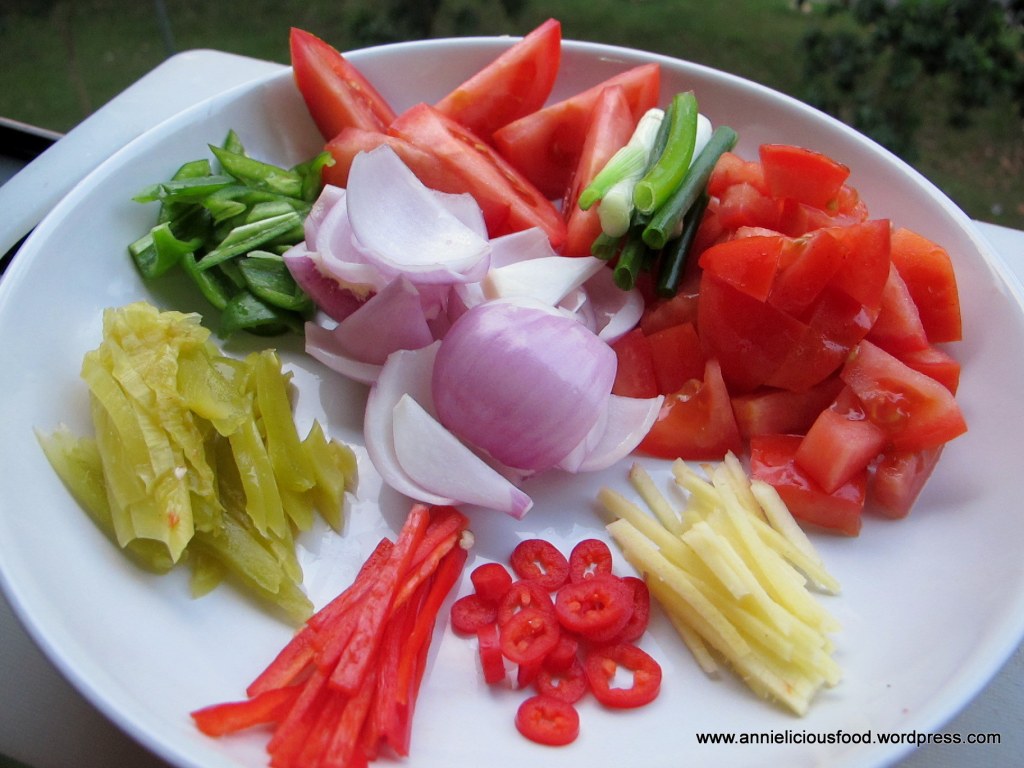
I've got tomatoes, onions, & bla bla bla... It should be good enough. And ingredients as follows :
Ingredients (Serves 2 to 3)
Method
1. Pan-Fry your fish till cooked / light brown. Set aside.
2. A tablespoons of oil, stir fry ginger till fragrant, add in the rest of the ingredients. Keep abit of red chilli & spring onion for garnishing. Give it a toss.
3. Add in all the seasoning except starch water. Simmer for about 2 - 3 minutes.
4. Add in starch water, stir well. And the sauce will get thickened.
5. Heat off, pour the sweet & sour sauce on the fish. Garnish & serve.
I told ya.. It's not difficult! :D

While the rice cooker is cooking the rice, what you need to do is to prepare this kind of ONE DISH meal. I think that is good enough for a simple weekday dinner :)
I've got two beautiful frozen Tuna Steak in the fridge. Imported from UK. Good stuff! :D

I don't know what to do with it except lightly pan-fried it and give abit of soy sauce and put some garnishing. That's the most plain way of cooking fish, which can be quite boring at times.
Just a simple dinner for two, I don't wanna cook two dishes. Sometimes, I just settle with only one dish with rich flavor, serve with steamed rice. That's it. But the dish must be balanced also. Since I've got fish, and rice. The next thing I need is veggies.
So, here.. I planned to cook sweet & sour fish! With all the ingredients here...

I've got tomatoes, onions, & bla bla bla... It should be good enough. And ingredients as follows :
Ingredients (Serves 2 to 3)
- 2 Tuna Steak. Or any kinds of fish that you prefer.
- 1 Onion
- 1 Tomato
- 1 Red Chilli
- 1 Green Chilli
- 1 Spring Onions
- 3 slices of Ginger, Julienned
- some salted vegetable (optional)
- 1 tablespoons of rice vinegar
- 4 to 5 tablespoons of Tomato Ketchup
- 1 tablespoons of sugar
- 2 tablespoons of fish sauce (or soy sauce)
- few dashes of pepper to taste
- 1 cup of water
- some starch water (2 to 3 tbsp of water + a tbsp of corn flour / tapioca flour)
Method
1. Pan-Fry your fish till cooked / light brown. Set aside.
2. A tablespoons of oil, stir fry ginger till fragrant, add in the rest of the ingredients. Keep abit of red chilli & spring onion for garnishing. Give it a toss.
3. Add in all the seasoning except starch water. Simmer for about 2 - 3 minutes.
4. Add in starch water, stir well. And the sauce will get thickened.
5. Heat off, pour the sweet & sour sauce on the fish. Garnish & serve.
I told ya.. It's not difficult! :D

While the rice cooker is cooking the rice, what you need to do is to prepare this kind of ONE DISH meal. I think that is good enough for a simple weekday dinner :)
Wednesday, March 21, 2012
Shiratama Dango (Japanese Rice Dumpling)
In my previous post about Rice Dumplings with Adzuki Beans & Brown Syrup, it is actually Shiratama Dango wannabe. Because I didn't go and hunt for Mochiko. But this time is the real Shiratama Dango that I'm making. I found Mochiko & Kinako in Meidi-Ya Liang Court! Mad happy!
I love Japanese food. But I have reserve when it comes to their desserts. And I must confess that I don’t like those traditional Japanese sweets that are based on sweetened beans. For the most part they are way too sweet for me, and I always imagine that if I were to make them for myself I will definitely adjust the sweetness level.
Diabetes leh! Hahahas...
I had been reading about Shiratama Dango recently. This is the 1st time I make Japanese dessert, and I somehow I find myself courageous. Hahas. Okays, before I start writing, allow me to give a simple explanation about this Japanese dessert :-
Dango is literally a Japanese dumpling made from Mochiko (Rice Flour), related to Mochi.
Shiratama-ko (白玉粉)is sweet or glutinous rice flour, or mochiko, mixed with a little corn starch or potato starch.
Kinako is a soy bean flour that is commonly used in Japanese cuisine as it is a healthy topping that contains Vit B and protein. Kinako is produced by finely grinding roasted soybeans into powder.
This is easy to make. Trust me. If you know how to make Tang-Yuan (汤圆), you can make this. And once you know how to make this, you will not want to pay S$5 - S$7 for a miserable portion of this dessert at Japanese Restaurants.
Ingredient 1 (Shiramata Dango)
Method
1. Combine two flours in a bowl. Drizzle in half of the water and use fingers to stir and moisten the ingredients. U can use spoon instead. No issue here. Then, gradually work in the remaining liquid, kneading the dough into a PlayDoh type of consistency, that is firm yet soft and smooth.
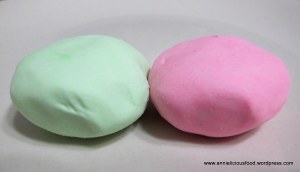
2. Divide dough into two, use a toothpick to dap a few drops of coloring, and continue to knead till the color turned evenly on the dough. Just like this...
3. Oh yea.. this is my favorite part here. It's PlayDoh Time! Divide them into small little cute balls. About 5 grams each. Just estimate will do. You should be getting about 16 to 17 balls in total.

4. Drop them into the boiling water one by one. Give it a gentle stir to avoid the balls sticking to each other.
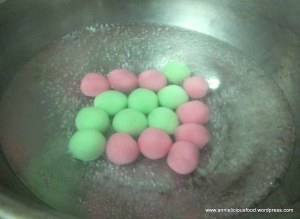
5. Until the balls float on top, it means they are cooked. Let it simmer for another minute. At this point of time, you can prepare a bowl of ice cube water.

6. Dish up the balls, and drop them into the ice cube water and let it cool down completely.

7. Once it has cooled down, scoop it up, and it's ready.
Lovely color! I should have make some white balls instead. I'm so engrossed with the color dough until I forgotten to keep some dough for white leh! Sigh!
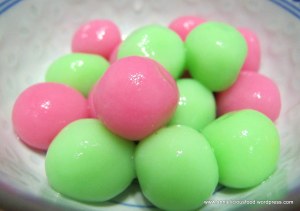
Nice?

Topped with some Kinako...
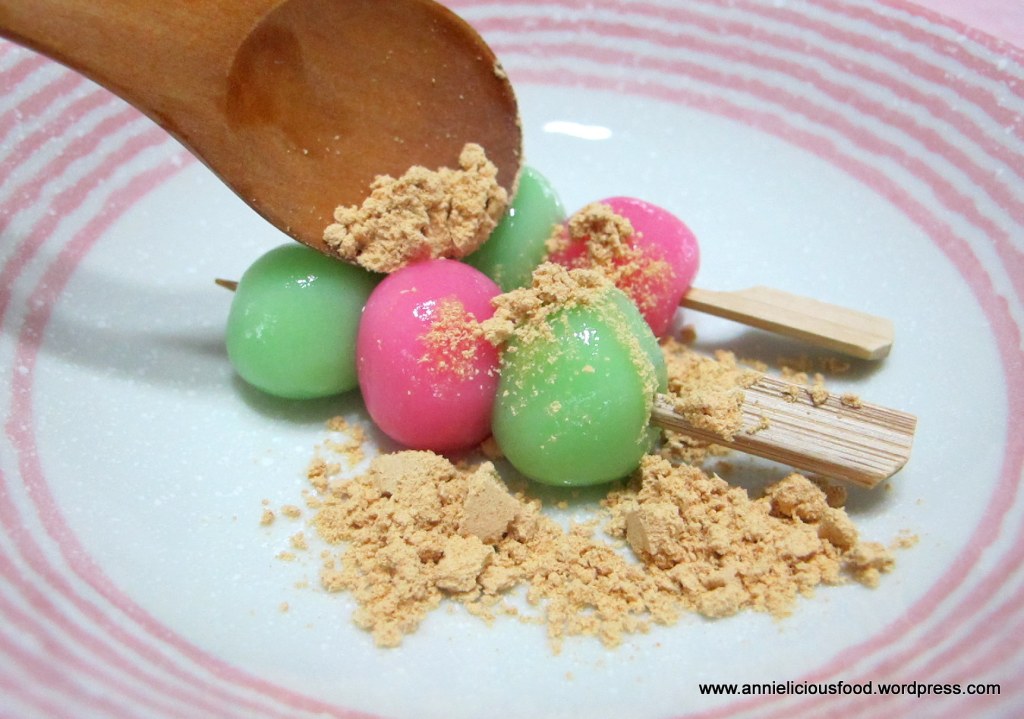
Love!!! <3

I really love the taste of the Kinako. It has a taste that is very much similar to the peanut butter that is indescribably good.
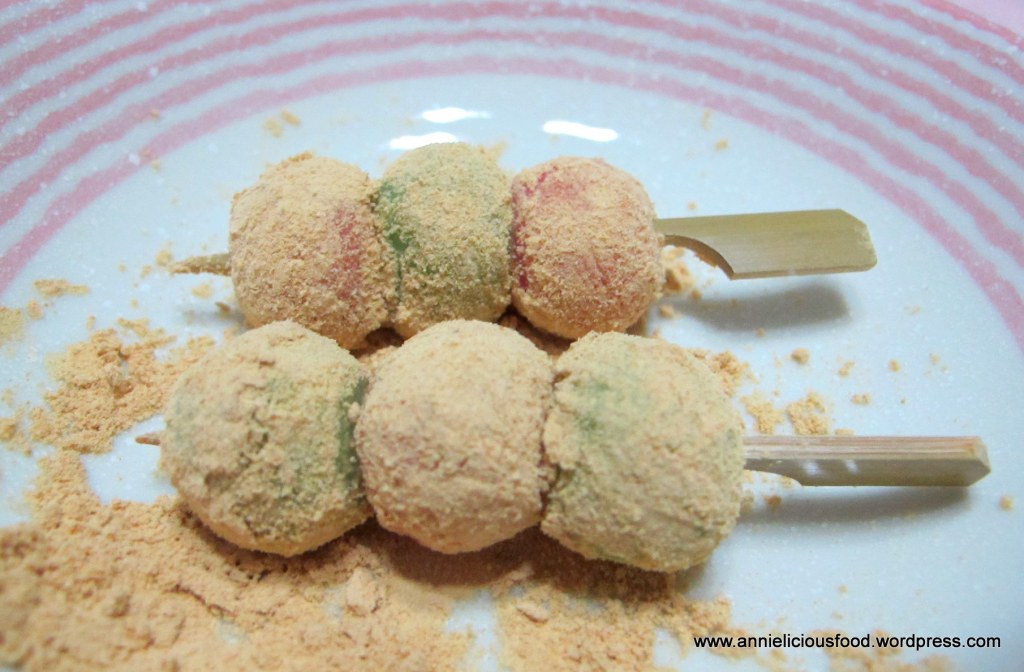
You know what I did? I actually scoop a spoon of Kinako straight my mouth. Eating plain Kinako just like that. It taste soooooo good!!! :D
Okay.. I'm crazy.
Oh Yea... You will have to eat this cute little balls with something really sweet. Because this Shiratama Dango itself is basically tasteless. It's normally eaten together with Sweet Adzuki Beans. Or alternatively, you can eat with Brown Sugar Syrup or something else sweet. It's up to you. So, here's the basic sweet adzuki bean method.
Ingredient 2 (Sweet Adzuki Beans)
1. Pre-soak adzuki beans for 5 hours. This is to shorten the cooking time.
2. Cook adzuki beans with water till soft.
3. Add in sugar. Stir till sugar is completely melted. Remember to adjust your own sugar level to your preferred sweetness. Heat off. Serve.
I like it when my sweet adzuki beans is more watery. And I mess it up like this!

This is the way! :D
I love Japanese food. But I have reserve when it comes to their desserts. And I must confess that I don’t like those traditional Japanese sweets that are based on sweetened beans. For the most part they are way too sweet for me, and I always imagine that if I were to make them for myself I will definitely adjust the sweetness level.
Diabetes leh! Hahahas...
I had been reading about Shiratama Dango recently. This is the 1st time I make Japanese dessert, and I somehow I find myself courageous. Hahas. Okays, before I start writing, allow me to give a simple explanation about this Japanese dessert :-
Dango is literally a Japanese dumpling made from Mochiko (Rice Flour), related to Mochi.
Shiratama-ko (白玉粉)is sweet or glutinous rice flour, or mochiko, mixed with a little corn starch or potato starch.
Kinako is a soy bean flour that is commonly used in Japanese cuisine as it is a healthy topping that contains Vit B and protein. Kinako is produced by finely grinding roasted soybeans into powder.
This is easy to make. Trust me. If you know how to make Tang-Yuan (汤圆), you can make this. And once you know how to make this, you will not want to pay S$5 - S$7 for a miserable portion of this dessert at Japanese Restaurants.
Ingredient 1 (Shiramata Dango)
- 4 tablespoons of glutinous rice flour
- 2 tablespoons of Mochiko
- about 8 tablespoons of water
- pink & green coloring
- some Kinako - for finishing
- Glutinous Rice Flour - Any convenient store. NTUC / Cold Storage & etc.
- Mochiko - So far I only saw it at Meidi-Ya Liang Court. It cost S$6.90/pack.
- Kinako - Daiso sell S$2.00/200g pack. Meidi-Ya sell S$3.00/300g pack.
- Pink / Green Coloring - Genera convenient stores that carry basic bakery stuffs should have. NTUC / Cold Storage / Sheng Siong / Phoon Huat & etc.
Method
1. Combine two flours in a bowl. Drizzle in half of the water and use fingers to stir and moisten the ingredients. U can use spoon instead. No issue here. Then, gradually work in the remaining liquid, kneading the dough into a PlayDoh type of consistency, that is firm yet soft and smooth.
2. Divide dough into two, use a toothpick to dap a few drops of coloring, and continue to knead till the color turned evenly on the dough. Just like this...

3. Oh yea.. this is my favorite part here. It's PlayDoh Time! Divide them into small little cute balls. About 5 grams each. Just estimate will do. You should be getting about 16 to 17 balls in total.

4. Drop them into the boiling water one by one. Give it a gentle stir to avoid the balls sticking to each other.

5. Until the balls float on top, it means they are cooked. Let it simmer for another minute. At this point of time, you can prepare a bowl of ice cube water.

6. Dish up the balls, and drop them into the ice cube water and let it cool down completely.

7. Once it has cooled down, scoop it up, and it's ready.
Lovely color! I should have make some white balls instead. I'm so engrossed with the color dough until I forgotten to keep some dough for white leh! Sigh!

Nice?

Topped with some Kinako...

Love!!! <3

I really love the taste of the Kinako. It has a taste that is very much similar to the peanut butter that is indescribably good.

You know what I did? I actually scoop a spoon of Kinako straight my mouth. Eating plain Kinako just like that. It taste soooooo good!!! :D
Okay.. I'm crazy.
Oh Yea... You will have to eat this cute little balls with something really sweet. Because this Shiratama Dango itself is basically tasteless. It's normally eaten together with Sweet Adzuki Beans. Or alternatively, you can eat with Brown Sugar Syrup or something else sweet. It's up to you. So, here's the basic sweet adzuki bean method.
Ingredient 2 (Sweet Adzuki Beans)
- half cups of adzuki beans
- 50 grams of brown sugar. This is sweet enough for me.
- water
1. Pre-soak adzuki beans for 5 hours. This is to shorten the cooking time.
2. Cook adzuki beans with water till soft.
3. Add in sugar. Stir till sugar is completely melted. Remember to adjust your own sugar level to your preferred sweetness. Heat off. Serve.
I like it when my sweet adzuki beans is more watery. And I mess it up like this!

This is the way! :D
Tuesday, March 20, 2012
Easy Sambal Tumis Petai
This dish is just like durians. You will either hate it or love it madly. Max loves durian and petai equally mad. Seriously...
Petai (Parkia speciosa), we called it chou-dou " 臭豆", or literally stinky beans. It is a unique green bean used in Malaysian home cooking. It grows in long pods on a large tree. Petai is semi-wild; it is usually grown on the outskirts of villages. Normally people get it directly from the forest. The beans have its unique pungency. It is usually cooked in sambal tumis ikan bilis, a fried chilli paste with dried anchovies. Traditionally, petai is believed to flush or “cleanse” the kidneys and urinary tract. How true? I don’t really know or care, but the elderly told me that. But you get a sense of its effect, from the pungent urine, after your petai meal. For that, I think the elderly makes sense.
Preparing ingredients for Sambal Tumis is never easy. During my secondary school time, I ever saw a Malay auntee cooking Sambal Tumis in a traditional way. It's really a pain when it comes to preparation this all the way from scratch. She prepared the spice and ingredients to be pounded with mortar and pestle. It consists of shallots, garlic, red chili, lemon grass, belacan and lots of dried shrimps. To cook the dish, she sautes the spice and pounded dried shrimps till fragrant and the chili oil separated. Then the petai is added to mix well. Gah! This is not for the lazy person like me!
Last week, while I was doing my shopping at Tebrau City Jusco, a lady approach me and asked me to purchase a pack of this to give it a try. Another cheat recipe. Sigh!

Pre-packed Sambal Tumis sauce. She kept assuring me that this pack of pre-packed sauce is really tasty and I will regret if I don't give it a try. I was like... "Urgh? Really so nice meh? Describe until so good wo". Well, since I don't have the habit nor any intention of making my own sambal tumis from scratch at home because I felt that it is too much of effort for doing that. And since this lady say until so good, I decided to give this pack of pre-packed Sambal Tumis sauce a try.
Here's the ingredients I've got :-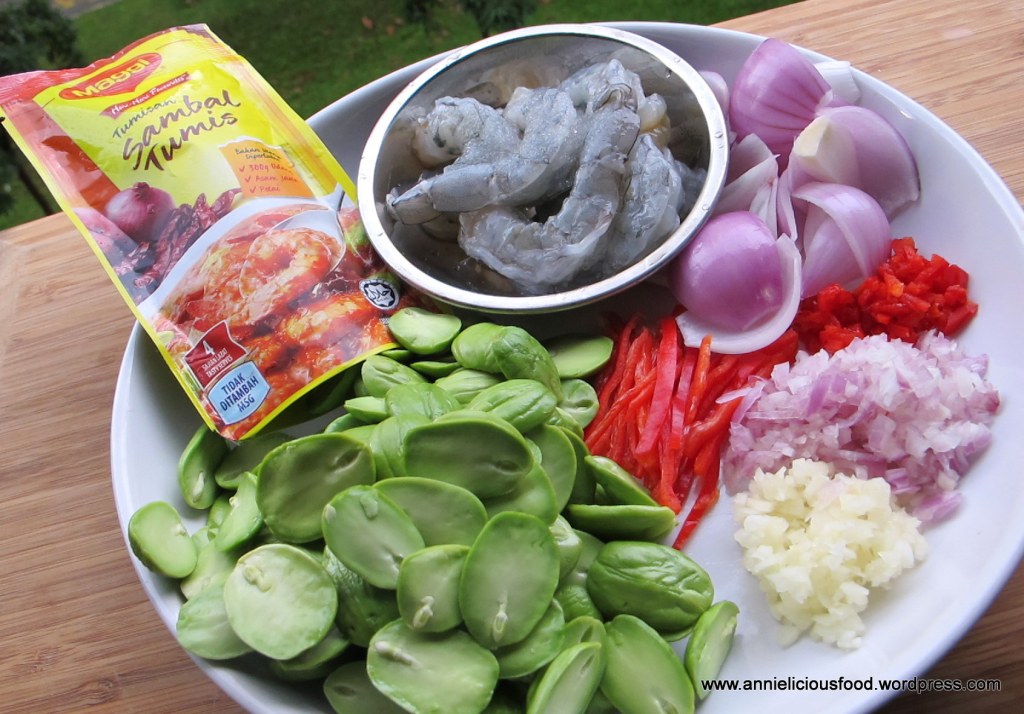
Some people may think that since I've got myself a pre-packed sauce, those chopped garlic, onions, chillis may not be necessary. But well.... I don't think so. No matter what, nothing beats the taste of the real stuff you know?
Ingredients

You'll spot some tiny white worms if you are lucky. This is why I always like to split them into two. Unless you dont bother about it, as you don't mind to add some exotic "protein" to our sambal petai dish. Ahh... well...

Method
1. Cooking oil on the pan. Fry chopped garlic, shallots, chillis till fragrant.
2. Add in Sambal Tumis sauce. Give it a quick stir.
3. Add in the remaining ingredients (except water), give it a quick toss.
4. Add in water, stir evenly. Cover up, simmer for a minute or two. Until the sauce has thickened and no longer watery. Heat off & dish up. Garnish with julienned chillies, and fried anchovies. Serve.
I fried some anchovies to put on top as a garnishing. Max loves crunchy anchovies. Hence, I did it on purpose for him. However, this is optional. You don't really need to follow.

I think this is a very good pre-packed sauce that will not fail you. It's worth a try. One thing I need to warn you is that... This is another dish that need you to cook more rice for the meal.
Like it?
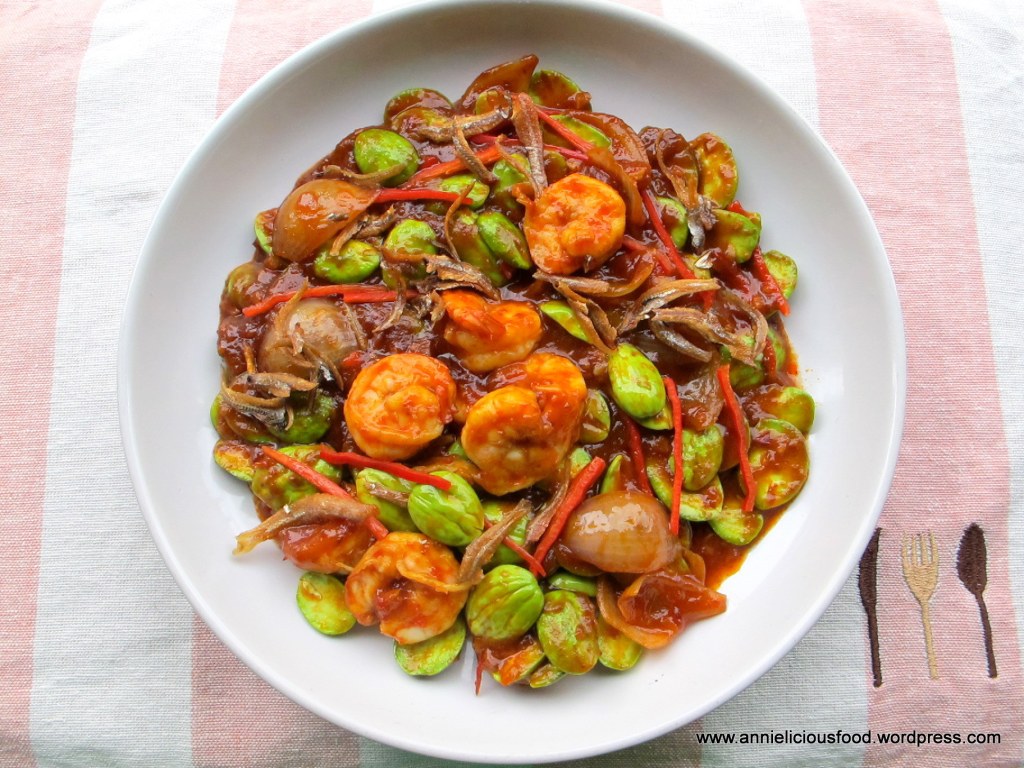
p/s : Friends, if you really can't get this pre-packed Sambal Tumis in Singapore, email me (mwmannie@yahoo.com). I will try to get it for you when I happened to go JB for shopping. But... must self collection at my place ok? :)
Petai (Parkia speciosa), we called it chou-dou " 臭豆", or literally stinky beans. It is a unique green bean used in Malaysian home cooking. It grows in long pods on a large tree. Petai is semi-wild; it is usually grown on the outskirts of villages. Normally people get it directly from the forest. The beans have its unique pungency. It is usually cooked in sambal tumis ikan bilis, a fried chilli paste with dried anchovies. Traditionally, petai is believed to flush or “cleanse” the kidneys and urinary tract. How true? I don’t really know or care, but the elderly told me that. But you get a sense of its effect, from the pungent urine, after your petai meal. For that, I think the elderly makes sense.
Preparing ingredients for Sambal Tumis is never easy. During my secondary school time, I ever saw a Malay auntee cooking Sambal Tumis in a traditional way. It's really a pain when it comes to preparation this all the way from scratch. She prepared the spice and ingredients to be pounded with mortar and pestle. It consists of shallots, garlic, red chili, lemon grass, belacan and lots of dried shrimps. To cook the dish, she sautes the spice and pounded dried shrimps till fragrant and the chili oil separated. Then the petai is added to mix well. Gah! This is not for the lazy person like me!
Last week, while I was doing my shopping at Tebrau City Jusco, a lady approach me and asked me to purchase a pack of this to give it a try. Another cheat recipe. Sigh!

Pre-packed Sambal Tumis sauce. She kept assuring me that this pack of pre-packed sauce is really tasty and I will regret if I don't give it a try. I was like... "Urgh? Really so nice meh? Describe until so good wo". Well, since I don't have the habit nor any intention of making my own sambal tumis from scratch at home because I felt that it is too much of effort for doing that. And since this lady say until so good, I decided to give this pack of pre-packed Sambal Tumis sauce a try.
Here's the ingredients I've got :-

Some people may think that since I've got myself a pre-packed sauce, those chopped garlic, onions, chillis may not be necessary. But well.... I don't think so. No matter what, nothing beats the taste of the real stuff you know?
Ingredients
- A pack of Petai from the market. I weighed, and it's about 135grams. Cost me S$2.00
- A pack of Sambal Tumis sauce.
- About 10 prawns or more. It's up to you.
- chopped shallot
- chopped garlic (2 cloves)
- 1 chilli (half chopped, half julienned)
- a small onion
- 1 cup water
- a handful of anchovy fish (Ikan Bilis) - Optional.

You'll spot some tiny white worms if you are lucky. This is why I always like to split them into two. Unless you dont bother about it, as you don't mind to add some exotic "protein" to our sambal petai dish. Ahh... well...

Method
1. Cooking oil on the pan. Fry chopped garlic, shallots, chillis till fragrant.
2. Add in Sambal Tumis sauce. Give it a quick stir.
3. Add in the remaining ingredients (except water), give it a quick toss.
4. Add in water, stir evenly. Cover up, simmer for a minute or two. Until the sauce has thickened and no longer watery. Heat off & dish up. Garnish with julienned chillies, and fried anchovies. Serve.
I fried some anchovies to put on top as a garnishing. Max loves crunchy anchovies. Hence, I did it on purpose for him. However, this is optional. You don't really need to follow.

I think this is a very good pre-packed sauce that will not fail you. It's worth a try. One thing I need to warn you is that... This is another dish that need you to cook more rice for the meal.
Like it?

p/s : Friends, if you really can't get this pre-packed Sambal Tumis in Singapore, email me (mwmannie@yahoo.com). I will try to get it for you when I happened to go JB for shopping. But... must self collection at my place ok? :)
Subscribe to:
Comments (Atom)


