Showing posts with label Pork. Show all posts

Sunday, April 10, 2016

Hakka White Radish Meatballs (客家清蒸萝卜丸)

Hakka White Radish Meatballs 客家萝卜丸 is a traditional dish among the Hakka Hor Poh 客家河婆 clan. This is my late grandma's super dish. Why I said so? Because whenever she make this, everyone will come home just for this dish. This is also our CNY dish (年菜) in our family too.


This dish is not appealing in appearance. But again, Hakka dishes are usually concentrate more on richness in flavors and balance in texture. No fancy color. Sadly. 

This White Radish Meatballs has very nice soft and springy texture. The umami taste from the dried prawns and dried cuttlefish complement very well with the white radish taste. We love dipping white radish meatballs with soy sauce. It's nice! 


My mom came to my house to make this White Radish Meatballs with me. The tradition is well maintained one generation after another. This recipe makes 35pcs

Ingredients 
(Source : My late grandma Mdm. Chong, and my mom Mdm. Chai)
  • 400g White Radish, shredded or julienned 
  • 400g Minced pork with good amount of fats
  • 40g Dried Cuttlefish, snip it into tiny dice
  • 40g Dried Shrimps, chopped
  • 100g Tapioca Flour
  • 2 cloves Garlic, minced
  • 1 tsp Salt
  • 1 tsp Sugar
  • 1 tsp Chicken Powder (Optional) *See Note
Note :
My mom says adding chicken powder taste better. She's not wrong. My grandma didn't use chicken powder. There's no such thing during my grandma's time. Haha..

Method 
  1. Radish must be shredded using the coarse shredder. Drain away the water if there's any.
  2. Heat up oil on a wok, fry dried cuttlefish, dried shrimps and garlic till fragrant. 
  3. Add in shredded radishes, salt, sugar, (and chicken powder if you are using it). Fry until radishes are half cooked. Heat off. 
  4. Add in half portion of tapioca flour. Mix well and let the heat on the radish cook the tapioca flour.
  5. Add the other half portion of tapioca flour and minced pork. Mix well.
  6. Use spoon to form into individual balls, and steam it for 20mins. Let radish balls cools down abit before serving. This gives you better bouncy texture. Serve with soy sauce. 
Here's the tutorial picture for your easy reference.


My mom says, she likes the radish balls to have more homely look. So, she just casually scoop the mixture and drop it on the plate.


This is how it looks like before steaming. But if you prefer, you can roll them into a nice ball. It's up to you.


Let it steam for 20mins and it's done. I always adore my bamboo steamer. The size is huge enough for me to do steaming in big portion! 


When the radish balls is cooked, remove from the steamer and let it cool down. Hot radish balls is too soft to be eaten, and it doesn't represent the right texture. Once it is cooled down, it will be bouncier and nice to eat.


We love dipping radish balls in soy sauce.


So yumms!


Other than Thunder Tea Rice (河婆擂茶) that I've posted back in 2012, this radish balls recipe is definitely a keeper to keep up my family tradition.

I hope you like as much as I do.

Saturday, March 5, 2016

Hakka Garlic Braised Pork Belly (香蒜焖腩肉)

This is another Hakka dish that will make me eat two bowls of rice with just the sauce. This is somehow similar, but different from the usual Tau Yeu Bak (豆油肉) or Lor Bak Png (卤肉饭) commonly seen in Hokkien, Teowchew and Taiwanese Families. This is simpler. Only 9 ingredients, but packed with flavors.


The Hakka people have marked cuisine and style of Chinese cooking which is little known outside the Hakka home. Often concentrates on the texture of food, the hallmark of Hakka cuisines. My grandma always says, braised pork belly must be soft enough, but the skin still retain its chew. Pork belly must be reasonably big chunks, but still, it should be maintained at bite size. This sounds complicated to me when I was younger. But when I grew older, I started to understand my grandma's logic.


Do use good quality soy sauce and dark soy sauce. Pay a little more for premium sauce or you may ruin the whole dish. It's your choice.

Ingredients
(Source: My late Grandma Mdm. Chong, with modification)
  • 600g Pork Belly, with skin (五花肉, 连皮)
  • 4 pcs Arrowhead, diced (慈姑/牙姑) - Optional
  • 3 tbsp Pork Lard with Lard Bits (猪油 + 猪油渣)
  • 30 cloves Garlic, cut into half (蒜头)
  • 500ml Water (水)
  • 1 tbsp Oyster Sauce (蚝油)
  • 1½ tbsp Soy Sauce (酱油)
  • 1 tbsp Dark Soy Sauce (黑酱油)
  • 20g Rock Sugar (冰糖)
  • 1 Sprig Spring Onions (青葱) - Optional

The basic for this recipe is simple. The main ingredients is Pork Belly, Garlic, and condiments. To make this dish more attractive, I added Arrowhead (I love this!), and some Spring Onions to give color contrast. Hence, Arrowhead and Spring Onions is optional for this dish.


Preparation is simple. Cut pork belly into bite size, and for garlic, leave it whole. Cut arrowhead into diced size.

Method
  • Heat up 3 tbsp Pork Lard with Lard Bits. When you can smell the pork lard aroma, add in garlic cloves until garlic looked slightly yellow and aroma comes out. 
  • Add in pork belly pieces, increase the heat slightly, fry for awhile. Add Arrowhead, stir fry the pork set its shape and almost cooked.
  • Add in rock sugar, add water, oyster sauce, soy sauce and dark soy sauce. Stir well and bring to a boil. (Tips : Once it is boiled, you may go ahead to transfer the dish to a claypot for further simmering. I did that. But this step is optional)
  • Covered, lower heat and simmer for approximately 40mins until the pork pieces are tender and the flavor has been absorbed, or until the gravy is almost absorbed. Add spring onions, give it a quick stir and its ready to dish up.
  • For tastier result, cook this dish a day in advance. (Read on)
Here's the picture tutorial on cooking process. 


Braised pork feature in Hakka delicacy highlight very much about it's texture in Hakka palate. The meat must be well caramelized which depends very much on cooking technique. The dish must be fragrant, well braised, but the meat still retain its good firm bite. It should't overcook and the pork shouldn't fall apart. Do taste the meat before dish up.   


Pork must cut into larger pieces as it will shrink during cooking process. We use 500ml water for braising process. So, set fire on as low as possible. Otherwise you will have no more sauce at the end. So, do your heat control well.

I would not recommend you to eat this dish right after you cooked it. Overnight would be the mist ideal plan. But if you insist, I'd urge you to cook it in the morning or afternoon. Leave it there, covered, let the flavors infused all over. Heat up under low low fire and serve hot for dinner. Yumms!!!


I would also suggest you to take a look at my another two Hakka Style Braised Pork Belly dishes

Happy cooking!!!!

Friday, March 4, 2016

Hakka Braised Pork Belly with Dried Cuttlefish (吊片焖花腩)

Hakka cuisine may be described as outwardly simple, but tasty. The ingredients are generally seasonally available in the market. Pragmatic and simple.

This is another Hakka Style Braised Pork Belly dish. Hakka Braised Pork Belly with Dried Cuttlefish (吊片焖花腩). This recipe has some similarity to my previous Hakka Simmered Pork Belly with Preserved Mustard Green (客家梅菜焖猪肉), but this one taste more Umami. The skill in Hakka cuisine lies in the ability to cook meat thoroughly without hardening it, and to bring out the proteinous flavor (Umami Taste) of the meat.


My late father loves this dish so so so much. He always be home early when he knew my mom is going to cook this dish for dinner. Whenever I cook this dish, I will think of my dad's smile and how he ask my mom to scoop another bowl of rice for him.


It's a sad thing that not many younger generations know this dish. I asked a few youngsters few days ago, they didn't know it actually exist. I hope this dish can be recreated again and again and again by other families and bring the Hakka traditions back to the dining table.

Ingredients
(Source: My late Grandma Mdm. Chong and My mother - Mdm Chai)
  • 500g Pork Belly, with skin (五花肉, 连皮)
  • 100g Dried Cuttlefish Strips (吊片丝/鱿鱼干丝)
  • 3 tbsp Pork Lard with Lard Bits (猪油 + 猪油渣)
  • 8 cloves Garlic, cut into half (蒜头)
  • 2 shallot, sliced (小葱头)
  • 2 slices Ginger, julienned (姜)
  • 700ml Water (水)
  • 1 tbso Shao Xing Wine (绍兴酒/花雕酒)
  • 1 tbsp Oyster Sauce (蚝油) *See Note
  • 1½ tbsp Soy Sauce (酱油)
  • 1 tbsp Dark Soy Sauce (黑酱油)
  • 20g Rock Sugar (冰糖)
Note : 
My grandma didn't use Oyster Sauce when she cook this dish. My mom improvised this dish to make it even tastier by adding half a tbsp of Oyster Sauce at later days.

Life was so much simpler during childhood times where we only have very little condiments. Pigs were locally farmed, and pigs are fed with grains that is almost organic. Meat taste more porky and delicious too. So, it's the change in society that makes recipe change? I'm not sure, but I think it's not difficult to understand :)

Preparation
  • Rinse dried cuttlefish strips and soak dried cuttlefish strips in 700ml water for 20mins. Remove soaked cuttlefish strips and reserve the 700ml water for later use.
  • Cut pork belly into bite size.
  • Slice shallots, julienned ginger, and cut garlic cloves into half.

Method 
  • Heat up wok WITHOUT oil. Add in cuttlefish strips and julienned ginger, stir fry on medium heat until cuttlefish aroma comes out, and looked abit dry. Dish up and set aside.
  • With the same wok, heat up 3 tbsp Pork Lard with Lard Bits. When you can smell the pork lard aroma, add in sliced shallot, garlic cloves and fry till fragrant. The garlic looked slightly yellow. 
  • Add in pork belly pieces, increase the heat slightly, stir fry the pork for awhile until the pork set its shape and almost cooked.
  • Add in cuttlefish strips and Rock Sugar. Fry for awhile, add water, oyster sauce, dark soy sauce and soy sauce. Stir well and bring to a boil. (Tips : Once it is boiled, you may go ahead to transfer the dish to a claypot for further simmering. I did that. But this step is optional)
  • Covered, lower heat and simmer for approximately 45mins until the pork pieces are tender and the flavor has been absorbed, or until the gravy is almost absorbed. Scatter Shao Xing Wine, mix well, let it simmer for another minute and its ready to dish up.
  • For tastier result, cook this dish a day in advance. (Read on)
Dried cuttlefish were sold in two forms. The whole dried cuttlefish is commonly sold in the market generally for brewing soups. The dried cuttlefish strips were sold in a pack to ease the convenience of consumers to snip their own strips at home. Dried cuttlefish strips generally used to cook dishes like stir-fry or steamed pork patty.

Save the hassle. Just buy the dried cuttlefish strips and your job would be so much easier. I bought my dried cuttlefish strips from Japan during my trip to Osaka last year. It taste so so so good! Haha.


Here's the picture tutorial :

This dish is the same as my previous braised pork belly dish. I cook this portion, half portion eat fresh, and keep the remaining half for tomorrow. This dish keeps well for upto 3 days in the fridge, and probably 12 days in the freezer. And I swear that it taste so so so soooo much better on the next day.

Yumms!! Two bowls of rice please!!!


I would also suggest you to take a look at my another two Hakka Style Braised Pork Belly dishes


Happy cooking!

Sunday, February 28, 2016

Hakka Simmered Pork Belly with Preserved Mustard Green / (客家梅菜焖猪肉)

This is one of my maternal Grandma's favorite dish that she always cook for us. She's Hakka, Hor Por Clan (河婆客家) and she's one real traditional cook! I always have fond memories over this traditional 梅菜焖猪肉 Hakka Simmered Pork Belly with Mui Choy (a.k.a Preserved Mustard Green) dish.


In Hakka dishes, there are 3 elements - Salty, Fatty, and most importantly, Fragrant. 

When I was small, due to my parents working schedule, I grew up under my maternal Grandma's care. I was heavily inspired by my grandma's simplicity in life. My grandma's dishes isn't fancy. They are classic, traditional, very flavorful, and surprisingly, no one ever complaint about her repeating same dishes even if it is quite often. I can talk about my grandma's dishes for 3 days 3 nights and I'm not sick about it. That's how close we are to each other. 


We grew up eating this. So, my mom could whip up this dish very well too. Before I replicate this dish at home, I called mom to confirm certain details to ensure I didn't screw this dish up. I'm cooking this for my Mother-In-Law who's a big fan of Mui Choy (a.k.a Preserved Mustard Green).

This dish involves two types of Mui Choy. Sweet Mui Choy (甜梅菜) and Salted Mui Choy (咸梅菜). Don't ask me if you can use only Sweet Mui Choy or only Salted Mui Choy. This dish needs both Salted and Sweet Mui Choy combined together to achieve the right balanced taste.

My mom says, this dish can go with or without Ginger. For usual day to day cooking, ginger can be skipped. This version, ginger is added and hence, this dish is suitable for confinement mums as part of the confinement menu. If you are ginger haters, skip the ginger. Simple as that.

Ingredients
(Source: My late Grandma Mdm. Chong and My mother - Mdm Chai)
  • 400g Pork Belly, with skin (五花肉, 连皮)
  • 100g Sweet Mui Choy (甜梅菜)
  • 150g Salted Mui Choy (咸梅菜)
  • 3 tbsp Pork Lard with Lard Bits (猪油 + 猪油渣)
  • 4 to 5 slices Ginger, julienned (姜)
  • 7 to 8 cloves Garlic, slice half, leave the other half whole (蒜头)
  • 400ml Water (水)
  • ½ tbsp Oyster Sauce (蚝油) *See Note
  • 1½ tbsp Soy Sauce (酱油)
  • ½ tsp Pepper (胡椒粉)
  • ½ tsp Sesame Oil (麻油)
  • 15g Rock Sugar (冰糖)
Note : 
My grandma didn't use Oyster Sauce when she cook this dish. My mom improvised this dish to make it even tastier by adding half a tbsp of Oyster Sauce at later days.

Life was so much simpler during childhood times where we only have very little condiments. Pigs were locally farmed, and pigs are fed with grains that is almost organic. Meat taste more porky and delicious too. So, it's the change in society that makes recipe change? I'm not sure, but I think it's not difficult to understand :)

Method 
  • Heat up wok WITHOUT any oil. Add in chopped Mui Choy, julienned ginger, and whole cloves garlic. Stir fry in medium heat until you can smell the Mui Choy aroma, and it looked dry. Dish up and set aside.
  • With the same wok, heat up 3 tbsp Pork Lard with Lard Bits.When you can smell the pork lard, add in sliced garlic, garlic cloves from the Mui Choy and fry till fragrant and garlic looked slightly yellow. 
  • Add in pork pieces, increase the heat slightly, stir fry the pork for awhile until the pork set its shape and almost cooked.
  • Add in Mui Choy and Rock Sugar. Fry for awhile, add water, oyster sauce, soy sauce, pepper and sesame oil. Stir well and bring to a boil. 
  • Under low heat, let it simmer for 20 to 25mins and the dish is ready. After simmering for 20mins the sauce for this dish remain minimum. Refer to photos below. 
  • For tastier result, cook this dish a day in advance. (Read on)

Two important point that I need you to take note while you prepare this dish.

One - Both Sweet and Salted Mui Choy must be washed, separately soaked with water for 20mins to reduce saltiness, rinse again, squeeze dry, and then cut them finely. Refer to photos below.

Two - This is traditional dish. My grandma uses Pork Lard. I follow. Never fear of eating Pork Lard. They are natural oil. Do prepare some at home, put it in the container and store it in the fridge. I always separate my Pork Lard and Crispy Lard Bits separately. But if you really don't have time to render your own Pork Lard, then too bad for you. You may use good quality Peanut Oil tho. But to be honest, sometimes Pork Lard's aroma is irreplaceable. Haha...


Prepare everything before you heat the wok. General Rule... 


Dry frying Mui Choy with ginger and garlic cloves is to bring out the Mui Choy flavor and remove some unwanted preserved smell on the Mui Choy.

By looking at these pictures, I'm sure this is quite clear on how this dish is cooked.


Look at above photo, 400ml water, simmered for 20mins and these are the leftover sauce for this dish. Never waste a drip of these goodness. This sauce makes you eat another bowl of rice. 


Usually, I cook this portion, half portion eat fresh, and keep the remaining half for tomorrow. This dish keeps well for upto 3 days in the fridge, and probably 12 days in the freezer. And I swear that it taste so so so soooo much better on the next day.


I refused to let tradition dies off. I probably will hate myself if I don't jot down this recipe and share with everyone. Sometimes, such simple dish is the only thing that make your family member come home early for you. Like if you agree! :)

P/s. My Mother-In-Law ate alot of rice because of this dish. Haha...


I would also suggest you to take a look at my another two Hakka Style Braised Pork Belly dishes

Monday, March 23, 2015

客家板麺 Malaysian Hakka Pan Mee

Do you prefer Pan Mee or Mee-Hoon-Kuay?

Some says they are the same. Some argues that they are different, but that's due to the shape of the noodles. Pan Mee (
板麺, pronounced as Ban Mian in mandarin) is a Hakka-Style noodle, originating from Malaysia. Some translate it as "flat flour noodle", while some, translate it as "board noodle".

Flour hand-kneaded into dough traditionally torn into smaller pieces of dough by hand, but such laborious work is conveniently replaced by machine that can produce variety of shapes. Pan Mee typically served in soup, together with dried anchovies, minced pork, mushrooms and leafy vegetables. In my hometown, 树仔菜 (aka pucuk manis / manicai 马尼菜) is used.

My grandmother used to cook this delicious noodles for us. Usually she will let us have our choices of Pan Mee or mee-hoon-kway, and she will prepare the dough accordingly. That's one of the sweetest childhood memory. All she need is pack of flour, some anchovies and vegetables. She can cook up a comforting bowl of soup dish for everyone in the house. My grandmother has 12 child. My mom is the youngest, the last amongst the 12th. I haven't even tell you the number of grandchild she have. You can imagine that now. My grandmother is a wonder woman!


Because this is a very simple noodle soup dish, the soup plays a very important role in the preparation of Pan Mee. I've seen variations in soup base preparations. But for my grandmother, she use only dried anchovies and soya bean for the soup. Yes. Only two ingredients, but it makes great and flavorful soup base. Sometimes, the simpler it is, the better it taste.

I'm very straightforward and I'm not afraid to tell you. I don't have my grandma's exact recipe. I only vaguely remember what are the main ingredients my grandma use. I found Alan's recipe is the closest to my grandma's simplicity. So, I just followed, but with minor modifications.
Ingredients (Serves 4)
(Source : Alan, with slight modification)

for Soup
  • 65g Dried Anchovies (aka Ikan Bilis / 江鱼仔)
  • 180g Soya Beans (黄豆)
  • 10 cups of water
  • 1 tsp salt (adjust to taste)
for Noodles
  • 250g Plain Flour or All-Purpose Flour 
  • 2 Eggs
  • 1/4 tsp Sea Salt
  • 5-7 tbsp water, adjust according to dough texture
  • 1 tbsp cooking oil 
  • flour for dusting
for Minced Meat Sauce
  • 300g Minced Pork (绞肉), preferably ground pork belly
  • 4 Chinese Mushrooms (香菇), soaked till soft, cut into strips
  • 2 Black Wood Ear Fungus (黑木耳), soaked till soft, cut into strips
  • 4 cloves Garlic, peeled, chopped finely
  • 5 Shallots, peeled, chopped finely
  • 2 tbsp Oil
  • 2 tbsp Dark Soya Sauce
  • 1/2 tbsp Oyster Sauce, adjust to taste
  • 1/2 tbsp Sugar, adjust to taste
  • 1/2 tsp Pepper
  • 1 tsp Corn Flour, to be mixed with mushroom soaking water
other ingredients
  • a bunch of 树仔菜 (aka pucuk manis) or Choy Sum 菜心 or any of your favorite green leafy vegetables that serves 4 sharing. 
  • 4 Eggs
  • Fried crispy anchovies 
  • Fried crispy shallots (optional)

Variation
  1. For the soup, there are some Pan Mee sellers likes to add pork bones into the soup to create extra sweetness. Some uses soya beans, some don't. But the general rule is... dried anchovies should be there.
  2. My grandma will only provide minced meat sauce and eggs when her budget allows. Eggs are usually cracked onto the soup and cook together with the noodles. It would be too costly for her to add eggs on every serving. 
  3. I personally prefers 树仔菜 (aka pucuk manis), but when first preference is not available, I shall go for my alternative Choy Sum 菜心.
  4. Fried crispy shallots is optional. But most Pan Mee stalls provide this topping. 

Method (for the soup)
  1. Give dried anchovies and soya beans a quick rinse.
  2. Soak soya bean in hot water for 20mins. Using both finger tips, rub away the skin from the soya beans. This is quite tedious. You can choose to skip this step if you are feeling lazy. 
  3. In a large soup pot, add 2 tbsp of cooking oil, add in anchovies, stir fry anchovies till fragrant. 
  4. Add in water and prepared soya beans, and bring to a boil. Lower flame to simmer with lid on for 20mins. Season with salt, turn off flame and leave to steep. 

Using both finger tips rub away the skin from the soya beans.


Stir fry anchovies till fragrant before adding in water. Fried anchovies will give you more flavorful soup.

Method (for the noodles)
  1. Combine flour and salt in a large mixing bowl. Form a 'well' in the middle and crack in the eggs.
  2. Add cooking oil and begin to combine everything together, adding water slowly by individual tablespoons until a non-sticky dough is obtained
  3. Dough needs to be kneaded repeatedly until smooth and uniform in color. 
  4. Cover dough with cloth and set aside to rest for 30 to 40 mins to relax the gluten. 
  5. After resting the dough long enough, go back to the dough by first dividing the dough into 4 portions. 
  6. Using pasta machine, process individual dough portions by repeatedly laminating and thinning the dough into elongated flat sheets before cutting into taligatelle-like strands. Dust some flour on the noodles to prevent noodles from sticking together. If pasta machine is not available, simply roll dough with rolling pin, on a flat surface dusted with flour, into elongated sheets before folded the dusted sheets slightly and cutting into strips. 
  7. If you are making mee-hoon-kuay, simply hand stretch the flat sheets dough into desired free-style shapes accordingly.

Method (for the meat sauce)
  1. In a saucepan, heat up 2 tbsp cooking oil. Add chopped garlic and shallots, stir-fry until shallots turned translucent and aromatic. 
  2. Add minced pork followed by all seasoning and stir-fry until meat is cooked and uniform in color. 
  3. Add in mushrooms strips, black wood ear fungus strips, and some mushroom soaking water. Stir well and cover with lid. Leave to simmer over medium low heat for 10mins. 
  4. Add some corn starch mixed with some mushrooms soaking water to thicken the sauce. 
  5. Dish up, covered, and set aside. 

Everything is prepared for the meat sauce.


Meat sauce is well cooked and in uniform color.

Method (to cook pan mee)
  1. Prepare two heavy saucepan. One side is 2 ladle cups of boiled water, another side is 2 ladle cups of soup base. Bring both to a boil
  2. Add a serving of noodles into the boiling water saucepan, cook noodles for a minute. Transfer half-cooked noodles into the soup base saucepan, and add a serving of vegetables. Adjust your cooking time accordingly.
  3. When noodles are cooked, crack an egg into the middle of the pot and leave it with lid on briefly for about 20 secs for the white to cook slightly.
  4. Ladle everything into a serving bowl, try not to break the yolk. Garnish generously with one portion of meat sauce, fried crispy anchovies, fried crispy shallots and serve!
You can, of course skip the part of using boiling water saucepan. You can just throw in your noodels and just cook it in the soup straightaway. However, the noodles will make your soup broth looked cloudy and thickened a little. I personally prefers to half-cook the noodles in boiling water first, as this step allows me to have nicer and clearer broth.

Pan Mee... Long, flat striped noodles.


While mee-hoon-kuay is free-style shaped flat dough by simply hand stretch the flat sheets dough in organic forms. There's no rocket science. Everyone can do this. To me. it should look homely and comforting. There's no rules here.


Look at my Pan Mee soup. The soup is quite clear and less cloudy compared to those selling outside. Although there's extra effort in cooking process, but this will make your noodles taste better in overall.


In Kuala Lumpur, Klang Valley, there's a popular version of Pan Mee that is prepared dry version. Everything is the same, just that they are without the soup, fiery dry chillies flakes are added, topped with some spring onions and stirred into noodles. That's another great way of enjoying Pan Mee.

Maybe next time I will try making dried version of Pan Mee.


I love this soup noodles. I think everyone should make this at home at least once. This just involves a few ingredients, and I guarantee you that this is a great bowl of comfort food, and something easy to prepare for weekend lunch for family.

So.... do you prefer pan mee? or mee-hoon-kuay?

Sunday, April 13, 2014

Bone Broth / Super Collagen Soup - (骨胶汤 / 胶原蛋白汤)

So you want to look young and radiant?

Forget about Botox! Drink Bone Broth for amazing skin! This magic pot of collagen soup could make your skin looks great!

This prolonged cooking of bones in water will give you results in a broth rich in nutritional constituents that promotes strength, nourish, help to prevent bone and connective tissue disorders and improves collagen level in your body!

Take a look at this real stuff. My bone broth produces a rubbery gelatin when chilled.


Home-made broth made from bones produces as much more nutritious gelatin that contains a wide range of minerals and amino acids. Most commercial gelatin products are made from animal skin and often contain MSG and something else that we might not know. Well. I'd prefer to consume real stuff, and cheaper too.

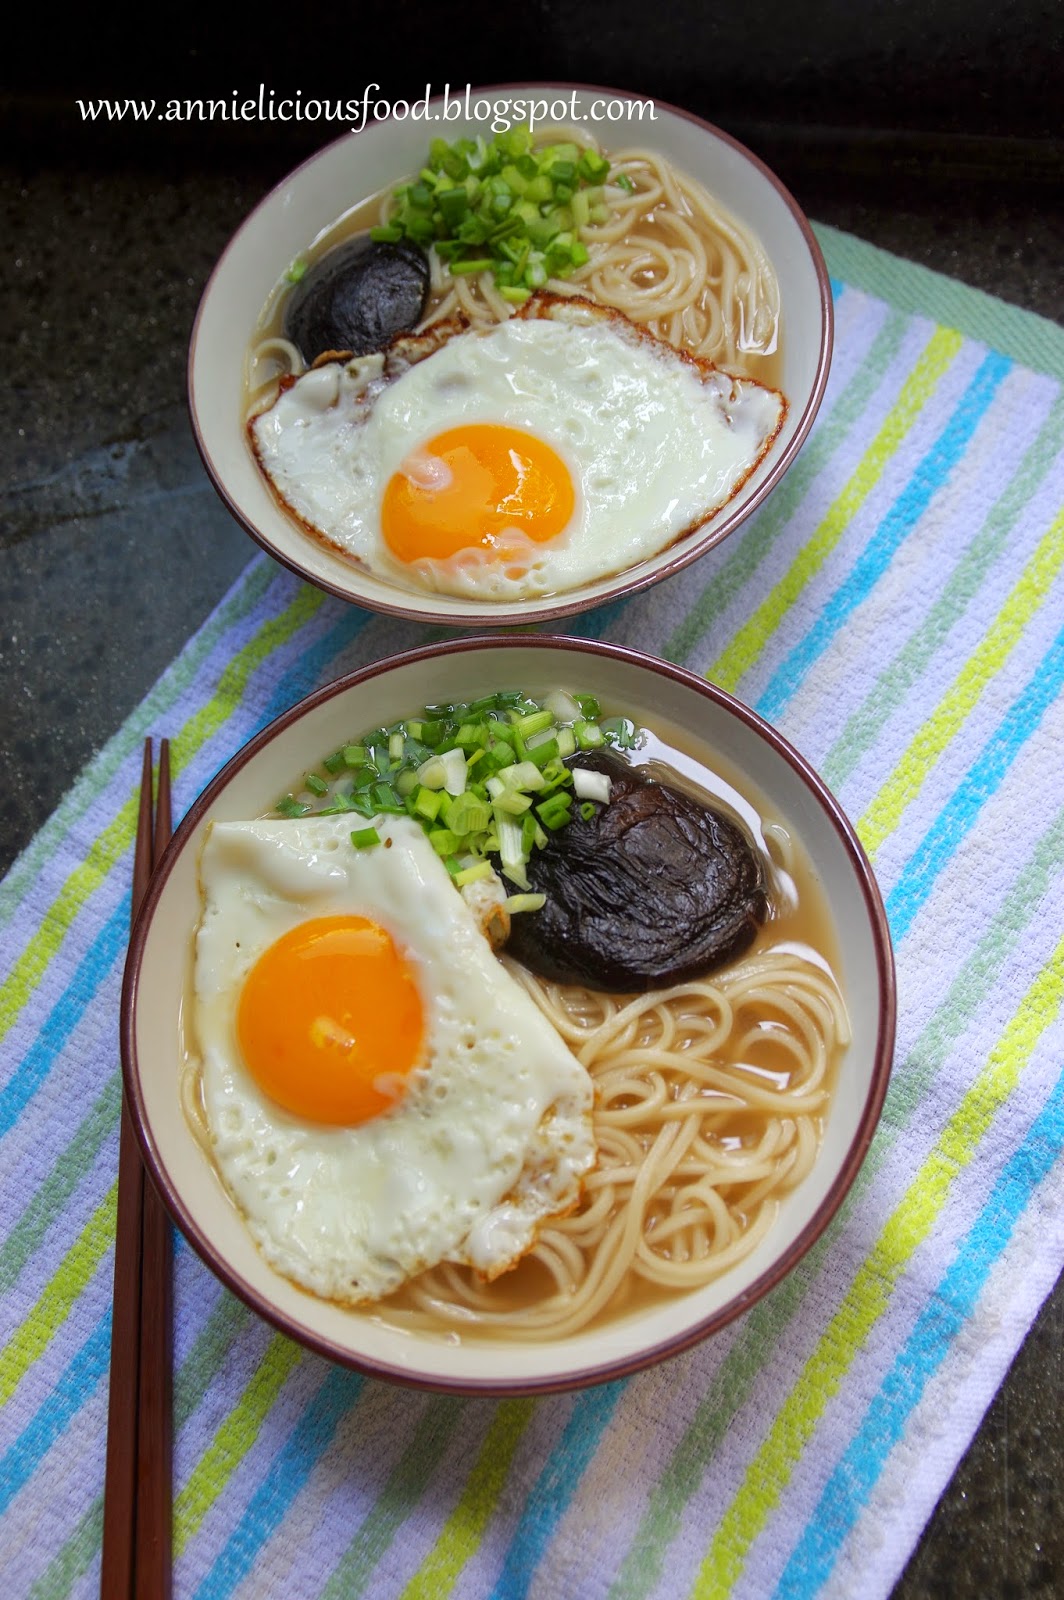
I prepared the soup in advance, chilled it. And I use the bone broth for some comforting noodles soup over the weekend. Of course, you could drink the soup just like that. Without noodles. It's up to you :)


Who doesn't know the goodness of collagen? I'd say, every woman should know! Collagen is the same as gelatin. It's just that the word Collagen used for its form when found in the body, and gelatin refers to the extracted collagen that is used as food. Gelatin is rich in amino acids. Although it is not a complete protein itself, it provides many amino acids and therefore decreases the amount of complete protein needed by the body.

Now, let me tell you where can you find collagen in nature and you could forget about botox. You see collagen almost everyday. It's in the skin, bones and joints of animals! For those people who say NO to pig skins, you totally have no idea how much collagen they have in there.

Ingredients
  • 2 Huge Pork Bones 大猪骨
  • 2 Chicken Carcass 鸡骨/鸡壳
  • 20pcs Chicken Feet 鸡脚
  • 200g Ground Nut / Raw Peanut, 花生 (Optional)
  • 4.5L Water 
  • Salt to taste (Optional)
Method
  1. Pre-soak the peanuts overnight (or at least 5 hours) before use. Remove the skin from soaked peanut by rubbing it hard with each other. The reason is because I would prefer my soup to have a clearer broth. Peanut skins gives your soup darker color. Rinse the peanuts until water runs clear.
  2. Rinse pork bones, chicken carcass, chicken feet, parboil them for 3 to 5mins. Rinse again.
  3. In a big soup pot, add in everything except salt. Bring to a boil for 10mins. Then reduce heat and simmer the soup over low heat for 4 hours. 
  4. After simmering the bones for several hours, remove all the bones and strain the broth. I wanted clear broth. So, I strained the broth 2nd time through a very fine hair sieve. You should get about 2L broth after strained. If you are drinking it fresh, lightly salt it. If you are keeping it as a stock for future use, it salt it only when you reheat it for consumption.
Let me tell you my way of sourcing collagen. This! All the bones here! Go ahead and add more bones if you want. No strict rules here. Adding pork hooves is awesome idea too. Trust me! :)


This is a pot of powerful soup. When you cook the bones, it breaks down the collagen and it becomes easily digestible. I added peanut in there, because peanuts gives extra nutrients. But if you are adding peanuts into the soup (like me), please please please pre-soak your peanut overnight and wash them well. If not, your soup will turn dark color. Peanut skin gives you dark soup.

If you have Crockpot or slow cooker at home, do use it. Cooking the broth on low setting is an easy way to cook broth for a prolonged time. Do bear in mind that it is a must to remove the surface scum that arises occasionally during the cooking process to achieve nicer tasting and clear looking broth.


NOTE : 
  1. Par-boiling and rinsing the bones before cooking and simmering the broth at low low heat is important. It helps to produce a clear broth as it greatly reduces the amount of residue in the liquid.
  2. The broth should be set to cool until the fat hardens on top. Then, remove the fat and refrigerate the broth. It will keep well in the refrigerator for a week, or upto a month in the freezer. 
  3. If your broth is properly prepared, it will gives you a rubbery, jellylike consistency broth due to the high gelatin content of the collagen. It is a great idea to prepare in advance, reheat it as a simple nutritious drink, or like me, use it for noodles.  
And if your broth looks like jello after it is chilled, YOU ARE A ROCK STAR!!! 


I reheat the jello-like bone broth to cook up some noodles here. It's simple, delicious, nutritious, and you don't need instant noodles anymore!


Ahhh!!! I love collagen! God knows how much! Look at the broth!


This is a super collagen soup. My grandma once told me... you drink this soup, you will become pretty. Oh well... olden days doesn't know what's collagen nor amino acid for sure :)
My grandma say it's beauty soup. Please drink more!!! Haha...


You may also like Chicken Feet Peanut Soup (花生鸡脚汤)