Saturday, March 16, 2013

Zebra Cake (斑马蛋糕)

Wanna take a stroll to the wild life in your kitchen? What about Zebra?

I haven't been baking for quite sometimes. This beautiful stripes hearty bake is not a coincidence. He spent his weekend helping me doing house cleaning. So, I baked this for Max to give him a good treat.


Actually this is a repeat recipe. I used Mrs.NgSK's Vanilla Butter Cake recipe that I baked last year. All I did this time is to add some good quality cocoa powder in it, and used Échiré Salted French Butter

I love this cake. Although I didn't do well on the Zebra stripes, but I love the whimsy touch.


Ingredients
(Source : Mrs.NgSK's Vanilla Butter Cake)

  • 250g Salted Butter, room temperature (I used Échiré Salted Butter) 
  • 200g Eggs (no shell) - About 4 eggs (Grade B). 
  • 50g + 150g Castor Sugar
  • 200g Self raising flour, sifted
  • 60ml Fresh Milk 
  • 1 tsp Vanilla Paste
  • 10g Cocoa Powder (I used Valrhona Brand)
Method 
  1. Pre-heat oven at 180C (Conventional).
  2. Prepare a 9' inch round cake tin. Line the base, grease the sides.
  3. Separate egg whites & yolk. Beat egg whites until soft peaks, gradually add 50g sugar and beat until stiff. 
  4. Cream butter and 150g sugar until pale and fluffy. Add in Vanilla paste, beat for awhile, and followed by egg yolks one at a time.
  5. Put in half the flour and mix on low speed until incorporated. Add in milk in 2 additions and mix until well incorporated. Mix in balance flour. 
  6. Put in half the egg whites in and mix on low speed. Pour the balance egg whits in and FOLD using your spatula. 
  7. Divide batter into 2 equal portions. Fold chocolate powder into one of the batter. 
  8. Using a tablespoon (or a small soup ladle), scoop 1 tablespoon of the vanilla batter into the center of the greased cake tin. Then, scoop 1 tablespoon chocolate batter on top of the center of the vanilla batter. And then, another tablespoon of vanilla batter on top of the chocolate batter. Repeat the process until the batter finished. 
  9. Bake for 45 minutes or until skewer comes out clean.
  10. Leave cake cooled before cut and serve.  

I've seen some bakers scooped 3 tablespoons of each batter at the beginning. And then reduce to 2 tablespoon each. And finally, the batter gradually reduced until 1 tablespoon of each batter. It's like, the circles will become smaller and smaller. This could achieve nice pattern lines on the cake. But I only read this tips right AFTER my cake is out of the oven. Sigh! Maybe I should try this tips. It should gives better Zebra result :)

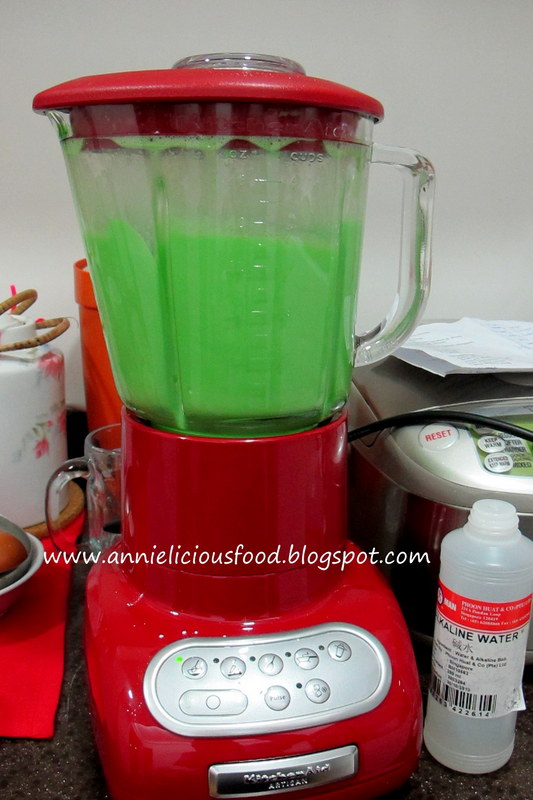
Here's how I did it :)


Yes, it looks messy. But nevermind. The most important is..... Tada!!! My cake didn't crack. I'm happy!!!


And here, you could see the layers of chocolate color at the side of the cake.


The stripes looks nice! If you think baking ordinary butter cake is boring, why not give this a try?


Happy Baking!

Wednesday, March 13, 2013

Talam Tokyo - (MFF-Johor) #6

My 6th MFF Johor dish - And the name of this dish sounds really special. Talam Tokyo.

The very first time I heard the name of this kueh, I started to wonder if it is originated from Tokyo, Japan or what. But no. After some read-ups, I realized that this is originated from Johor. Why is it called Talam Tokyo? Till now, it is still unknown. There's no historical writings that I could find on the internet tho. But with Wendy's encouragement, I decided to give this kueh a try :)


Wendy told me that this kueh taste nice. She had it in Johor before. When I first saw the recipe, I spotted glass noodles in there. I thought it's interesting! But I book-marked the recipe, dragged more than 3 months, then, I started to move my fingers to get it done.


It looks really like seri muka. But it is not. I never try the real thing before, I just try my best to replicate it. As much as I could, as close as it can be.Original recipe ask for 10' x 10' inch cake tin. For me, I don't need such big portion of kueh at home. So, I halved the recipe instead, and I'm gonna use 7' x 7' inch cake tin for that.

Ingredients
(Source : Yatie Memories, with modification)

For Bottom Layer
  • 150g Sago (small sized)
  • 30g Glass Noodles (aka Soo Hoon / Tang Hoon)
  • 50g Grated Coconut
  • 50ml Coconut Milk
  • 150ml Water
  • ½ tsp Salt

For Top Layer
  • 2 Eggs
  • 150ml Sugar
  • 200ml Coconut Milk
  • 200ml Water + 2 Pandan Leaves (Blend them together, strained, keep the juice)
  • 50g Custard Powder
  • few drops of Green Coloring or Pandan Paste
  • ½ tsp Alkaline Water
  • ½ tsp Salt

Method (for Bottom Layer)
  1. Wash sago, soaked in water for 30mins, drained.
  2. Wash glass noodles, soaked in WARM water for 30mins, drained and snip into about 1 inch length (or shorter if you want)
  3. Prepare a 7' x 7' inch cake tin. Line a layer of cling wrap paper at the bottom of the cake tin. Lightly grease the cake tin with oil.
  4. Combine all Bottom Layer ingredients in the cake tin. mix well and spread the mixture evenly.
  5. Under a steaming wok, steam the bottom layer kueh under high heat for about 25 minutes. Use a spoon to kinda gently press it if you find that the layer of kueh is uneven.

Method (for Top Layer)
  1. First, blend the pandan leaves and water together, strained and set the pandan juice aside. Wash the blender, and make sure it is free from pandan leaves residues.
  2. With clean blender, combine all Top Layer ingredients together and blend it away.
  3. Strain the mixture, and pour the mixture straight to the wok. Under very low fire, continuously stirring, cook the mixture until thickened and almost going to boil, NOT boiling.
  4. Pour the mixture on top of the steamed bottom layer kueh. If you are worried that it will have some lumps in there, strain the mixture one more time before you pour them in.
  5. With a clean white cloth cover on top of the kueh, steam it for 25 minutes.
  6. Once kueh is cooked, let the cake cooled down COMPLETELY before unmould and cut for serving. 

If you don't have clean cloth to cover the kueh during steaming, the vapor water will drip down, and your kueh will end up having lots of dimples. To prevent that, there are 3 ways.

1. Use those chinese bamboo steamer cover. Those that dim sum restaurants used.

2. Cover the kueh with clean cloth. But the cloth MUST NOT touch the surface of the kueh.

3. Stand infront of the steamer, For every 4 or 5 minutes, remove the steam cover and give the steam cover a very quick wipe, to wipe away the vapor water, and cover it back. This is to prevent steam water drip down. But this motion must be fast, and of course, the most tedious method. But if your kueh still have some vapor drips dimples, gently use toilet roll to absorb the water away from the surface of the kueh.

See! I used blender to lighten up my work. You could use food processor or mixer to do the work too.


Incase you don't know, this is Alkaline water that you could easily get from Phoon Huat. Or sometimes, places like Sheng Siong do have it too. Depends on which outlet you visit :)


And here, the main ingredients. Coconut milk, grated coconut, glass noodles, eggs, pandan leaves and sago.


In a big steaming wok, steam 1st layer for 25 minutes. Once it is cooked, it will looks transparent.


Under very low fire, continuously stirring, cook the mixture until thickened and until it's almost boiling.


Pour the mixture on top of the steamed bottom layer kueh. If you are worried that it will have some lumps in there, strain the mixture one more time before you pour them in.


Once kueh completely cooled, remove from the mould, remove the bottom layer of cling wrap paper and it is ready to cut.


No doubt that the taste of the kueh is nice. I like the texture of the top layer, but I don't really used to the existence of glass noodles at the bottom layer. It's just the overall feel of the bottom layer of the kueh. Maybe it is just me or something. Sometimes, food is very much about individual preference. I distributed some kueh to my neighbor and Serene to try too.


Although I won't categorize this Talam Tokyo as one of my favorite kueh, in overall, it is still a decent kueh that worth my time experimenting. Oh well, I've tried it, and now I know. It is a good experiment experience tho. If you happened to try this, do let me know the outcome and tell me if you like it or not. Okay?  :)

Sunday, March 10, 2013

Roti Jala / Roti Kirai - (MFF-Johor) #5

Okays, here's my 5th dish for MFF - Johor :)

Roti Jala (aka Roti Kirai) fondly called here as Lacy Crepes too, another well known Malaysian delicacy that deserves the introduction. Just like roti canai / roti prata or nasi lemak, these lacy net like crepes are very popular all over in Malaysia. 

However, referring to these 3 websites - WikipediaMakanan tradisi orang Johor and Grand Reception Johor, it is listed as Johorean food. Although there's no historical explanation why is it originated from Johor, but I'm sure there should be a reason why they categorize Roti Jala as one of the Johor delicacy. 


This is usually well known as afternoon tea-snack. To me, I can eat them anytime of the day as long as I have some curries to go with them. And I would not dare to speak of how many of these I can eat in one sitting. This is so difficult to tell. Hahaha... 

Ingredients
(Recipe Source : My Kitchen, with modification)

  • 140 grams All Purpose Flour
  • 1 large Egg
  • 350ml Water (or less, or more)
  • 100ml Coconut Milk
  • ½ tsp Turmeric Powder
  • ½ tbsp Cooking Oil
  • Salt to taste (about ½ tsp)

I bought this ultimate roti jala tool in Ipoh, Malaysia, during my trip back to visit my mom. It cost me RM 2.00. I'm sure Singapore do sells too. Places like Sia Huat should have :)


If you can't find this tool, use a mineral water bottle, poke a few holes on the cap, and you will have squeezed bottle. It works too. 

Method :
  1. In a bowl, lightly whisk all ingredients together until well incorporated.
  2. Heat a non-stick pan. Fill the mould with batter and make circular motion over the pan to make the crepe. If the batter does not flow out smoothly, add abit more water to make the batter thinner. 
  3. Cook the crepe on one side only, until the crepe is set. There's no need to cook the other side.
  4. Fold each crepe into quarter, stacking them up as you go. Or you could fold them like an envelope shape.  
  5. Serve Roti Jala with a curry dish.
Some people strain the batter through a fine sieve and set aside for 15 minutes. I didn't. But if your batter has lumps, then, you better sieve. 

Actually, making roti jala is quite fun. No stress at all. Haha... 


The textures of the Roti Jala vary to include a soft finish, or, if cooked a minute or two longer, a crispy consistency. But I'd prefer to leave it that way, soft finish. Again, it's individual. 


Roti Jala by itself is very light and it is absolutely delicious as an accompaniment to any type of curries such as curry chicken. Oh well, I won't wanna say much. Just let the picture speaks em' all. Hehe :)


Yes! Don't forget to refer to my Curry Chicken recipe here

Happy cooking!

Thursday, March 7, 2013

Begedil (Deep Fried Potato Patty) - (MFF - Johor) #4

Okay, I get scolded for posting Soto Johor recipe without my Begedil recipe. Hahaha...

(Edited ) .. I just get to know that there is Begedil Johor. All thanks to Queenie for the alert. And I was told that the usual Begedil uses par-boiled or steamed potatoes method. While Johor version fried the potatoes before it is mashed. And I look at my Begedil... YES!!! I fried my potatoes before I mash em'! Johor version Begedil! Hahahaha... This is a coincidence. I did it totally without knowing. Now I can submit this to MFF Johor :)

I had been busy and I finally have some free time for a few days before my crazy schedule start again. So, okay... Begedil Recipe :)

Begedil is basically deep fried potato patty, usually eaten alongside with other Malaysian or Indonesian dishes like Mee Soto or Mee Rebus. or even with rice as part of the dish. Some like it with bits of browned minced beef, but I did mine without beef. It's up to you to add or omit whatever additional ingredients.


You can make these a day ahead, keep them chilled in the fridge, and then reheat them again in your oven or toaster. But with that aroma, I don't think so. I assure you, you'd want to start eating when they are straight off the frying pan!

Look at my golden stack! Hehe...


Okays. Cut short. Let's see the ingredients and start cooking. It's simple and easily available at supermart. But before you start cooking.... Let me tell you, this is not diet food.


Ingredient
(Source : Little Teowchew, with modification)
  • 650g Potatoes, use slightly firmer ones. Brastagi is the best.
  • 50g Shallots, sliced, fried
  • 2 sprig Spring Onion
  • 1 sprig Coriander leaves (optional)
  • 1 tsp Salt, or more
  • dashes of pepper
  • 1 beaten egg

Method
  1. Fry sliced shallots till golden brown. Set aside. Do not discard the shallot oil. Those are good stuffs.
  2. Slice potatoes into thick slices, deep fry it until potato slices are cooked. Use chopstick to poke on it to test it's softness. 
  3. Cut spring onions and coriander leaves.
  4. Mash the fried potatoes. You don't have to 100% mash them. Leave some chunks (about 30% roughly mashed). It gives patties a nice bite.
  5. Add fried shallots, spring onions and coriander leaves into the mashed potatoes. Mix well. 
  6. Scoop some of the mashed potatoes and put them into the palm. Repeatedly press and make the patties compact. Roll them into balls and press it into thick patty form.
  7. Heat up enough oil for deep frying - medium heat. 
  8. Beat egg in a bowl.
  9. Dip the begedil into beaten eggs, one at a time. And then fry the begedil till golden brown.
  10. Drain the begedils of excess oil before serving.


I know. It's sinful. You don't have to remind me. But frying the potatoes slices (instead of steaming or boiling) adds more flavor to the and texture to the potatoes. For this part, I swear by it! But well, some people choose to go for the short cut method by par-boiling it. It's all about individual preference.


OMG.. Look at this! Loooook at this!!! Salivating? Hahahaha...


You want one?

Do read my  Mee Soto or Mee Rebus recipe if you are free :)

Wednesday, March 6, 2013

Soto Johor / Mee Soto - (MFF-Johor) #3

I cooked this as my 3rd submission of Johor month. This Soto Johor recipe is Parit Tengah Version.

Mee Soto noodle soup dish is very commonly found in Indonesia, Malaysia and Singapore. This is one of the Javanese influenced dish, and the word soto refers to Indonesian soup. And I'm not feeling shame to tell you that I'm actually drooling while I'm writing this post. Darn!


My favorite part of eating soto is to mix em' with hot chilli soy sauce, also known as Kicap Cili. It is a simple blend of chillies, bird's eye chillies, garlic, sweet soy sauce, and lime juice. The garlicky Kicap Cili somehow adds extra depth to the flavors of the whole soup dish and gives it the drool-factor! Yea, I'm salivating while I'm trying to describe it. Now look at this photo... this is the one with Kicap Cili in there :)


The ingredient list is quite long. The ingredients for the soup base, the noodles, the garnishing, accompaniments and also the Kicap Cili. But this recipe is a real stuff! So, I kinda feel proud of myself that I actually did it. Hahaha...

Ingredients  - Serves 6 adult
(Recipe Source : Selera Malaya, with minor changes)

For Soup
A
½ Fresh Chicken
1 Chicken Carcass / Chicken Backbone
2.5L Water, or more if you want
1½ tbsp Salt, or adjust to suit your taste
1 tbsp Sugar, or adjust to suit your taste
3 tbsp Cooking Oil

B (Grind everything into paste)
1 Onion (Bawang Besar)
3 to 4 bulbs Shallot (Bawang Merah)
5 cloves Garlic (Bawang Putih)
2 inch Ginger (Halia)
½ inch Tumeric (Kunyit Hidup)
½ inch Galangal (Lengkuas)
1 stalk Lemongrass (Serai), 1 inch from the bottom part. 

C
3 pcs Star Anise (Bunga Lawang)
5 pcs Cardamom (Pelage)
1 stick Cinnamon (Kulit Kayu Manis)
3 pcs Cloves (Bunga Cengkih)

D
3 tsp Coriander Seed (Ketumbar Biji)
2 tsp Fennel (Jintan Manis)
1 tsp Cumin (Jintan Putih)
1 tsp White Pepper (Lada Putih)

Lot's of ingredients. I know. I prepare all these spices a day in advance. So that my burden won't be that heavy on my cooking day.


These are Ingredient C for the soup. And I'd say, without them, the soup would lost it's soul.


Method 
  1. Heat up some oil, add in (B) and fry till fragrant.
  2. Add in (C), continue to fry until (B) looks dry.
  3. Add in (D), fry until all the aroma is all over your kitchen.
  4. Add in 2.5L water, and then add in chicken and chicken carcass / chicken backbone. 
  5. Once water is boiled, add salt and sugar to flavor the soup. Taste, adjust to your preferred liking. 
  6. And then, turn fire into medium low heat and let it slowly simmer for about 1 hour 30mins or so, so that the flavor of the spices will gives good aroma to the soup and also the chicken.
  7. Once the time is up, heat off, dish up the chicken, let the chicken slightly cooled. And then tear the chicken meat into pieces. Set aside.  
  8. I want clean soup on my noodles. So, I dish up all the chicken carcass / chicken backbones, pour the soup over to my slow cooker. Discard the residue sunken at the bottom of the soup pot. Re-heat the soup for later use.


For Noodles
1kg Vermicelli (Beehoon) or mixture of both Vermicelli and Yellow Noodles.
Chicken Meat (Chicken from the soup), tear it into small pieces
150 - 200g Bean Sprout, pluck away the end part

For Garnishing and Accompaniments 
Some Celery Leaves (Daun Sup)
30 to 50g Fried Shallots (Bawang Goreng)
6 Fried Potato Patty - Begedil (Optional)
6 small hard boiled eggs (Optional)


I having hard time hunting for this celery leaves. For those who don't know, Malay call these Daun Sup, usually used to sprinkle on top of soup dishes as part of the garnishing. When I go to my nearby wet market and ask for Daun Sup, nobody understand me! Luckily Giant super mart is not too faraway from my residence. Just 3 mins drive away, and I got it :)


For Spicy Black Chilli Sauce
4 Red Chillies
3 Green Chillies
3 Red Bird's Eye Chillies
2 Green Bird's Eye's Chillies
1 Clove Garlic
100ml Sweet Soy Sauce (Kicap Manis)
1 Lime, extract the juice
1 tsp Sugar
1 tsp Salt

This is really easy. Just remove the seeds from the chillies, mix all the ingredients together in a blender and blend it away! It is so easy until I don't even wanna spent too much time to write it. Haha..


To serve :
  1. Boil a pot of water, cook the noodles together with bean sprout. Drain. 
  2. Place cooked noodles and bean sprout on a bowl. Add in chicken meat, and pour the hot soup over. 
  3. Garnish with daun sup, fried shallots, Begedil and hard boiled eggs. And yes! Kicap Cili

Ooohh.. I'm so so so in love with Mee Soto. I'm so so so glad that I did it at home :)


Happy cooking! :D

Do refer to Begedil Recipe here.

Sunday, March 3, 2013

Mee Rebus Johor - (MFF-Johor) #2

Mee Rebus Johor is my 2nd dish for Malaysian Food Fest (MFF) Johor Month. I really love this! And I don't think I will ever forget it's taste. To me, this is a deluxe version of mee rebus! Hahaha..

I love mee rebus. Max loves it too. When I cooked Mee Soto Johor, Max asked if there's Mee Rebus Johor too. I said "Yes!", and he immediately request me to cook it.


Mee Rebus Johor is the least well known but special and well received dish. It is a noodle dish which consist of mee (yellow noodle) and served with tangy, spicy brown gravy, and then topped with condiments.

This might be a simple meal, but it gives you lots of satisfaction!


I had been living in Singapore for almost 15 years. So far, I couldn't find any mee rebus stall that makes me wanna revisit them. It's either their gravy are too bland, watery, or too salty. This version of mee rebus Johor is not the ordinary mee rebus that has peanut sauce in there. This is really different, and I love this version of mee rebus gravy more than the usual ones.

The preparation is easier than Mee Soto. I assure you. Lesser ingredients, not that time consuming too. I adapted the ingredient from Masam Manis, source from Iza Akma, but did minor modification.

Recipe (Feed 6 to 7, generously)
(Recipe Source :  Masam Manis, with minor modification)

Ingredient for gravy
  • 300g Minced Beef
  • 1 tbsp Corn Flour
  • 250g Orange Sweet Potatoes, cook till soften, drained, mashed.
  • 35g Dried Shrimp, washed, drained, finely grinded.
  • 2 stalks of Lemongrass, cut into 5 inch length, bruised
  • 8 pcs Star Anise
  • 4 tbsp Pre-Packed Chilli Paste (You could grind your own fresh chilli paste too)
  • 2 tbsp Curry Powder
  • 1 tsp Tumeric Powder
  • 1 tbsp Chicken Powder (Original recipe ask for 1 cube Beef Stock)
  • ½ cup Tamarind Juice / Asam Juice (35g Tamarind Paste + ½ cup Water)
  • 70g Grated Palm Sugar / Gula Melaka, or more. Adjust to suit your own. 
  • 1 tbsp Salt, or adjust to taste.
  • 800ml Water, or more
  • 4 tbsp Cooking Oil
Spices for gravy (for grinding)
  • 3 Onions
  • 4 cloves Garlic
  • 1 inch Ginger
  • ¾ inch Galangal 
  • 1 pc Candlenut / Buah Keras
Noodles and garnishing
  • 800g to 1kg Yellow Noodles
  • 200 to 250g Bean Sprout
  • 1 piece Tofu, Fried, cubed
  • 3 to 4 hard boiled eggs, halved
  • 3 to 4 Calamansi, halved. I used Lime, and cut into wedges.
  • some Celery Leaves / Daun Sup
  • some Red and Green Chillies, sliced.
  • some Fried Shallots

This is the main influential ingredient for the kuah (Gravy) for Mee rebus johor - Minced beef, Sweet Potatoes, Dried Shrimps and Chillies.


The irreplaceable spices that we usually found in Malaysian dishes


.
Preparation
  • Cook potatoes till soften, mashed, set aside.
  • Grind onions, garlic, candle nut, ginger and galangal, set aside.
  • Grind dried shrimps, set aside.
  • Mix beef with 1 tbsp corn flour, form into small beef balls, set aside.
  • Lemongrass, cut into 5 inch length, bruised.
  • Rub the tamarind pulp, strained, discard the seed. Keep the juice.
  • Grate palm sugar, set aside.

Make sure everything is ready before you start cooking the gravy.


.
Method
  1. Heat oil in a wok, under medium heat, add in star anise and lemongrass, fry till fragrant.
  2. Add in grinded spices, fry till fragrant.
  3. Add chilli paste and fry till you could smell the chilli aroma.
  4. Add grinded dried shrimps and mix well.
  5. Add curry powder and tumeric powder, mix well.
  6. Add water, chicken powder and bring to a boil.
  7. Add in meat balls, stir, don't let it stick together. Don't break the meatballs, stir gently.
  8. Under medium low heat, add in mashed sweet potatoes, tamarind juice, palm sugar and salt. Continue to stir until the mashed sweet potatoes incorporated with the gravy.  
  9. Let it simmer for awhile until gravy thickened. If you wants your gravy more watery, add more water. I prefer my gravy to looks really thick.
  10. Taste, and adjust accordingly. If too spicy, add more palm sugar.

It's a simple meal. But I have to be frank to you that this is quite alot of ingredients to prepare.


I love the color of the gravy. It looks thick and curry-ish, but it totally doesn't taste curry at all. It's sweet and spicy. This Mee Rebus has got meatballs in it and a whole ladle full of sauce sitting on top of the noodles. How to describe such a dish? Perhaps the word that comes to mind is - Power!


Look at the noodles incorporated with the thick gravy.... Oh my! My saliva dripping while I writing this!


I will definitely repeat this recipe if I were to cook mee rebus again :)


Do refer to my Begedil recipe and Mee Soto recipe too.

Friday, March 1, 2013

Muar Otak (麻坡乌挞) - (MFF-Johor) #1

Otak-otak (aka Otah or Otar in Singapore) is a fish cake well known in Johor, particularly in Muar. This fish cake is basically made by mixing fish paste with mixture of spices, shallot, garlic and coconut milk. And then, the mixture is wrapped in coconut leaves or banana leaf. Usually grilling or steaming method is used.


Although otak is traditionally made with fish meat, crab meat, prawn meat, cuttlefish or even fish head is used in modern versions of otak. There are different forms of otak originating from different regions. Nyonya version's otak from Melaka and Penang, they wrapped their otak in parcel, like a piece of kuih, and of course, there's a difference in the spices they use too. Otak from Muar is wrapped up as a thin slice using coconut leaf, some uses banana leaf, and then grilled over charcoal fire. There are commercialized version too, we see frozen otak selling in blocks, usually can be easily spotted at our neighborhood super-mart too. These frozen one's are meant for steaming.


I did this recipe twice.

For the 1st time, I prepared all my ingredients, but realized that my blender spoilt.  Damn it! But I still continue. Because I've got really nice Spanish Mackerel at that time. And so, I just go ahead to do whatever I can. I use knife to mince the fish meat into paste instead. Yes! tiring! And the result might not be that good. Oh well, never try, never know. In the end otak taste good, but texture is ROUGH, FIRM AND DRY!!!

Taste wise, pass. Texture... FAIL!!!


For the 2nd time, it's much better with my new bought blender. I get to blend my fish meat into paste and I slightly modified the ingredients to make it more moist. Better texture and softer meat. So, the recipe that I stated here is my 2nd attempt modified recipe. It may not be the best otak, but my family like them! :D


The usual way of making otak is to wrap em' in coconut leaves, and then grilling it over an open flame. But hello?! I'm staying in Singapore. Where to get coconut leaves??!! No choice. I settled down with banana leaves instead, and I'm happy with it.

This recipe makes about 12 pcs otak, weight about 100g each.

Ingredient 
(Recipe Source : Y3K Free Recipe with modification) 

450g Fish meat from Spanish Mackerel or Ikan Tenggiri
250ml Coconut Milk
100ml Water (or more)... However, this is optional.

For Seasoning : 
3 tbsp Corn Flour
3 tbsp Curry Powder

1½ tsp Turmeric Powder
1½ tsp Chilli Powder
3 tbsp Blended Chilli Paste (shop-bought chilli paste is fine)

2 tsp Salt
 tsp Sugar
tsp Minced Garlic
tsp Minced Shallot

For Wrapping : 
If you are using banana leaves : Grab a bunch of banana leaves from the wet market. Cost about S$1.50.
If you are using coconut leaves : About 40 to 50 finds of coconut leaves (est. 8" in length), and staples.


Method 
  1. Prepare your banana leaves - Wilt the banana leaves by either steam them, blanch them or over open fire. I did it open fire. And then, trim it into your preferred size. Mine is about 6" x 10" big. 
  2. Debone fish. Use a spoon, scrape the fish meat out. I did this a day in advance. Freeze it. The day after, thaw it before use. Separate my work load. 
  3. Set aside 150g of fish meat. Place the remaining 300g fish meat into a food processor (I used blender. So, my work is tougher). Add in coconut milk. Blend it into a smooth paste. 
  4. Scrape the fish paste mixture into a big bowl, add in all the seasoning. Mix until everything is incorporated. And then, add in the 150g fish meat chunk.
  5. If you find the fish paste too dry (which I think you will), this is the time you add 100g water. Mix again. If you are not confident about the texture, put a dollop of  fish paste on a frying pan, pan-fry it. Give the texture a try. If the otak is soft enough to your liking when it is cooked, then, proceed to wrap your otak paste with banana leaves. If you want your otak to have softer texture, add more water, mix, pan-fry it, try again. Until you achieve your preferred soft texture.  
  6. Wrap otak paste using prepared banana leaves. I wrap mine at about 100g otak paste each. How big you want your otak to be? It's up to you.
  7. Steam the wrapped otak under high flame. My otak is bigger and thicker, hence, I steam it for 5 mins, and then grill it to perfection. The 5 mins steaming is to set it's shape too.  
  8. Grill the otak over charcoal fire until slightly charred. Serve hot. 
  9. If you are not able to finish all the grilled otak, wrap them well and keep it in the freezer. When you want to eat again, just re-steam it.
Note : 
  1. Get fish monger to debone the fish for you. Like that, it save your trouble from doing it yourself.
  2. Fresh fish meat tends to be more bouncy, and gives otak firmer texture. I realized this for the 1st attempt. For the 2nd attempt, I scrape the fish meat out, and freeze the fish meat for next day use. Like that, fish meat will be less bouncy and otak will have less firm texture.
  3. Set aside 150g fish meat chunks and add them into the fish paste later. This is because I want my otak to have some chunky bite. Unfortunately, mine doesn't looks obvious in my photo. I think my fish chunks not big enough. Sigh!
  4. If you can't setup charcoal fire at home but still want to grill it, use oven. Bake it at 200 degree till it achieve the grilling result you want. 
  5. If you find it too troublesome to do both steaming and grilling like me, you could just steam it and skip the grilling part. Although I grilling makes significant difference in overall fragrance.
Otak can be eaten as a snack or with bread or rice as part of a meal. Once otak is cooked, it can be wrapped nicely and freeze it for next time. I'm totally not worried for making it in a big batch. So, I buy big fish and make bigger batch. So, I got myself a beautiful and big Spanish mackerel from Tekka Market :)


Incase you gonna debone the fish yourself...


Step 4 : Mix fish paste and seasoning together


Step 6 : Wrap otak paste using prepared banana leaves.


Step 7 : Steam the wrapped otak under high flame for 5mins to set it's shape.


Step 8 : Grill the otak over charcoal fire until slightly charred


This photo is from my 1st attempt. Bigger parcel. For the 2nd time, I make it smaller. You don't have to worry that the banana leaves all burnt. This is exactly what we wanna achieve.


And tada!!!! Must eat it while it's hot! :D


I don't know about you. But I like my otak to have abit of charred at the side. The charcoal grilled taste is just awesome!


This version of otak is simple enough for people like us to make it at home. I hope you like it!