Monday, June 24, 2013

Kuih Bengka Beras (肥豬肉) - (MFF - Penang)

I missed last month's Malaysian Food Fest (MFF) fun due to hectic school assignment. This month I told myself that I really can't miss it. This kuih looked unattractive and pale looking. But it taste really nice and bouncy with the existence of coconut milk, pandan leaves and rice flour. Coconut milk and pandan are good friends. It will never goes wrong.

I remembered I ate this kuih in Penang when I was 8 yrs old. The memory is so fresh that I could still remember how I bite the delicious kuih and it dropped the other half on the floor, and I cried because there's no more left. Hahaha...
 
Why bengka beras and not other Nyonya kuih's? That's because last month Max randomly picked one of my cookbook, and he pointed at the recipe, asking me if I could make this for him. He say this is one of his favorite nyonya kuih. I ignored his request. Later, I decided to bake kuih bengka beras after I get a confirmation from this website, showing that bengka beras is actually the Nyonya Kuih in Penang.  
 
 
Oh no. Please don't misunderstood me. I didn't say this kuih is originated in Penang. Infact, this kuih is widely selling in Malaysia, particularly in Penang, as there's alot of Nyonya kuih's available there.
 
Kampar do sell bengka beras too. And we called this kueh "fei-jue-yoke" 肥豬肉, literally pork fats in cantonese. This kuih looked really like a thick slab of pork fats. Probably that's why they named  the kuih based on it's appearance resembles it? I'm not sure.
 
All I could remember is, my late father is madly in love with this bengka beras. Whenever he goes back to hometown, he will want to buy this, and he can swallow 5 pieces at a time! Now, when I see Max eating the bengka beras that I baked, makes me remind of my late father, holding a slice of bengka beras with his satisfaction smile. Priceless!


I adapted my recipe from a cookbook called Nyonya Traditional Kueh, Snacks and Desserts, written by Chef Ricky Ng. He's nothern nyonya descendants. His recipe ask for 8 x 8 inch square pan. But I didn't wanna make that much kuih, as I knew I won't be able to finish it. So, I reduce the recipe ratio by 24% just to fit into a 7 x 7 inch square pan instead.
 
Ingredients
(Source :  Nyonya Traditional Kueh, Snacks and Desserts cookbook, by Chef Ricky Ng, with modification)
  • 153g Rice Flour
  • 42g Green Bean Flour
  • 12g Tapioca Flour or Sago Flour (I used Sago Flour)
  • 500ml Coconut Milk
  • 500ml Water
  • 150g Sugar
  • 3 blades of Pandan Leaves, tie knot.
  • a pinch of salt
 
Method
  1. Grease a 7 inch square pan with some oil, and pre-heat oven to 220 degree.
  2. Mix all ingredients together, except pandan leaves. Stir till sugar has completely dissolved and strain.
  3. In a heavy based pan or pot, add in mixture and pandan leaves knot. Cook under low flame and stirring continuously till mixture begin thickened.
  4. Discard pandan leaves and pour the mixture into the greased tin. If your mixture has lots of lumps at this point of time, do consider to strain it when you pour them into the greased tin.
  5. Bake bengka beras for 30 to 35 minutes, and then switch to 240 degree and let it grill for 5 mins, or until top of kuih turns dark brown.
  6. Let it cool completely before cutting the kuih.
 
 
This is my bengka beras just out of the oven.
 
 
Unmoulded. Nice charred color! I like! But if you compare with those shop-bought ones, they are not as charred as this. This is the best thing about home-made stuffs. I like the way I want :)
 
 
Once kuih completely cooled, trim away the charred sides and cut into slices.
 
 
Take a look at this... They are soft, bouncy and fragrant!
 

If you had this kuih before, you won't need me to further elaborate it's addictive yumms. If you never had this before, give this a try. It's really simple to make.
 
 
I am submitting this post to Malaysian Food Fest, Penang Month hosted by Alan of Travellingfoodies

Sunday, June 16, 2013

BEST Double Chocolate Walnut Brownies

I absolutely love the result of this double chocolate walnut brownies! It's moist and taste amazing!

These were easy to make and the results were absolutely satisfying! I put in some chocolate chips and it tasted really good. If you don't like walnuts, you could opt out or replaced with macadamia.


I don't intend to blog this recipe so soon. But upon Henny and Linda's request, I just post it for them.

I love brownies. But I refrain from baking it due to it's sinfulness. But then, recently I got myself a new pro-ceramic brownies baking pan at a discount price! So, I have a reason to bake it! And at the same time, I'm a little nervous about baking brownies.

Believe it or not? This is the 2nd time I bake brownies. The 1st time didn't turned up well as I just started pick up baking back then. I over-baked it, and I followed online recipe blindly. The brownies turned up to be an overly-sugared chocolate bar. Now I think back, this really makes me laugh at myself. Hahaha..

This might be the Brownies recipe that you are looking for, but this might not! But allow me to share with you, Max is the one who named this brownie. Max gave me his review about this brownies. He says "Ohhh!!! This is one of the BEST brownies that I'd ever tasted!" ..... Oh! I have to agree with him. Because I really love this brownies too. He said I should name it BEST double chocolate walnut brownies. And there you go! He name it!

But I won't wanna shout to the whole world that this is the BEST! No... I won't wanna debate nor claim this is the best brownies in the world or something like that. Because different people has different expectation on brownies.


There are many types of brownies recipe out there. There's fudgy, chewy or cakey brownies types of brownies. Fudgy brownies is dense, moist, packed with intense chocolatey interior. Cakey brownie has a moist crumb and a slightly fluffy interior. Chewy brownie is moist, but not quite as gooey as fudgy one.

The thing about fudgy brownies is "gooey", though what it really is ... should be like a gummy bar if I were to describe em'. No. I'm not making fudgy brownies this time.

My brownies is cakey and chewy. Not fudgy. If you are looking for fudgy brownies, skip this recipe.

Ingredients
(Recipe Source : Hershey's Kitchen with modification)
  • 200g All Purpose Flour
  • 80g Cocoa Powder 
  • 1/2 tsp Baking Soda
  • 75g + 75g Unsalted Butter, melted
  • 120ml Boiling Water
  • 70g Semi-Sweet Dark Chocolate, melted 
  • 2 Large Eggs
  • 350g Castor Sugar
  • 1tsp Vanilla Extract
  • Pinch of Salt
  • 120g Semi-Sweet Dark Chocolate Chips
  • 50g Chopped Walnut, lightly toasted. 
I adapted this recipe from Hershey's Kitchen. But I modified the recipe based on my personal feel. I decreased 80g sugar from the original recipe. I just can't convince myself to use so much sugar. But if I decrease sugar, I will affect the moisture of the brownies. So, I increased the butter to add more moisture. I increased the flour ratio, and added melted dark chocolate too. And of course, I added walnuts!

Method
  1. Lightly grease 13 x 9 inch Brownie baking pan. Or TWO 8 x 8 inch square baking pans if you don't have standard (13 x 9 inch) brownie baking pan. Line baking pan with baking sheet. Or lightly grease them with oil. I personally prefer to line the pan tho. It's much easier to remove the brownies from the pan later. 
  2. Pre-heat oven at 175 degree. Fan OFF. 
  3. In a large bowl, combine cocoa powder and baking soda. Stir in 75g melted butter and boiling water. Stir until mixture thickens.
  4. Stir in sugar, eggs, melted chocolate and remaining 75g melted butter. Stir until mixture turned smooth.
  5. Add flour, vanilla extract and salt. Mix until all ingredients well blended. 
  6. Stir in half portion of chocolate chips and half portion of chopped walnuts.
  7. Pour the mixture into the prepared pan. Sprinkle the rest of the chocolate chips and walnuts on top and bake for 35 to 40 mins for rectangular pan. 30 to 35 mins for square pan. Or until brownies begin to pull away from sides of pan. Brownies are done when toothpick comes out with a few moist crumbs still clinging. It's okay for the pick to look moist, but if you see wet batter, keep baking.
  8. Cool completely in pan on wire rack. Once brownies completely cooled, cut into squares and serve. 
TIPS : 
You could make this ahead. Once the brownies are well baked and completely cooled, wrap them nicely and freeze them. Brownies freeze well. Just thaw to room temperature and serve. But I personally would suggest you to serve the brownies warm. Just microwave it awhile before serving. It makes really perfect match with vanilla ice cream! :)


Eggs is the ingredient that pack everything together and make it deep, intense and chewy richness. 


The chewiness of the brownies seems to come from a couple of different factors. More on all-purpose flour, whose proteins provide "bite". You could use cake flour or super-lite flour too. But the result would be much lighter and it might turned out to be chocolate cake. No, I don't prefer that. I want those "bite".

This is just out of the oven. It looked slightly bumpy. I kinda slightly over-baked them. I confess, I throw the brownies into the oven and I forgotten about it. And this is NOT the 1st time I repeat this bad habit. Hahaha... So, this has caused the brownies crack at the side.


Once brownies completely cooled, it will go turn flat and nice. My advice is not to attempt to cut warm brownies. Because this brownies is cakey and crumbly it might turned messy if you cut it while it's warm. Let the brownies sit inside the pan for few hours (I leave it there for 8 hours) before I remove it.


Look at this dark beauty... It's moist, soft, cakey but yet chewy. This is absolutely rich and delicious! The thin crust at the top makes the brownies looked really sexy!


I gave some to Soke Kuan (who came all the way from M'sia to Singapore) and Meng Teng too. They looked so happy when they sees my brownies. Their facial expression? ...... Priceless! :D

Happy baking!

Monday, June 10, 2013

Lye Water Rice Dumplings / 鹼水粽 (aka Kee Zhang)

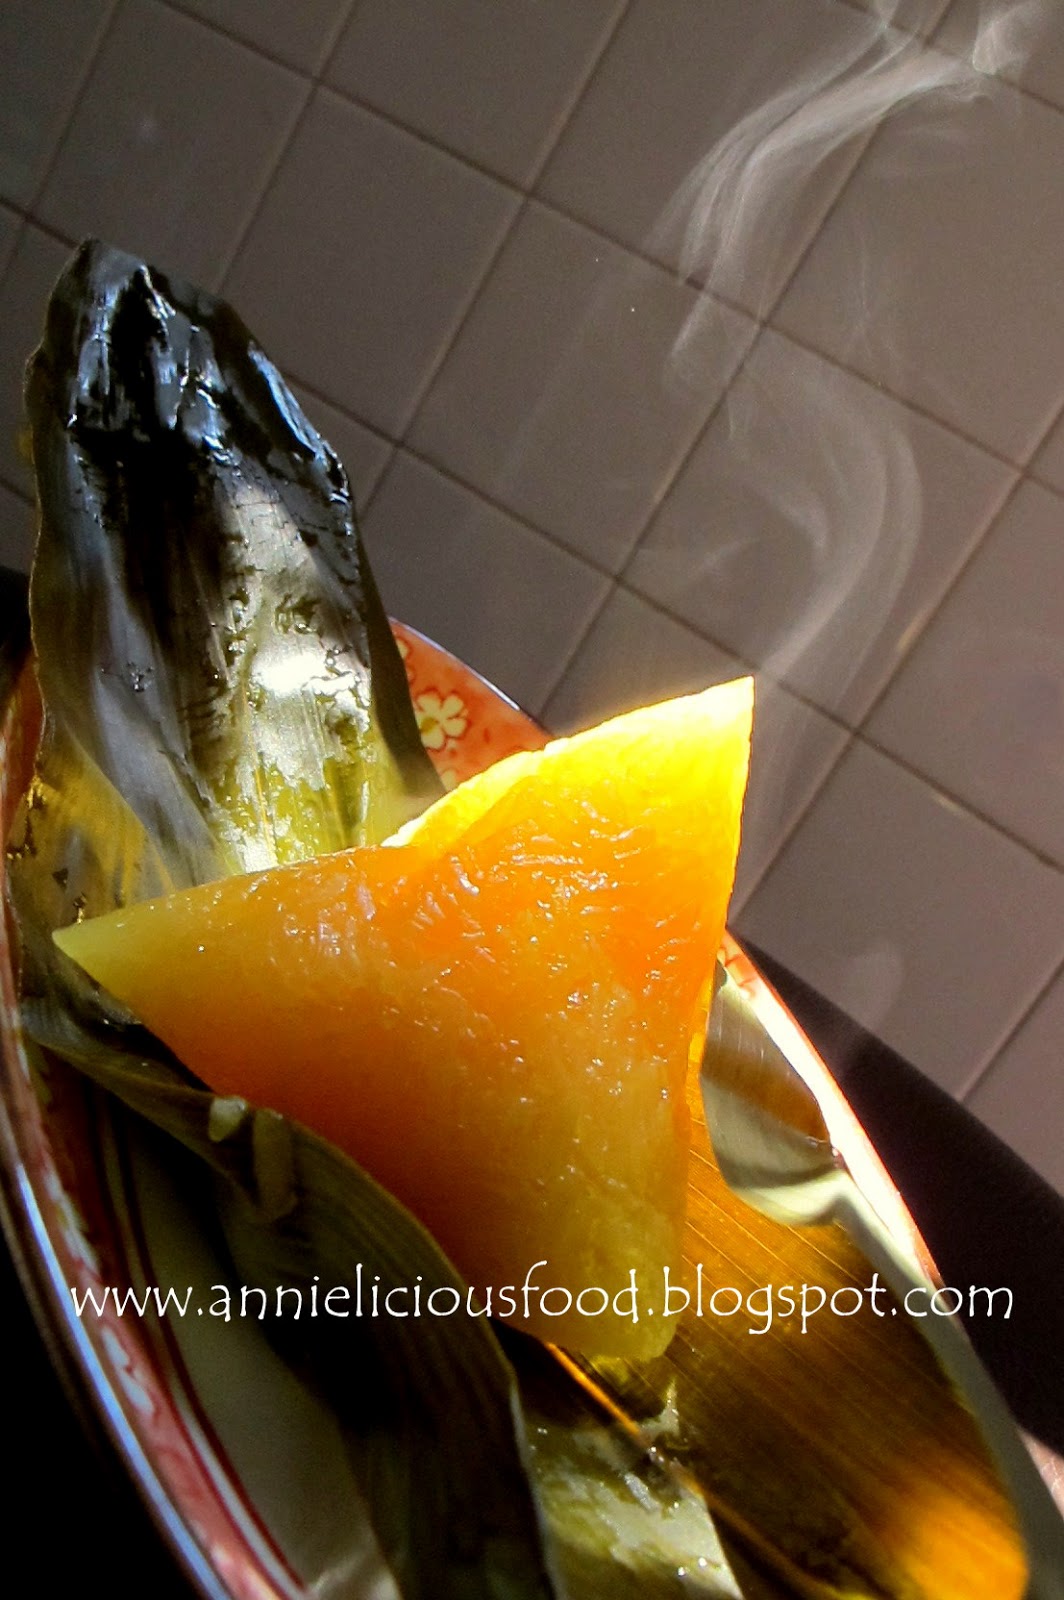
Oh! I just couldn't tell you how much I love this! Cantonese called this Gan Sui Joong (鹼水粽), also known as Kee Chang in Hokkien is one of the most basic rice dumplings during the Chinese Rice Dumplings Festivals. But I also knows that this lye water rice dumpling is the least favorite to most modern people nowadays. Some don't even wanna look at it.

But Woohhhh!!! Look at my Kee Chang! The smokey effect! Hehehe...


Last year, I posted My Mama's Savory Rice Dumpling (我妈妈的咸肉粽) recipe and Nyonya Rice Dumpling (娘惹粽子) recipe. This year, I'm gonna post Lye Water Rice Dumplings (鹼水粽) recipe.

This rice dumpling may appear to be boring and taste bland. But hey! When you get the dipping right, you will fall in love with it! It can be anything sweet! I love to dunk my Kee Chang in Gula Melaka (Palm Sugar), or Kaya (Coconut Jam), or some really good Honey, or even just plain fine grain white sugar! One dumpling, but many ways of enjoying it :)


I want my Kee Chang to have golden effect. So, I used some really nice Honey to do the photography work :)

This recipe makes about 35 to 40 rice dumplings. Depends on how big you want your rice dumplings to be. I've got 37pcs if I'm not wrong. If you are not feeding a village or giveaway, half of the recipe will do :)

Ingredients
  • 1 kg Glutinous Rice
  • 1 Lye Rock (鹼水头)
  • 40 to 50pcs of Dumpling Leaves (or more, incase some leaves are not in good shape)
  • some grass strands to tie the dumplings

Method

  1. Prepare dumpling leaves. Boil the dumpling leaves for 20mins or upto 30mins if you are boiling alot of leaves. Remember to add in the grass strands and boil together. Let the whole pot of leaves cool down on it's own. Use water to kinda gently wash them, drained. Use a cloth to wipe the leaves piece by piece. Set aside for later use. 
  2. Use mortar pestle to break the lye rock into small pieces. Add broken lye bits into a bowl of water, stir until dissolved. Some people says it will speed up this process if hot water is used. I never try it before. I just use room temperature water. It worked fine. It dissolves well.
  3. Wash glutinous rice for few times until water runs clear. Add enough water to cover the rice by 5cm or so. Pour in the bowl lye water into the rice and give it a good stir. Make sure it is mixed evenly. Leave it soaked overnight thoroughly.
  4. The next day, drain the rice using colander. Once rice well drained, you could start wrapping the dumplings. 
  5. Once dumplings are wrapped, using a big pot, cook half pot of water. Once water is boiled, add in the rice dumplings and let it cook for at least 2 hours (if you have 20+pcs in the pot), or upto 3 hours or more (if you have more dumplings in the pot).
  6. To check if dumplings are done, simply dish up one dumpling, unwrap it and check if the inside of the dumpling is soft enough. If it is hard or bitter, continue to boil for another 20 or 30 mins. 
  7. Once dumplings are cooked, remove dumplings from water and hang it up. Let it air dry and cool down for at least 1 hour before eating. 

The most painful part about making nice Kee Chang is the rice picking work. Nope! I'm not asking you to go to the paddy field to harvest glutinous rice yourself. But you have to pick the jasmine rice out of the bag of glutinous rice! For dunnowot reason, glutinous rice available in Malaysia and Singapore somehow mixed with a little bit of jasmine rice. I hate it! And this is where all the "rice-picking" work came in. You could skip this step if you are feeling lazy. But in order to make some really good Kee Chang that gives you every good mouthful of gooey and waxy feel, you really have to do this "pain-in-your-arse" work if you want quality Kee Chang. Last year, I get my MIL and Max to help me. This year, I've got Henny and Linda! Haha :)


This is the lye rock 鹼水头 (a.k.a Kee in Hokkien). Easily available at any grocery shops or even supermarket during rice dumpling festivals. It should cost about 20cts to 30cts per piece. If you are staying in Malaysia, usually they sell lye water instead. After soaked for 2 hours. The lye water gives really nice color to the glutinous rice. But NO... 2 hours isn't enough. You got to soak this overnight! :)


Ooohhhh!!! Look at this sexy shiny and waxy looking Kee Zhang! Yumms!!!


If you intend to learn how to make rice dumplings, Kee Chang is the 1st rice dumpling you should try making. They are the easiest of all and they are the best rice dumpling for you to practice wrapping because if you failed to shape your dumpling, you could always re-wrap it again and again as long as the dumpling leaf is still in good shape. And yes! Henny and Linda picked up rice dumpling skills through wrapping Kee Chang too!

Don't forget to take a look at My Mama's Savory Rice Dumpling (我妈妈的咸肉粽) recipe and Nyonya Rice Dumpling (娘惹粽子) recipe too!


Happy Rice Dumpling Festival everyone! :)

Sunday, May 12, 2013

Steamed Fish with Fermented Bean Paste (豆瓣酱蒸鱼)

Good quality taucheo 豆瓣酱 (aka Fermented Bean Paste) is very fragrant and umami. It could bring out the sweetness of the fish. Fresh tasting fish like Red Snapper or Threadfin works well with taucheo as they taste milder, and not as fishy as fishes like big head carp.


I love using Malaysian made taucheo. They are more fragrant, flavorful and not as salty as those imported from other place. Somehow, I'm quite particular. Am I too used to the taste? Or I had a cursed tongue? No. Probably I just love the taste. Haha..


I'm having problem here. I actually don't know what is the Chinese name of Red Snapper. Until I asked around, then I came to realized that the scientific name of Red Snapper is 红鲷, and fellow Hokkiens called Red Snapper as 红鸡. Now I learnt new words :)

I'm lucky. I've got myself two slice of nice and fresh Red Snapper fillet at the Supermart. So, I'm gonna steam it! FYI, incase you are buying at the wet market, market price for Red Snapper is about S$20 to S$22/kg. So, don't get cheated by fish monger! :)


Ingredients
  • 2 slices of Red Snapper Fish Fillet (mine is 380gm in total)
  • 1 tsp Salt, to rub on the fish
  • 1 tbsp Corn Flour / Tapioca Flour, to rub on the fish (optional)
Condiment
  • 75g Fermented Bean Paste, a.k.a 豆瓣酱 / 豆酱 "Tao-Cheo"
  • 1/2 tsp Sugar
  • Ginger, julienned
  • 1 tbsp Soy Sauce
  • 1 tbsp Hot Shallot Oil 
Garnishing
  • Fried Shallot
  • Spring Onions
  • Coriander Leaves

Method

  1. Clean fish, pat dry. Rub salt on the fish, and then pat some corn flour on it.
  2. Place some ginger on a steaming dish, place fish on top. 
  3. Apply fermented bean paste on top of the fish. Just like spreading peanut butter on your bread, generously. Sprinkle sugar on top.
  4. Bring water in the steamer to a boil and steam fish over high heat for 7 minutes. 
  5. While the fish is steaming half way, heat shallot oil and soy sauce in a pot and bring to a boil.
  6. Remove fish from the steamer, pour away excess steaming liquid.
  7. Drizzle hot shallot oil and soy sauce mixture over. Garnish and serve!


You must be wondering why I rub some corn flour on the fish before I steam it. Very simple. I'm steaming fish fillet here. The logic is to "lock" the juices from the fish meat. If you are steaming whole fish, you may skip this part.

These two slices of fillet is from big fish, and it has big bones. Difficult to cook, especially at the bone side. So, I steam it for 7 minutes. But please please please always bear in mind. When I mentioned the steaming time, I do expect the fish is in room temperature. If your fish is cold and right out of the fridge, please increase the steaming time.


Steamed fish must be eaten right after it's out of the wok. It won't taste nice if the steamed fish dish turned cold. Hence, whenever I blog about steamed fish, I fought my way through the rush hour try to make all the garnishing and photo taking as fast as I could. Because at another side, my family is waiting for me and the steamed fish to start the dinner.

This explained that my steamed fish has no strict rule on how this dish supposed to looks like, nor it looks neat. This is a home-cooked dish. The messier it is, the more home-cooked it looks like! Agree?


I hope you like it!


Do visit my other steamed fish recipes too :)

Prosperity Steamed Cod (富贵鳕鱼)

Canto Style Steamed Red Grouper (清蒸红石斑)

Hong Kong Style Steamed Cod Fish (港蒸鳕鱼)

Saturday, May 4, 2013

Nutella Cake / Torta Alla Gianduja

This cake is fabulously easy and yummy! It's moist, light and DELICIOUS! you won't regret baking it. It's Nigella Lawson's Torta Alla Gianduja. Simply Nutella Cake.


Another reason for you to bake the cake, it's Mother's day soon. The hazelnuts on top somehow gives it a burnished, ceremonial and yet home-made look. I'm sure your mom will feels so proud of you if you baked this for her :)


Max is a huge fan of Nutella. Or I'd say, he's obsessed! He can eat almost everything with Nutella and even the Nutella alone! Urgh! Nutella Monster! Anyway, he's happy when I told him I wanted to bake Nutella cake. And when I complained that hazelnuts are expensive, he said he sponsor it. But he end up didn't even pay me. And neither did he mention that he wanna sponsor that big jar of Nutella. Sigh!

The ingredient is simple. This cake is not the ordinary cake. If you notice, this cake doesn't have flour, baking powder and sugar. Fret not. It will be okay. The cake will collapse. But this is what it should be.


I use shop-bought lightly roasted hazelnuts. Brought home, toast it on the pan. Grind half of it, and keep the remaining half for decoration. And also, if you have Frangelico (hazelnut liqueur) at home, use it. If not, use rum. If you have none, don't scream. Just use water. I don't have Frangelico, and my bottle of Rum gone missing for no reason. So, used Bourbon instead. And I kinda like it :)

Ingredient
(Source : Nigella Lawson's How To Be A Domestic Goddess book)

For the Cake
6 Large Eggs, separated
pinch of Salt
125g Soft Unsalted Butter
400g Nutella
1 tbsp Frangelico, Rum or Water (I used Bourbon)
100g Ground Hazelnut
100g Dark Chocolate, melted. (I used Valrhona)

For the Icing
100g Whole Toasted Hazelnuts
125ml Double Cream (I used Whipping Cream)
1 tbsp Frangelico, Rum or Water (I used Whisky)
125g Dark Chocolate

Don't worry about the cream part. The difference between double cream and whipping cream is in the concentration of fats. For this cake, I used whipping cream because I can't get double cream. I'm fine with it.


Preparation

1. Toast 200g Hazelnut in a dry frying pan until the aroma wafts upwards and the nuts are golden-brown in parts. Keep shaking the pan so that they don't burn on one side and stay to pallid on others. Transfer to a plate and let it cool completely. If they go on the ganache while hot, it'll turn oily. So, be patient. Let it cool first. You may want to consider to make this a day ahead.


2. Grind 100g of the cooled Hazelnut. And I just can't tell you how much I love my Cuisinart mini food processor! It makes my cooking and baking so so so much easier! :)


3. Melt chocolate using double boiling method, to allow it to melt over gently under indirect heat. Once chocolate begins to melt, stir it gently with plastic spatula. When almost all of the chocolate is melted, lift up the bowl from the saucepan and set it on the counter. Stir continuously until it is shiny, smooth and completely melted. Set aside and leave it cool before use.


Okay, let's start baking!

Method

For the Cake

  1. Prepare a 9 inch springform tin, greased and lined. 
  2. Preheat the oven to 180 degree.
  3. In a large clean bowl, whisk the egg whites and salt until stiff, but not dry. 
  4. In a separate bowl, beat the butter and Nutella together, and then add the Frangelico (or whatever you are using), egg yolk and ground hazelnuts.
  5. Fold in the cooled melted chocolate, then lighten the mixture with large dollop of egg white, which you can beat in as roughly as you want, before gently folding the rest of then in a third at a time. Just like the way you make chiffon cake. 
  6. Pour into the prepared tin and bake it for 40 mins or until the cake's beginning to come away at the sides.
  7. Let the cake cool on a rack completely before you un-mould them carefully. This is a damp cake, you might find it abit difficult removing it from the tin.


My cake cracked badly, because I forgot to adjust my oven rack. I just dump the cake in and let it bake while I enjoy my favorite TV show at the living room. I'm a bad baker! Hahaha.

Well, as I said, the cake will collapse abit once it's cooled. But because mine cracked badly, so, it sank like a Titanic! But I'm not worried at all. I'm gonna ice it anyway.


For the Icing

  1. In a heavy-bottomed saucepan, add the cream, liqueur (or whatever you are using) and chopped chocolate, and heat gently under low fire. 
  2. Once the chocolate's melted, take the pan off the heat, leave it cool down abit and whisk until it reaches the right consistency to ice the top of the cake. 
  3. Ice the top of the cake with the chocolate icing, and dot thickly with the whole toasted hazelnuts.
  4. Set the cake aside and let it rest (or in the chiller) for an hour. This will allow the icing set and sit nicely on top of the cake when you cut. Or incase you want to bring the cake to a party or something. It would avoid mess. But if you are only eating it at home and you'd want some sexy and runny icing effect (just like mine), you don't have to let the cake rest that long then.
Here's the tips. You could prepare, and bake the cake a day ahead. And then, ice the cake on the 2nd day. This delicious chocolate cake keeps very well. 


So, how good is this cake? Max swallowed ate 1/3 of the cake AFTER our dinner! OMG! Can you imagine that? He just had his dinner, and this cake supposed to be his dessert. But.... when he's allowed to freely cut his portion of cake, he greedily cut 1/3 of the cake! He doesn't feels guilty at all! And I witness him eating the cake happily and kept saying "oh~yumm" while he nom it.

All in all, this recipe is indeed a keeper. And it's gluten free!


Happy Mother's day to my mom, my mother-in-law and all the mothers out there! Happy Baking! :)

Sunday, April 28, 2013

Akok Kedut / Wrinkly Akok (MFF - Kelantan)

Never ever judge the taste by it's look. Never! The look of this kueh can be deceiving. Yes! But it taste really nice! This palm sugar and coconut dessert is accentuated by their rich, caramel taste and distinctive aroma.


Well, human depend way too much on their sense of sight as it is their primary tool of perception. But this kueh looks like a mega failed soggy cake! How can people NOT judge by it's appearance?

If you scroll down, read the ingredients, and you should be able to imagine how delicious this kueh is. The making process is quite fuss free too! :)


I've got myself some really nice Gula Melaka (Palm Sugar) from Melaka last month. The 1st day when I reached Melaka, I bought a pack of Gula Melaka at the roadside. It cost me RM4.50. The 2nd day, I went Makko Restaurant for some Nyonya cuisines. And I spotted 100% Gula Melaka! It cost RM6.00 a pack. Look at this, just by the color itself, you could tell the difference.


Ingredients (Makes about 18 to 20pcs)
(Source : Wendyinkk)
  • 5 Eggs
  • 30gm Plain Flour
  • 150gm Palm Sugar (Gula Melaka)
  • 125ml Water
  • 2 blades of Pandan leaves (Screwpine Leaves), snip into pieces.
  • 200ml Coconut Milk
  • 1/8 tsp Salt
  • Oil as needed

Method
  1. Preheat oven 200C Fan ON. Apply a few drops of oil on a non-stick muffin tin. You could use aluminium egg tart pans. Put the oiled muffin tin into the oven to preheat together.
  2. Chop palm sugar into small pieces. In a saucepan, add water, pandan leaves and palm sugar. Bring to a boil and gently simmer for 5 minutes, lid on. Let it coo to warm. You should get about 150ml to 160ml in the end.
  3. Whisk eggs vigorously. I use hand-held mixer to do the fast work. Add in flour and salt. Make sure you whisk until no lumps are seen. 
  4. Strain in coconut milk and palm sugar syrup. Discard Pandan leaves. Mix well.
  5. Pour batter into the hot muffin tin. Like 2/3 full will do. You won't finish all at one go. You could repeat the baking later.
  6. Bake them for 12 minutes or until surface is golden brown. 


The mixture is now done and ready to bake.


When this Akok Kedut is baking in the oven, I sent a photo to Alan and Wendy. Alan asked if I'm baking Yorkshire pudding! Oh well, good guess! *wink*


Once it's out of the oven, the Akok will shrunk and collapsed immediately. Max thought I failed my cake baking when he saw it! Waaahahahaha...


The texture is like.... egg pudding? No. It should be baked caramelized palm sugar egg pudding! Yes! This sounds much nearer :)


Yes, it's wrinkly, it's ugly, it's not appealing. But it taste really delicious! The fragrant smoky sweet aroma is just... just... just hard to resist! Max loves it. He ate quite alot. Haha :)


I am submitting this to Malaysian Food Fest Kelantan Month hosted by Gertrude of My Kitchen Snippets

Saturday, April 6, 2013

Prosperity Steamed Cod (富贵鳕鱼)

This recipe is meant for my girlfriend Katherine Xu who'd just got pregnant and she's gonna due in another 4 month's time I think. I'll try to post somes dish that's suitable for confinement. So that she would be able to refer to my blog during her confinement if she run out of cooking ideas :)

I like steamed fish. It has less fat which makes it healthy, easy, and most of all, the kitchen is less greasy and less cleaning compared to pan-fried fish. This is my first attempt steaming fish with herbs. And I must admit that it's delicious, and the herbal gravy pairs very well with plain rice.


But I confess, I do use good quality ingredients. Good quality angelica root 当归, good quality red dates 红枣, good quality wolfberries 枸杞子. They are bought from Eu Yan Sang medical shop. I reckon that they do sell good stuffs, but of course, pricier than the usual medical shop of course.

Good quality angelica root 当归 is very important. If you are buying good quality ones, it taste sweet. If you are buying those at a lower priced ones, they taste bitter, and less fragrance of course. This highly revered herbs is very popular. Some people called it "female ginseng", as it used to nourish the blood and is believed to help invigorated blood circulation, strengthen liver, heart and spleen. My mother says it is also a uterine tonic, effective against menstrual disorders. Angelica root sounds powerful eh? Indeed. And it is also explains why angelica root is widely used in confinement soups and recipes to treat postpartum women.

Note : Pregnant Woman should not consume angelica root.

Oh! Come back to my fish. I got a piece of really nice cod fish at Bukit Merah wet market. It's not expensive. I stand at the fish stall and gave my sad puppy look to the fish monger, I end up paid only S$12 instead of S$15. Hahaha! Good deal!


The original recipe ask for normal Chinese dried mushrooms. But I used dried pearl mushrooms instead. I got it in Hong Kong. But some shops in Singapore do sell too. I'm just plain lazy. I don't have to slice them as pearl mushrooms are petite in size.

The original recipe is not really accurate. Especially the seasoning part. The ratio doesn't really work. Especially when the cookbook indicated 1 tablespoon of salt. I was like.... "OMG! You serious about this?" Hahaha... So, I did modification to make it taste right.

Ingredients
(Source : Choong Su Yin's Harvest Rich cookbook, with modification)

  • 1 pc Cod Fish 鳕鱼 (Mine is about 220g)
  • 2 slices Ginger 姜
  • 2 stalks Spring Onions 葱 (the bottom part will do)
  • 1 tbsp Shao Xing Wine 绍兴酒 / Hua Diao Wine 花雕酒
  • 200ml Water 水 (or more if you want)
  • ½ tbsp Wolfberries 枸杞子
  • 4 Red Dates 红枣, shredded
  • 2 slices Angelica Root 当归
  • 10g Dried Pearl Mushrooms 珍珠菇 or 3 slices of Dried Mushrooms 香菇
Seasonings
  • ½ tsp Salt 盐
  • 1 tsp Sugar 糖
  • 1 tsp Sesame Oil 麻油
  • Some corn starch (2 tsp Corn Flour 玉米粉 + 4 tbsp water 水)
  • Coriander for garnishing.

Method
  1. Clean fish, pat dry using kitchen towel. 
  2. Heat up a tablespoon of oil, fry ginger and spring onion till fragrant. Add in Shao Xing wine and water, bring to boil over low heat. 
  3. Once water is boiled, discard ginger and spring onions. Add in wolferries, red dates, angelica root, mushrooms and seasonings. Under low fire, let it simmer until fragrant. Set the sauce aside.
  4. Steam cod fish under high heat for 5 minutes (mine is just 220grams, 5 minutes is really good enough). 
  5. Once fish steamed, pour away excess water. 
  6. Reheat the sauce, once it's boiled, add in some corn starch mixture, teaspoon by teaspoon. Until it achieve the ideal thickness that you wanted. 
  7. Garnish with coriander and serve immediately with rice. 

The original recipe ask for normal Chinese dried mushrooms. But I used dried pearl mushrooms instead. I got it in Hong Kong. But some shops in Singapore do sell too. I'm just plain lazy. I don't have to slice them as pearl mushrooms are petite in size. You just go ahead to use normal Chinese mushrooms. Slice it before use. It's fine.


The thing about cooking is that, you find the taste right, but it might not suit others. When the recipe ask for ½ tsp of salt, but to others, they might think that it is too salty or it is not salty enough. So, I always emphasize to all my readers to adjust the saltiness / sweetness to suit your own preferred taste.


I looooove the umami sauce! Woohhhh!!

Happy cooking!


Do visit my other steamed fish recipes too :)

Hong Kong Style Steamed Cod Fish (港蒸鳕鱼)

Canto Style Steamed Red Grouper (清蒸红石斑)

TeowChew Style Steamed Pomfret (潮州式清蒸鲳鱼)

Tuesday, April 2, 2013

MFF Johor Round Up

Last month has been hectic for me. Picking up the new task at work, my prof is giving us really hard time on our assignments and I really didn't get to spent much time to monitor the whole process of MFF Johor. I'd like to apologize for that.

Even though I'm really busy with my work and study, it is always encouraging when I sees people email me and submit their Johor dish cooking. It keeps me motivated. I'm so glad that the entries this month is indeed encouraging :)

Here's all the participation from all the fellow supporters who'd replicate Johor dishes at home. 


* * * *
Noodles


Vivian Pang of Vivian Pang Kitchen


Queenie of Semalam berlalu esok menanti


WendyinKK of Table for 2.....or More


Annie of Annielicious Food


Queenie of Semalam berlalu esok menanti


Alice of I Love. I Cook. I Bake


Sonia of Nasi Lemak Lover


Annie of Annielicious Food


Adeline of Lite Home Bake


* * * *
Chicken Dishes


Mui of My Little Favorite DIY


Ivy Sew of Simply Beautiful and Healthy Living


Cass Tan of 揾到食


Cindy of yummylittlecooks


Queenie of Semalam berlalu esok menanti


* * * *
Fish Dishes


WendyinKK of Table for 2.....or More


Mel Lee of Through The Kitchen Door


Queenie of Semalam berlalu esok menanti


Queenie of Semalam berlalu esok menanti


Lena of Frozen Wings


Hody Loh of Cook 4 you & me


* * * *
Roti Jala


Annie of Annielicious Food


Queenie of Semalam berlalu esok menanti


Kelly Siew of Kelly Siew Cooks


Hippomamalai of Hippomama's Kitchen


Bee Bee of HoneyBeeSweets


Cindy of yummylittlecooks


* * * * 
Ogura Cake


Joceline of Butter, Flour and Me


Christine Choy of Food@home sweet home


Christine Choy of Food@home sweet home


Angeline of Angeline's Side of Story


* * * * 
Kacang Phool / Pool


WendyinKK of Table for 2.....or More


Gertrude of My Kitchen Snippets


Shannon Lim of Just As Delish


* * * * 
Acar Darat


Lena of Frozen Wings


Gertrude of My Kitchen Snippets


* * * * 
Johor Snacks / Side Dishes


Annie of Annielicious Food


Queenie of Semalam berlalu esok menanti


Gertrude of My Kitchen Snippets


WendyinKK of Table for 2.....or More


Annie of Annielicious Food


Cindy of yummylittlecooks


Rozita of Cerita Ita


It is indeed quite hectic for hosting Johor MFF last month. But I learnt alot through the process. I'm glad that I'd given the opportunity. See you all this month in Kelantan Month, hosted by Gertrude of My Kitchen Snippets.

Facebook Page, click here