Showing posts with label Chocolates. Show all posts

Saturday, July 19, 2014

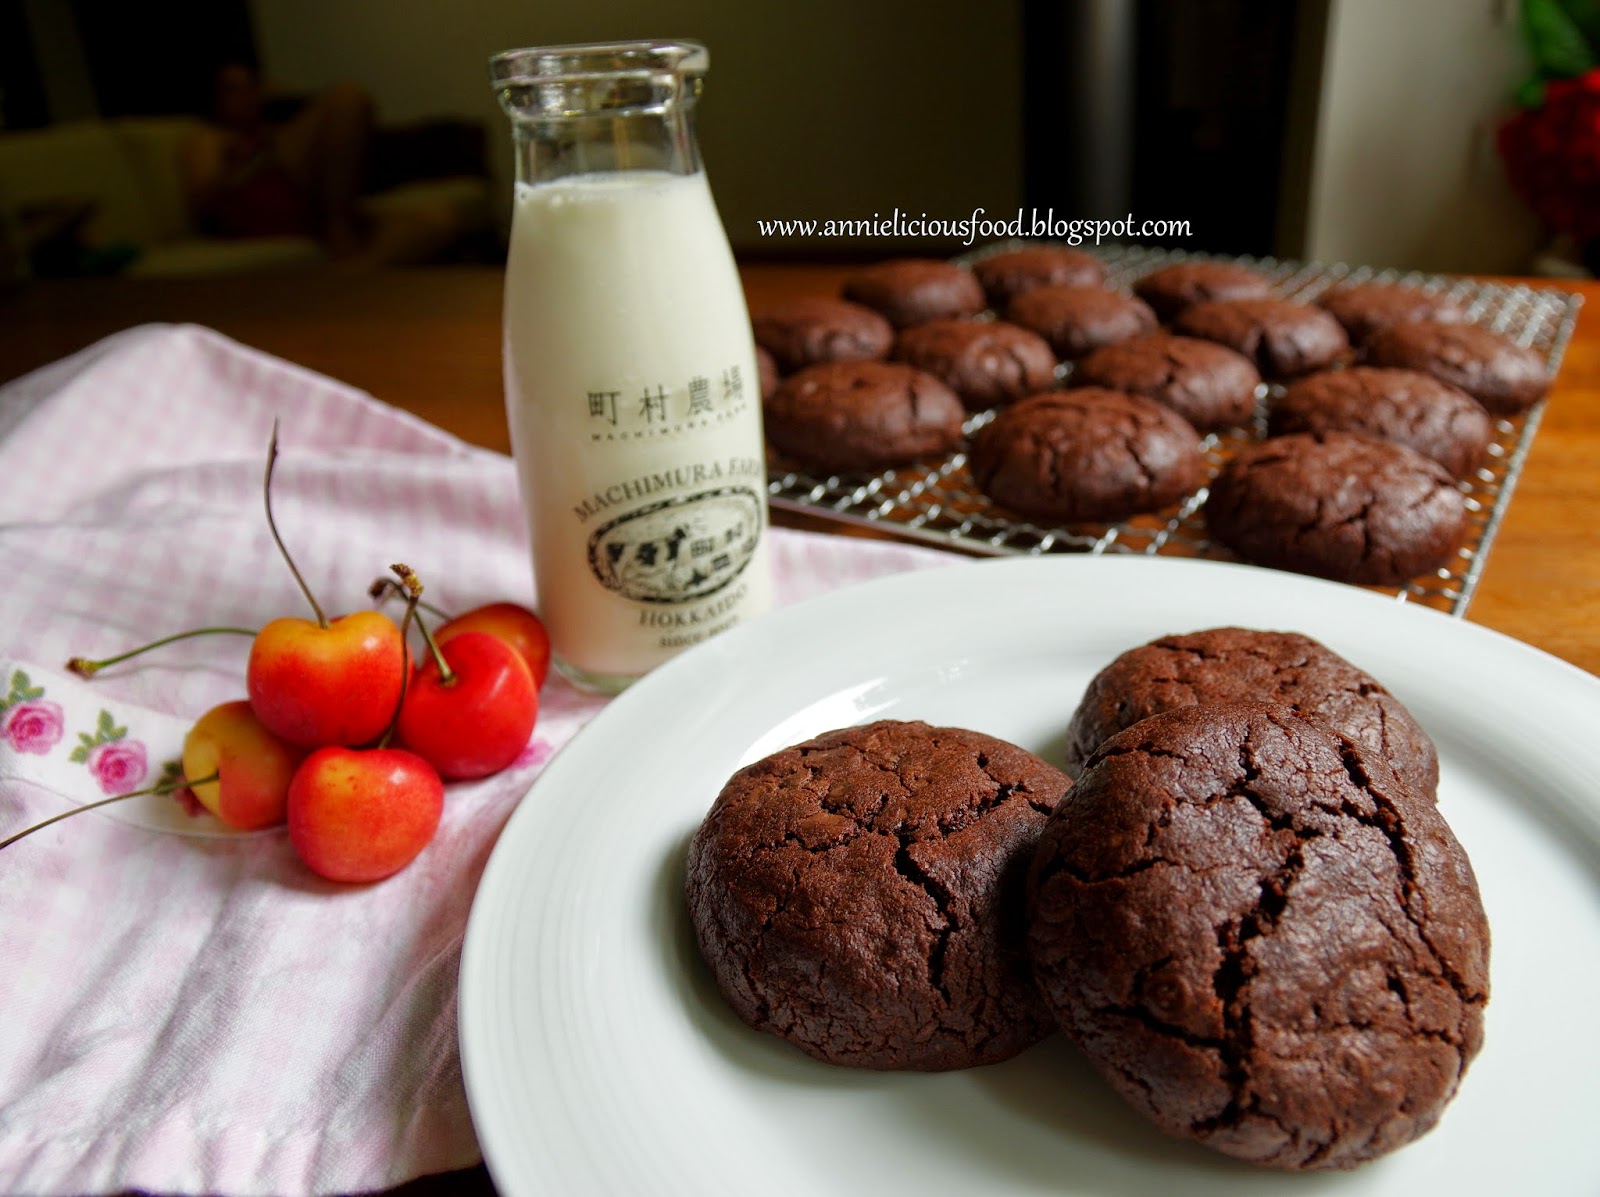
Totally Chocolate Chocolate Chips Cookies

A whopper of a deep dark chocolate cookie packed with chock full of chocolate chips. There's no reason to resist eating this cookies. Absolutely delicious, and by far the best cookie recipe I've ever used! There's nothing short of SENSATIONAL!!!

Incase you don't know.... Now this, my friends, is what I called chocolate cookies :)


The glass of milk is not just a prop. It is a necessity for this. A bite of chocolate chips cookies and a sip of milk? I'm totally on board. It's just heavenly! These are the chocolatiest cookies I'd ever come across.


I adapted this recipe from Nigella Lawson, but tweaked abit. It makes 12 big cookies or make it 14 if you want your cookies to be slightly smaller. I urge you to make full recipe. Because this is so good, I guarantee you, it won't keep long. But if you are only feeding 2 to 3, you can bake half the dough and freeze the other half. Just form the cookies dough into balls, freeze the cookies balls on a little tray. Once they're hard, just bung them in a freezer bag, seal, and stash it back in the freezer. You could bake them unthawed at a later date.

Using good chocolate is important. The logic is simple. If you use good chocolate, you will get good quality chocolate cookies. This is what I call an investment. And it's worth it. I used Hershey's brand chocolate chips and chocolate powder for this.

Recipe
  • 125g Dark Chocolate (minimum 70% cocoa solids)
  • 150g Plain Flour
  • 30g Cocoa Powder (Sieved)
  • ½ tsp Salt
  • ½ tsp Bicarbonate Soda
  • 1 tsp Baking Powder
  • 125g Soft Unsalted Butter
  • 75g Soft Light Brown Sugar
  • 50g White Fine Sugar
  • 1 tsp Vanilla Extract
  • 1 Large Egg (cold from the fridge)
  • 320g Dark Choocolate Chips (semi sweet is preferred)
Method 
  1. Preheat the oven to 170°C, fan ON. 
  2. Melt the 125g dark chocolate in a heatproof dish over a pan of simmering water. Set aside to cool. 
  3. Put the flour, cocoa, bicarbonate soda, baking powder and salt into a bowl. 
  4. Cream the butter, fine sugar and brown sugar in another bowl. Add the melted chocolate and mix together. 
  5. Beat in the vanilla extract and cold egg, and then mix in the dry ingredients. Finally, stir in the chocolate chips, mix well. 
  6. Divide the cookies dough into two portion. Wrap them with cling wrap, and shape them. (Refer pics below)
  7. Put the shaped cookies dough into the fridge and refrigerate it for 20 mins.
  8. Cut the dough into equal piece, remove the cling wrap layer and shape the cookie dough. (Refer pics below) Place shaped cookie dough on a lined baking sheet about 6cm apart. Do not flatten them. 
  9. Cook the cookie dough for 18 to 19 minutes, testing with a cake tester to make sure it comes out semi-clean and not wet with cake batter. If you pierce a chocolate chip, try again. 
  10. Leave to cool slightly on the baking sheet for 4 to 5 mins, then, transfer them to a cooling rack to harden as they cool.  
The secret of this recipe is simplicity and good quality ingredients. Do bear in mind.


Step 5 - Mix wet and dry ingredients together, and stir in the chocolate chips. Look at the sinful mess!


Step 6 -  Divide the cookies dough into two portion. Wrap them with cling wrap, and shape them.


Step 8 - Cut the dough into equal piece, remove the cling wrap layer and shape the cookie dough. No mess!


Place shaped cookie dough on a lined baking sheet about 6cm apart. Do not flatten them.


You cannot go wrong with this recipe. They are so easy and absolutely delicious! Max requested me to bake 30 pcs for him to bring to work next time.


Do I have to say more? It look and taste nothing short of perfection. This is definitely a MUST TRY recipe.

Update : Sorry that I forgot to mention, this is a crispy cookies :)

Sunday, June 16, 2013

BEST Double Chocolate Walnut Brownies

I absolutely love the result of this double chocolate walnut brownies! It's moist and taste amazing!

These were easy to make and the results were absolutely satisfying! I put in some chocolate chips and it tasted really good. If you don't like walnuts, you could opt out or replaced with macadamia.


I don't intend to blog this recipe so soon. But upon Henny and Linda's request, I just post it for them.

I love brownies. But I refrain from baking it due to it's sinfulness. But then, recently I got myself a new pro-ceramic brownies baking pan at a discount price! So, I have a reason to bake it! And at the same time, I'm a little nervous about baking brownies.

Believe it or not? This is the 2nd time I bake brownies. The 1st time didn't turned up well as I just started pick up baking back then. I over-baked it, and I followed online recipe blindly. The brownies turned up to be an overly-sugared chocolate bar. Now I think back, this really makes me laugh at myself. Hahaha..

This might be the Brownies recipe that you are looking for, but this might not! But allow me to share with you, Max is the one who named this brownie. Max gave me his review about this brownies. He says "Ohhh!!! This is one of the BEST brownies that I'd ever tasted!" ..... Oh! I have to agree with him. Because I really love this brownies too. He said I should name it BEST double chocolate walnut brownies. And there you go! He name it!

But I won't wanna shout to the whole world that this is the BEST! No... I won't wanna debate nor claim this is the best brownies in the world or something like that. Because different people has different expectation on brownies.


There are many types of brownies recipe out there. There's fudgy, chewy or cakey brownies types of brownies. Fudgy brownies is dense, moist, packed with intense chocolatey interior. Cakey brownie has a moist crumb and a slightly fluffy interior. Chewy brownie is moist, but not quite as gooey as fudgy one.

The thing about fudgy brownies is "gooey", though what it really is ... should be like a gummy bar if I were to describe em'. No. I'm not making fudgy brownies this time.

My brownies is cakey and chewy. Not fudgy. If you are looking for fudgy brownies, skip this recipe.

Ingredients
(Recipe Source : Hershey's Kitchen with modification)
  • 200g All Purpose Flour
  • 80g Cocoa Powder 
  • 1/2 tsp Baking Soda
  • 75g + 75g Unsalted Butter, melted
  • 120ml Boiling Water
  • 70g Semi-Sweet Dark Chocolate, melted 
  • 2 Large Eggs
  • 350g Castor Sugar
  • 1tsp Vanilla Extract
  • Pinch of Salt
  • 120g Semi-Sweet Dark Chocolate Chips
  • 50g Chopped Walnut, lightly toasted. 
I adapted this recipe from Hershey's Kitchen. But I modified the recipe based on my personal feel. I decreased 80g sugar from the original recipe. I just can't convince myself to use so much sugar. But if I decrease sugar, I will affect the moisture of the brownies. So, I increased the butter to add more moisture. I increased the flour ratio, and added melted dark chocolate too. And of course, I added walnuts!

Method
  1. Lightly grease 13 x 9 inch Brownie baking pan. Or TWO 8 x 8 inch square baking pans if you don't have standard (13 x 9 inch) brownie baking pan. Line baking pan with baking sheet. Or lightly grease them with oil. I personally prefer to line the pan tho. It's much easier to remove the brownies from the pan later. 
  2. Pre-heat oven at 175 degree. Fan OFF. 
  3. In a large bowl, combine cocoa powder and baking soda. Stir in 75g melted butter and boiling water. Stir until mixture thickens.
  4. Stir in sugar, eggs, melted chocolate and remaining 75g melted butter. Stir until mixture turned smooth.
  5. Add flour, vanilla extract and salt. Mix until all ingredients well blended. 
  6. Stir in half portion of chocolate chips and half portion of chopped walnuts.
  7. Pour the mixture into the prepared pan. Sprinkle the rest of the chocolate chips and walnuts on top and bake for 35 to 40 mins for rectangular pan. 30 to 35 mins for square pan. Or until brownies begin to pull away from sides of pan. Brownies are done when toothpick comes out with a few moist crumbs still clinging. It's okay for the pick to look moist, but if you see wet batter, keep baking.
  8. Cool completely in pan on wire rack. Once brownies completely cooled, cut into squares and serve. 
TIPS : 
You could make this ahead. Once the brownies are well baked and completely cooled, wrap them nicely and freeze them. Brownies freeze well. Just thaw to room temperature and serve. But I personally would suggest you to serve the brownies warm. Just microwave it awhile before serving. It makes really perfect match with vanilla ice cream! :)


Eggs is the ingredient that pack everything together and make it deep, intense and chewy richness. 


The chewiness of the brownies seems to come from a couple of different factors. More on all-purpose flour, whose proteins provide "bite". You could use cake flour or super-lite flour too. But the result would be much lighter and it might turned out to be chocolate cake. No, I don't prefer that. I want those "bite".

This is just out of the oven. It looked slightly bumpy. I kinda slightly over-baked them. I confess, I throw the brownies into the oven and I forgotten about it. And this is NOT the 1st time I repeat this bad habit. Hahaha... So, this has caused the brownies crack at the side.


Once brownies completely cooled, it will go turn flat and nice. My advice is not to attempt to cut warm brownies. Because this brownies is cakey and crumbly it might turned messy if you cut it while it's warm. Let the brownies sit inside the pan for few hours (I leave it there for 8 hours) before I remove it.


Look at this dark beauty... It's moist, soft, cakey but yet chewy. This is absolutely rich and delicious! The thin crust at the top makes the brownies looked really sexy!


I gave some to Soke Kuan (who came all the way from M'sia to Singapore) and Meng Teng too. They looked so happy when they sees my brownies. Their facial expression? ...... Priceless! :D

Happy baking!

Saturday, May 4, 2013

Nutella Cake / Torta Alla Gianduja

This cake is fabulously easy and yummy! It's moist, light and DELICIOUS! you won't regret baking it. It's Nigella Lawson's Torta Alla Gianduja. Simply Nutella Cake.


Another reason for you to bake the cake, it's Mother's day soon. The hazelnuts on top somehow gives it a burnished, ceremonial and yet home-made look. I'm sure your mom will feels so proud of you if you baked this for her :)


Max is a huge fan of Nutella. Or I'd say, he's obsessed! He can eat almost everything with Nutella and even the Nutella alone! Urgh! Nutella Monster! Anyway, he's happy when I told him I wanted to bake Nutella cake. And when I complained that hazelnuts are expensive, he said he sponsor it. But he end up didn't even pay me. And neither did he mention that he wanna sponsor that big jar of Nutella. Sigh!

The ingredient is simple. This cake is not the ordinary cake. If you notice, this cake doesn't have flour, baking powder and sugar. Fret not. It will be okay. The cake will collapse. But this is what it should be.


I use shop-bought lightly roasted hazelnuts. Brought home, toast it on the pan. Grind half of it, and keep the remaining half for decoration. And also, if you have Frangelico (hazelnut liqueur) at home, use it. If not, use rum. If you have none, don't scream. Just use water. I don't have Frangelico, and my bottle of Rum gone missing for no reason. So, used Bourbon instead. And I kinda like it :)

Ingredient
(Source : Nigella Lawson's How To Be A Domestic Goddess book)

For the Cake
6 Large Eggs, separated
pinch of Salt
125g Soft Unsalted Butter
400g Nutella
1 tbsp Frangelico, Rum or Water (I used Bourbon)
100g Ground Hazelnut
100g Dark Chocolate, melted. (I used Valrhona)

For the Icing
100g Whole Toasted Hazelnuts
125ml Double Cream (I used Whipping Cream)
1 tbsp Frangelico, Rum or Water (I used Whisky)
125g Dark Chocolate

Don't worry about the cream part. The difference between double cream and whipping cream is in the concentration of fats. For this cake, I used whipping cream because I can't get double cream. I'm fine with it.


Preparation

1. Toast 200g Hazelnut in a dry frying pan until the aroma wafts upwards and the nuts are golden-brown in parts. Keep shaking the pan so that they don't burn on one side and stay to pallid on others. Transfer to a plate and let it cool completely. If they go on the ganache while hot, it'll turn oily. So, be patient. Let it cool first. You may want to consider to make this a day ahead.


2. Grind 100g of the cooled Hazelnut. And I just can't tell you how much I love my Cuisinart mini food processor! It makes my cooking and baking so so so much easier! :)


3. Melt chocolate using double boiling method, to allow it to melt over gently under indirect heat. Once chocolate begins to melt, stir it gently with plastic spatula. When almost all of the chocolate is melted, lift up the bowl from the saucepan and set it on the counter. Stir continuously until it is shiny, smooth and completely melted. Set aside and leave it cool before use.


Okay, let's start baking!

Method

For the Cake

  1. Prepare a 9 inch springform tin, greased and lined. 
  2. Preheat the oven to 180 degree.
  3. In a large clean bowl, whisk the egg whites and salt until stiff, but not dry. 
  4. In a separate bowl, beat the butter and Nutella together, and then add the Frangelico (or whatever you are using), egg yolk and ground hazelnuts.
  5. Fold in the cooled melted chocolate, then lighten the mixture with large dollop of egg white, which you can beat in as roughly as you want, before gently folding the rest of then in a third at a time. Just like the way you make chiffon cake. 
  6. Pour into the prepared tin and bake it for 40 mins or until the cake's beginning to come away at the sides.
  7. Let the cake cool on a rack completely before you un-mould them carefully. This is a damp cake, you might find it abit difficult removing it from the tin.


My cake cracked badly, because I forgot to adjust my oven rack. I just dump the cake in and let it bake while I enjoy my favorite TV show at the living room. I'm a bad baker! Hahaha.

Well, as I said, the cake will collapse abit once it's cooled. But because mine cracked badly, so, it sank like a Titanic! But I'm not worried at all. I'm gonna ice it anyway.


For the Icing

  1. In a heavy-bottomed saucepan, add the cream, liqueur (or whatever you are using) and chopped chocolate, and heat gently under low fire. 
  2. Once the chocolate's melted, take the pan off the heat, leave it cool down abit and whisk until it reaches the right consistency to ice the top of the cake. 
  3. Ice the top of the cake with the chocolate icing, and dot thickly with the whole toasted hazelnuts.
  4. Set the cake aside and let it rest (or in the chiller) for an hour. This will allow the icing set and sit nicely on top of the cake when you cut. Or incase you want to bring the cake to a party or something. It would avoid mess. But if you are only eating it at home and you'd want some sexy and runny icing effect (just like mine), you don't have to let the cake rest that long then.
Here's the tips. You could prepare, and bake the cake a day ahead. And then, ice the cake on the 2nd day. This delicious chocolate cake keeps very well. 


So, how good is this cake? Max swallowed ate 1/3 of the cake AFTER our dinner! OMG! Can you imagine that? He just had his dinner, and this cake supposed to be his dessert. But.... when he's allowed to freely cut his portion of cake, he greedily cut 1/3 of the cake! He doesn't feels guilty at all! And I witness him eating the cake happily and kept saying "oh~yumm" while he nom it.

All in all, this recipe is indeed a keeper. And it's gluten free!


Happy Mother's day to my mom, my mother-in-law and all the mothers out there! Happy Baking! :)

Saturday, March 16, 2013

Zebra Cake (斑马蛋糕)

Wanna take a stroll to the wild life in your kitchen? What about Zebra?

I haven't been baking for quite sometimes. This beautiful stripes hearty bake is not a coincidence. He spent his weekend helping me doing house cleaning. So, I baked this for Max to give him a good treat.


Actually this is a repeat recipe. I used Mrs.NgSK's Vanilla Butter Cake recipe that I baked last year. All I did this time is to add some good quality cocoa powder in it, and used Échiré Salted French Butter. 

I love this cake. Although I didn't do well on the Zebra stripes, but I love the whimsy touch.


Ingredients
(Source : Mrs.NgSK's Vanilla Butter Cake)

  • 250g Salted Butter, room temperature (I used Échiré Salted Butter) 
  • 200g Eggs (no shell) - About 4 eggs (Grade B). 
  • 50g + 150g Castor Sugar
  • 200g Self raising flour, sifted
  • 60ml Fresh Milk 
  • 1 tsp Vanilla Paste
  • 10g Cocoa Powder (I used Valrhona Brand)
Method 
  1. Pre-heat oven at 180C (Conventional).
  2. Prepare a 9' inch round cake tin. Line the base, grease the sides.
  3. Separate egg whites & yolk. Beat egg whites until soft peaks, gradually add 50g sugar and beat until stiff. 
  4. Cream butter and 150g sugar until pale and fluffy. Add in Vanilla paste, beat for awhile, and followed by egg yolks one at a time.
  5. Put in half the flour and mix on low speed until incorporated. Add in milk in 2 additions and mix until well incorporated. Mix in balance flour. 
  6. Put in half the egg whites in and mix on low speed. Pour the balance egg whits in and FOLD using your spatula. 
  7. Divide batter into 2 equal portions. Fold chocolate powder into one of the batter. 
  8. Using a tablespoon (or a small soup ladle), scoop 1 tablespoon of the vanilla batter into the center of the greased cake tin. Then, scoop 1 tablespoon chocolate batter on top of the center of the vanilla batter. And then, another tablespoon of vanilla batter on top of the chocolate batter. Repeat the process until the batter finished. 
  9. Bake for 45 minutes or until skewer comes out clean.
  10. Leave cake cooled before cut and serve.  

I've seen some bakers scooped 3 tablespoons of each batter at the beginning. And then reduce to 2 tablespoon each. And finally, the batter gradually reduced until 1 tablespoon of each batter. It's like, the circles will become smaller and smaller. This could achieve nice pattern lines on the cake. But I only read this tips right AFTER my cake is out of the oven. Sigh! Maybe I should try this tips. It should gives better Zebra result :)

Here's how I did it :)


Yes, it looks messy. But nevermind. The most important is..... Tada!!! My cake didn't crack. I'm happy!!!


And here, you could see the layers of chocolate color at the side of the cake.


The stripes looks nice! If you think baking ordinary butter cake is boring, why not give this a try?


Happy Baking!

Wednesday, December 12, 2012

Annie's Tiramisu

Tiramisu is simply the perfect combination of light cheese, cocoa powder and coffee, I can't really describe it explicitly enough. It's just heavenly Italian dessert!

This is the marking of the 100th post in my blog. So, I wanted to share something significant. There’s a tale behind on why I learn making Tiramisu and why I put in so much effort to perfect my Tiramisu recipe. Of course I know, there's no shortage of Tiramisu recipe out there. But at least, my version of Tiramisu makes my husband asking for more!


Once upon a time (that’s somewhere 3 years odd ago), me and my music friends had a BBQ gathering at YuTong’s apartment for post Youth Ignite Concert celebration. It was a successful concert, and since we put in so much effort to make the concert happen, we shall give ourselves a treat! YuTong handed a box of Tiramisu to Max, and when Max tasted the 1st scoop of Tiramisu, he said to me “Wah! Darling, if you can make this, I will marry you!”
And so, I asked YuTong for the recipe, and take up the task to learn making Tiramisu for Max. Without anyone guiding me, for the first attempt, it was quite disastrous! So, for the second attempt, I’m smarter. I asked YuTong where went wrong, and I watched YouTube for a few Tiramisu tutorial to do comparison. Read lots of Tiramisu recipe too! Along the way, for the past 3 years, on and off, all I did is to try various Tiramisu recipe, twist and turn them, so as to perfect the texture and the taste. My reference includes YuTong’s Tiramisu recipe, a few random recipes from the internet, and also Nigella Lawson’s Tiramisu recipe from Nigella’s Christmas book.
After 3 years of trials, feeding numerous of guests. Asking friends who has the pickiest tongue for feedback and even mass produced 100 mini box of Tiramisu for the Soka Youth Musical show cast 2 years ago as an encouragement for their great effort and performance. Now I could humbly conclude that my Tiramisu recipe really makes me proud! Max is the witness on how hard I work just to perfect it :D
Well, I wouldn’t wanna say that my Tiramisu is the best in town. But at least, to me, so far, this is the best. Many friends asked me for the recipe actually. I refrain from posting my Tiramisu recipe on my blog at earlier stage is because I had been trying out different type of sponge fingers, whipping cream, so as to allow readers to have alternative source or something. I wanted to give myself and others some options.
But hell, NO! I’m so wrong. The last two attempt, I used different brand sponge finger (price is slightly cheaper), used cheaper whipping cream. And I brought the Tiramisu to the bloggers gathering at Edith’s house. When I eat it, my heart sank like a TITANIC! Hell yea! Lesson learnt! Never anyhow change the brand of the sponge finger. Always believe in the quality food comes with a higher price tag. I know you could simply bake nice sponge fingers at home. But since shop-bought ones could serve me well, I really don't mind. I won't wanna go thru the hassle of making it (at least for now).


My recipe could make TWO 6 inch round cake. If you are making only one cake, half the recipe. 

Ingredients :
  • 8 tsp Instant coffee powder (I used Moccona Continental Gold)
  • 8 tsp caster sugar, or fine sugar if you want.
  • 8 + 2 tbsp Kahlua (Coffee Liqueur)
  • 1 tub Mascarpone Cheese (500g)
  • 200ml Chilled Whipping Cream (always kept in the fridge)
  • 2 large Eggs
  • 1 large pack of Cantreau brand Savoiardi (Ladyfingers / Sponge Fingers)
  • Cocoa Powder (To sieve on top before serving)
  • Ribbons for finishing (Optional)
Method :
  1.  Mix 8 tsp instant coffee powder and 8 tsp caster sugar in a bowl. Add 8 tbsp Kahlua into the coffee mixture. Stir until coffee and sugar completely melted. It takes a little bit of patience here. If you are using castor sugar, it will be easier. Fine sugar takes longer time to melt tho.
  2. Pour coffee mixture into a dish. Dish length must be longer than the Sponge finger.
  3. Whisk cold whipping cream till stiff. Once done, put the cream back to the fridge.
  4. Separate egg whites and egg yolks. Beat egg yolk till pale color.
  5. In another clean and dry mixing bowl, beat the egg whites till stiff peak.
  6. Add mascarpone into a mixing bowl, add egg yolk and mix well.
  7. Add in whipping cream, egg whites and 2 tbsp kahlua into the mascarpone mixture. Mix until everything incorporated. Put the whole bowl of mixture back to the fridge for later use.
  8. Prepare a loose base cake tin, line the side with baking paper. No need to line the base. If you have mousse cake ring, use it. It will be easier. If you don’t wanna make it into a cake-like form, just use oblong dish or a square Tupperware. I always did that when I feel lazy.

Assembling 


1st Layer – Dip sponge fingers (Sugary side) into the coffee mixture. Do not wet the sponge finger too much. Just dip in, count 1, 2, 3. And you will have to take the sponge finger away.  
Cut the sponge fingers to fit onto the cake tin (if required). Put dipped sponge fingers into the cake tin, sugary side up.

2nd Layer - Spread half of the creamy mixture on top of the sponge fingers. Sift some cocoa powder on top.

3rd Layer – Repeat step 1. Dip sponge fingers into the coffee mixture (NON-Sugary Side this time). Put another layer of sponge fingers on top of the cream.

4th Layer - Cover with another layer of creamy mixture on top.
Use cling wrap to cover the cake tin. Keep tiramisu into the fridge for at least 8 hours. But I highly encourage you to keep it overnight for better result. 1 day is the best!

Finishing
  1. Remove tiramisu from cake tin. Remove baking paper at the side.
  2. Use a sharp and thin knife to run around the base of the cake. And then, carefully transfer the cake to a plate or a serving dish.  If you are using mousse cake ring to do this cake, you will be easier. So, the choice is your’s.
  3. Sift cocoa powder on top. Wipe away the cocoa powder at the side to give it a clean finishing.
  4. Cut sponge fingers into half, and place it at the side of the cake.
  5. Tie ribbon around, wipe the side of the plate one more time to give it a clean finishing, and the cake is ready to serve.
Tips :
1.     You can get all the ingredients from Cold Storage.
2.     For goodness sake, please DO NOT use 3 in 1 instant coffee powder. You will end up claim that my recipe no good. Trust me.
3.     For the eggs, try to use fresh eggs. The egg that you bought on the same day. If you are worried, use pasteurized eggs.
4.     For the whipping cream, always keep them in the fridge till the time when you want to whip them, then you take it out. If your whipping cream is not cold enough, you won’t be able to whip em’ up. So, keep the whipping cream chilled is VERY important.
5.    For sponge fingers, I realized that different brand of sponge fingers gives different texture and taste. This particular brand is my all-time favorite, and I don’t think I will wanna change it.
6.    Buy Kahlua from airport if somebody happened to travel. It cost about S$27 per bottle only. Buying outside (Cold Storage & etc hard liquer shop) could easily cost you S$55 or more.
7.    Do add more Kahlua into the coffee mixture if you find that the liquid is not enough for you to wet all the sponge fingers.
8.    The purpose of lining baking paper at the side of the cake tin is to ease the pain of removing the cake. If you don’t want to line baking paper at the side, it’s still fine. You might end up need to use blow torch to burn the side of the cake tin before removing it. But trust me, most of the people don’t have blow torch at home. They usually use hot towels. So, please line baking paper. 
9.    I don’t know how tall your cake would turn out to be. But if you are making 6 inch cake (this recipe can make TWO 6 inch cake), cut sponge finger into half, the height of the sponge fingers would be just nice. So, if you want, measure the height of your cake before you cut the sponge fingers. I used 11 pcs of sponge finger for my 6 inch cake, cut into half, I get 22 pcs to stick at the side of the cake.
10. If you are taking too long to do the cake finishing part, once it’s done, chill the cake again and let the shape set better before you serve.

Step 1 -  Mix 8 tsp instant coffee powder and 8 tsp caster sugar in a bowl. Add 8 tbsp Kahlua into the coffee mixture. Stir until coffee and sugar completely melted.


Step 3 and 5  - Whisk cold whipping cream till stiff and beat the egg whites till stiff peak.


Step 4 and 6 - Beat egg yolk till pale color and add into mascarpone. Mix well.


Step 7 - Add in whipping cream, egg whites and kahlua into the mascarpone mixture. Mix until everything incorporated. Put the whole bowl of mixture back to the fridge for later assembly use.


So now, this is the assembly part

1st Layer – Dip sponge fingers (Sugary side) into the coffee mixture. Do not wet the sponge finger too much. Just dip in, count 1, 2, 3. And you will have to take the sponge finger away. 

Cut the sponge fingers to fit onto the cake tin (if required). Put dipped sponge fingers into the cake tin, sugary side up.


2nd Layer - Spread half of the creamy mixture on top of the sponge fingers. Sift some cocoa powder on it. However, sifting cocoa powder is optional.


3rd Layer – Repeat step 1. Dip sponge fingers into the coffee mixture (NON-Sugary Side this time). Put another layer of sponge fingers on top of the cream.


4th Layer - Cover with another layer of creamy mixture on top. Use cling wrap to cover the cake tin. Keep tiramisu into the fridge for at least 8 hours. But I highly encourage you to keep it overnight for better result. 1 day is the best!


And here's the finished product!!! Simply love it! Did you notice that I have uneven spreading curves on the surface? I did it intentionally. It's home-made cake! The messier it is, the more welcoming it will be. Agree with me?


Pardon me for the messy slice. It's really a rush when I slice this cake because everybody is watching me when I slice em'. It might not look appealing to you. But I could assure you that this slice of cake taste heavenly!


The moisture level of the Tiramisu can be very crucial. Too dry, the sponge fingers will not gives you good texture. Too wet, you will end up eating drenched sponge fingers, and the layer of mascarpone cheese won't stand tall and proud.


Max ever told me that his favorite Tiramisu is the one selling at La Foketta. That tiny piece of dessert that probably sized 2.5 inch x 2.5 inch could easily cost him S$10.00. But after I learnt making Tiramisu at home, he never visit this restaurant anymore.
Although it sounds really nonsense, but hey! this is the cake that makes my husband marry me! Hahahaha...
I hope you like this recipe of love :D


Try to make full recipe of you could afford to do so. Make one, eat it fresh. Keep the other one, nicely wrapped, keep it in air-tight container and throw it into your freezer. It can keep upto a month. When you are ready to eat it, transfer the frozen cake to the chiller and let it thaw overnight. Sift cocoa powder before serving. It will still taste equally good.
This is another great idea for you to make ahead for your Christmas party :)

Do to show me your end product if you happened to follow this recipe ok? Email to me at mwmannie@yahoo.com :D

Tuesday, March 27, 2012

Chocolate Chiffon Cake

Oh! I did Chiffon again last night. This time round, I used Valrhona Chocolate powder. It's upon Max request for Chocolate flavor. So, I did it. 


Tuesday, March 13, 2012

Chocolate Ganache Moist Cake

This is not my 1st Chocolate Cake that I bake. But amongst all the Chocolate Cake that I baked, I think I like this the most. It's soft, moist, and it's simply chocolatey and with a hint of Coffee.

It's not a special occasion nor somebody's birthday. I just bake it because I feel like doing it for Max. I won't pretend that this is simple. Because whenever I bake a cake, I hate the part when I knew I need to do all the washing of all the utensils, that makes a lazy person like me feels tedious and somewhat "difficult".

But........... If you feel that the cake making process is too long, you could always divide your cake making into 2 days to ease the pain. 1st day is to bake the chocolate sponge. 2nd day is to frost the cake with Chocolate Ganache. I did that.
This recipe makes 5 x 10 inch cake. But I make it into 2 cakes (5 x 5 inch each). Because I wanna keep one at home for Max, and bring the other one to work for my colleagues.

Good thing must share :)

Ingredients (Moist Chocolate Sponge)
  • 250g of Chocolate Sponge Cake Mix (Sieved)
  • 6nos of Eggs (or 5 if your eggs are XL size)
  • 50ml of water
  • 70g of butter (melted)
  • 10 x 10 inch baking tin (Refer to below picture)

Method (Moist Chocolate Sponge)

1. In a mixer, add in Chocolate Sponge Cake Mix, eggs, water. Mix at high speed for 7mins. Use a timer and set the time. Leave it there while you line your baking tin with baking paper and turn on your oven at 175 degree.

2. Reduce to low speed and mix for another 3mins. By now, your baking tin should be ready.

3. Use a spatula, fold in the melted butter. Do not use mixing method. Just gently FOLD the butter in. Pour the batter onto the cake tin, and straight to the oven. Bake it for 30mins. You can now do all the washing while the oven is doing the work.

4. Remove the cake from the baking tin immediately after your cake is out of the oven. Leave it cool completely.


As I mentioned earlier, you can choose to complete the whole cake making process within the day or separate your work into 2 days (less stressful). If you wanna separate your work into 2 days, cut the cake into half, keep your sponge cake into a container, or make sure you wrap it nicely before you keep into the fridge.

For the Chocolate Ganache...  I did mentioned that this cake has a hint of Coffee right? And here it is...

Ingredients (Chocolate Ganache)
  • 250g Semi-Sweet Dark Chocolate. I used Hersheys.
  • 130ml Whipping Cream
  • 10g butter
  • 2 tsp Instant Coffee. 
  • 2 soup spoon of Kahlua or Tia-Maria or any Coffee liquor.
  • some chocolate coated coffee bean for deco (optional)
Method (Chocolate Ganache)

1. Take the cake out of the fridge, brush some Kahlua onto the cake surface, and set aside.

2. A metal bowl, chocolate in. Sit the bowl of chocolate on the boiling water. Melt it.

3. At another side, bring whipping cream to boil. Heat off, stir in instant coffee and then add in melted chocolate and butter. Mix well, and your ganache is done. Let the ganache cool abit, and it should be in spreadable consistency (like kaya).

4. After ganache has cooled abit (but still abit warm). Stack up your cake, cut and shape the side of the cake and ensure they are aligned. And the moment that you enjoy the most has arrived.... Sprrrrread the cake with your ganache!!!

5. If you want your cake to have thicker ganache frosting... Spread 1 thin layer of Ganache, put the cake in the fridge for 15 to 20mins. Let the 1st layer of ganache set. Take out and spread 2nd layer of ganache on it. If you want it thicker, repeat the steps.

6. Decorate it with some chocolate coated coffee bean. Keep it in the fridge for at least 1 hour and let it set before you serve. I leave it in the fridge overnight.

And here it is...

It's ugly. I know. I did it on purpose. But it's home-made cake! The messier it is, the more welcoming it would be. There's no rules here. So, you don't need to be so stressed up just wanting to frost your cake till it looks like shop bought cake.

Brushing Kahlua on the cake is to make the cake taste more moist and yummy. Also, the cake will be less "crumbs" when you spread your ganache on it later. But if you don't have Kahlua at home. How? Buy a bottle just because you need to use 2 soup spoon of it?

Don't be silly. Just substitute with 2 tablespoons of Instant Coffee, mix with 2 tablespoons of hot water. You will get the Coffee taste also. But of course, Kahlua taste better for sure.

Let's take a look at the cake texture...


If you notice it, I spread my ganache in a thin layer. Less sinful. And I have quite abit of leftover Ganache tho. But if you want it to be thicker, just go ahead with it. You have my full support.


My fellow colleagues like my cake. I'm happy to see that they enjoyed the cake very
much.

Do give it a try :)