Showing posts with label Rice. Show all posts

Sunday, April 5, 2015

TeowChew Png Kueh / TeowChew Glutinous Rice Dumpling (潮州饭粿 / 潮州红桃粄 )

Beautiful pink hue rice flour skin wrapped with flavorful glutinous rice. Pressed on a nicely designed peach shaped wooden mould, and then steam the dumpling to perfection. You can eat it freshly steamed, or pan-fried. It's up to you.


I have a long list of kuehs' and dumplings to make. But first, I wanna make TeowChew Png Kueh.

Max told me that he doesn't really fancy Png Kueh. He felt that it is a super thick skinned tasteless kueh. I frowned when I heard how he described it. But I just braved myself to do it, even though I knew he probably won't appreciate it.

In Tradition, almost every TeowChew family will make Png Kueh for festive season and also part of the religious offering. There are white and pink version of peach dumpling. White is commonly used as offering to the ancestors, pink is used during religious praying session. In Malaysia, there's still certain TeowChew family practicing the Png Kueh's color differentiation for different purpose. But in Singapore, white colored Png Kueh almost doesn't exist anymore unless they are making it on their own at home.

This lovely pink peach shaped dumpling has two versions, differentiating different clans.

The TeowChew version's pink peach shaped dumpling is wrapped with flavorful glutinous rice filling, called 潮州饭粿 / 潮州红桃粄. The HorPor Clan (河婆) version's pink peach shaped dumpling is wrapped with crushed toasted peanuts with sugar, and this sweet dumpling is identified it as 桃粄.

Max like it pan-fried. The crusty layer of skin gives aroma, served with sweet dark soy sauce, some toasted sesame, I personally preferred to add some chopped coriander and chillies for richer in flavor. Yummm!!!


It's quite a challenge for the first time, without anyone guiding me. I need to factor in the overall taste of the Png Kueh as a whole. The skin is almost tasteless. The glutinous rice filling is savory. Both skin and filling will be eaten and chewed together in my mouth. And so, the filling must be more salty than the savory glutinous rice that we usually cook for plain eating. And this is how we balance the overall taste.

I also imagined that the Png Kueh to be pan-fried, serve with sweet black soy sauce and chilli. Sweet black soy sauce has slight saltiness, and so does chilli sauce. Hence, the saltiness of the Png Kueh itself cannot be over-powered, but at the same time, it must be flavorful, robust and aromatic. In Singapore, yes, we eat it this way. But in other places, maybe they eat it plain. If you love it in plainly steamed Png Kueh rather than pan-frying, I'd suggest you to add another half tsp of salt on your glutinous rice seasoning.

This Png Kueh is lightly pan-fried. The skin is not as thick as those selling out there. The filling is firmly pressed during wrapping, and hence, filling is fully packed, to ensure every chew gives mouthful of flavored glutinous rice. Max is totally sold by my Png Kueh. He says he'd changed the way he feels about Png Kueh. Hahaha...

You want a bite?


For Png Kueh, you need to plan ahead. Glutinous rice and chinese dried mushrooms need to be soaked overnight. So, here, I will tell you my preparation process to shorten your actual day's chore.

DO NOT get freaked out by my long writings. I'm just trying to give you as much details as you probably need. This recipe makes 20 to 22 dumplings. But it also depends on the size of your dumplings, and how thick or how thin your dumpling skin is. My dumpling skin is 45 grams each dough, and wrapped up 40 grams of glutinous rice filling.

Ingredients 
(Source : Authentic Chinese Dumplings published by Famous Cuisine Publishers, with modification) 

The Skin Dough
  • 400g Rice Flour
  • 80g Tapioca Flour
  • 1 tbsp Caster Sugar
  • 560ml Boiling Water
  • ½ tsp Salt
  • 2 tbsp Cooking Oil
The Glutinous Rice Filling
  • 360g Glutinous Rice, soaked overnight
  • 60g Chinese dried mushrooms, soaked overnight
  • 25g Dried Shrimps
  • 12 Shallots
  • 1 can of Canned Braised Peanuts
Seasoning
  • 1 heaped tbsp Premium Oyster Sauce
  • ½ tsp Sesame Oil
  • 3 tbsp Light Soy Sauce
  • 1½ tsp Sugar
  • ½ tsp Salt
  • 1½ tsp White Pepper
  • 6 tbsp Water
Serving Suggestions
  • Sweet Dark Soy Sauce
  • some toasted sesame seeds
  • some chopped coriander
  • some chilli sauce or sambal or whatever chilli you prefer
Note : The original recipe ask for 600g Rice Flour and 100g Tapioca Flour. But at the end of the day, I have 20% dough leftover, and no more filling left. So, I discarded the remaining dough. And so, if you are like me, prefer thinner skin and thicker filling, this recipe above gives you the right amount of dough with the right amount of filling. But if you prefer thicker skin just like those store-bought dumpling, do add 20% of everything for your dough recipe.

Preparation (The night before) 
  1. Walk to the supermarket and get everything I need. 
  2. Wash and soak glutinous rice. Do the same to the chinese dried mushrooms. 
  3. Peel shallots, rinse, pat dry with kitchen towel, pack it in a plastic bag. Throw it in the fridge. 
Preparation (Actual Day) 
  1. Rinse and soak dried shrimps for 10mins. Chop up dried shrimps using chopper.
  2. Snip away mushrooms stems, discard. Cut mushrooms into small pieces. 
  3. Chop up peeled shallots using chopper. 
  4. Open up a can of braised peanuts. Discard the braised sauce. We only need the peanuts. 
  5. In a bowl, mix all the seasoning together. 
  6. Drain soaked glutinous rice, place it on a large plate, steam it for 25 minutes. Uncover the lid and splash some water on the glutinous rice every 10 mins steaming interim. Set aside.

To cook the Filling
  1. In a pre-heated wok, 4 tbsp cooking oil, saute shallots and dried shrimps over low heat until fragrant. 
  2. Add in mushrooms, stir fry briskly over until well combined and heat through. 
  3. Add the steamed glutinous rice, turn to low heat. With your spatula, break the lumpy glutinous rice.
  4. Pour in seasoning, stir and toss well. Ensure all glutinous rice is well coated with the seasoning. Stir in braised peanuts. Stir well.
  5. Dish out. Transfer the glutinous rice to the steamer and steam another 10mins.
  6. Remove from steamer and leave to cool. Cover it up with a wet towel to prevent the top layer of the glutinous rice from drying out.     
Steaming, stir-frying, and steaming... This process is to ensure glutinous rice is evenly flavored, evenly cooked, bouncy, chewy, and yet not overly cooked. I don't like mushy glutinous rice. It is easy to over cooked it. But it is not easy to cook it just right. Some people choose to let the rice cooker to do the job. I'm anal quite particular. So, do it the way my mother taught me, and it never fails me so far, although there are more steps to follow.

You can get braised peanuts from supermarket. I used Narcissus brand. I think it taste pretty good.


To prepare the Dough
  1. In a mixer, add in rice flour, tapioca flour, sugar and salt. Mix well. 
  2. While the mixer is still moving, add in boiling water and cooking oil in the flour mixture in two intervals. Half boiling water, mix, half cooking oil, mix. And then, half boiling water, mix, half cooking oil, mix. And when I said boiling water, use boiling water. Don't give me warm water and expect it to work. You need boiled water to "pre-cook" the dough here. 
  3. Add a drop of red coloring, mix. Observe the change in color for your dough while mixer is doing the job. Is that the pink hue you want? If yes, continue to let the mixer to mix. If no, add more coloring. Do remember to add coloring abit at a time. You don't want to over-power the color. 
  4. Continue to let the mixer mix until the dough turned entirely pink. 
  5. Transfer the pink dough into a big bowl, and this is where you need to do it manually. Knead the dough with both palm until dough is smooth. 
  6. Evenly divide the dough into small portions, cover it with wet cloth to prevent dough from drying. My individual dough is about 45g each.

To wrap and form the dumpling
  1. Form the dough into ball shape, then, make a hole, flatten it with your fingers, to create a "bowl" shape. 
  2. Spoon in some glutinous rice filling, wrap well. My filling is about 40g for each dumpling. Firmly press the rice filling abit, so that they are packed together and you will be able to do the wrapping easier. If there's holes here and there, patch it with some extra dough pieces. It's fine. Patches would be hardly seen because it is steamed dumplings. Do it the way you prefer.
  3. Dust the mould with a little tapioca flour, knock the excess tapioca flour out of the mould. Dust the wrapped dumpling with a little tapioca flour too if you want. Dusting the mould is tedious. I only dust the wrapped dumpling. It works also. 
  4. Put the wrapped dumpling into the mould, press it firmly with your palm and invert the dumpling. 

To steam and serve
  1. Arrange dumplings on a greased steaming tray or a plate.
  2. Steam the dumpling under medium heat for 10mins or until it is cooked. If your dumpling is bigger in size, steam it for another 1 or 2 minutes. 
  3. Transfer steamed dumpling into a plate and leave it cool abit, then, grease the dumpling with some cooking oil on top to prevent them from sticking to each other. 
  4. Serve the dumpling hot from the steamer or slowly pan-fry it to achieve crust on the skin, accompanied with sweet dark soy sauce, toasted sesame seeds, and some chilli sauce if you prefer.  

The recipe request it to be steamed under high heat. And yes, usually, some people do that. But I realized that steaming the dumpling over high heat will probably over-steamed it and eventually, the dumpling will somehow disfigured. The beautiful flowery pattern on the dumpling will "melt-away". I believe you've seen disfigured store-bought ang ku kueh before don't ya?

This is my peach shaped wooden mould. I got it from taobao, the china shopping website. I love it and it is probably one of the nicest peach shaped mould I've found so far.


Look at the result. Isn't it lovely? It has nice round sexy butt! Max says ... "我的饭粿有屁股的!!!" Hahaha..


The medium heat steaming gives good result in retaining the nice flowery pattern on the dumpling. Absolutely lovely! However, the skin will turn abit hardened when dumpling is cooled. Just re-steam it before serving, and the skin will turn soft again.


For this first attempt, the result was satisfactory, although I do prefer the skin to be slightly softer. But again, it depends on what's your expectations on the end result. I'm quite happy with it for now. But I will continue to seek improvement. When it comes to cooking, imaginations do comes in.


TeowChew, Hor Por, Hakka, GuangDong and HuiZhou. They are so near to each other. That probably explains why there's a similarity in their traditions and cuisines. Not only the peach shaped dumpling. For example, Hor Por style Mochi 河婆客糍粑 and Hui Zhou style Mochi. They are the same. But in different shape. In Singapore, we identified it as "Muah Chee" 麻糍, in Japan, it is Mochi.

There are so many types of kuehs, dumplings and small eats to learn and explore. I'm quite into it. Are you one of them?

Update : There are people commented that this recipe doesn't give soft png kueh skin. Neither do I mention that this recipe will give you soft skin. The skin will turn harder when png kueh is cooled. But if you want the skin to be soft again, do resteam it. Pls take note of that.

Sunday, September 7, 2014

Hainanese Chicken Rice (海南鸡饭) - (AFF - Singapore #1)

In conjunction with this month's Asian Food Fest, I cooked Hainanese Chicken Rice (海南鸡饭) for weekend lunch. This dish is very well known here in Singapore and it is considered one of the national dishes. You can find Hainanese Chicken Rice almost everywhere in Singapore!


Hainanese Chicken Rice is a dish adapted from early Chinese immigrants originally from the Hainan province in southern China. It is based on a well-known Hainanese dish called Wenchang Chicken (文昌雞), due to its adoption by the Hainanese overseas Chinese population in the Nanyang area. (Source : Wikipedia)


Bite-sized pieces of blanched white chicken, fragrant rice cooked in chicken broth, delicious ground chilli and spring onion ginger oil. And some likes going with dark soy sauce, some don't. These are common way of eating Hainanese Chicken Rice in Singapore.

This dish can be simple. But to make it good, you need some patience here. Everything starts from stepping into the market and select the freshest ingredients, picking the right Kampong Chicken (or Free Range Chicken), ensuring the rice is well cooked, and to prepare the condiments well.

My mom always says, Chicken Rice is a simple dish, but this probably can categorized as Kungfu dish (功夫菜). It means the dish is using simple ingredients, but to make it good, it needs alot of attention and every details must be well taken care of.

Chicken should be cooked very lightly, pink inside the bones, not too bloody, and with a gelatinous skin. I'm still learning :)


A lot of effort goes into the preparation of this flavorful dish, with effort of slowly blanching the chicken until it is fully cooked, before immediately soaking it in cold water. This stops the cooking process and ensures that the meat remains tender, and is also why the meat is usually served at room temperature. 

Ingredients 
(Source: My mother-Mdm Chai, her source is from a Hainanese Chicken Rice Stall's owner in SG)

The Chicken
  • 1 Kampong Chicken (or Free Range Chicken), estimated 1kg
  • 5 thick slice Old Ginger, about 35g
  • 2 cloves Garlic, bruised
  • 1 sprig Spring Onion, tied into a knot
  • 2300ml Water (or more)
  • 1 tbsp Sesame Oil
Rendering Chicken Fats 
  • 150g Chicken Fats / Skins
  • 1 tbsp Peanut Oil / Cooking Oil
The Rice
  • 475g Jasmine Rice (95%)
  • 25g Glutinous Rice (5%) (Trade secret)
  • 500ml Chicken Stock
  • 1 tsp Salt
  • 8 tbsp Rendered Chicken Fats (Or you can use shallot oil as alternative)
  • 4 strands of Pandan Leaf (Screwpine Leaf), tied into 2 knots
  • 1 stalk Lemon Grass, lightly bruised
  • 4 cloves Garlic, bruised
  • 2 thumb sized Old Ginger, sliced
  • 2 tsp Planta / Margarine (Optional. I didn't use and I don't recommend) (Trade secret)
The Chilli
  • 3 cloves Garlic
  • 3 Red Chilli
  • 2 Bird Eye Chilli / Cili Padi
  • 1 thumb sized Young Ginger
  • Juice from 3 to 4 Small Calamansi
  • ½ tsp Salt, or more to taste
  • ½ tsp Sugar, or more to taste
  • ¼ tsp MSG (Optional - I didn't use)
  • 1 to 2 tbsp Chicken stock to dilute it. But I'd prefer 2 tbsp Rendered Chicken Oil
  • 1 tsp DelMonte Ketchup (Optional) (Trade secret)
Spring Onion and Ginger Oil (Optional)
  • 100g Old Ginger
  • 25g Spring Onions (or more)
  • 2 tbsp Rendered Chicken Oil
  • 1 tbsp Sesame Oil
  • ½ tsp Salt, or more to taste
  • ½ tsp Sugar, or more to taste
  • ¼ tsp Chicken Powder (Optional - I didn't use)
Dark Soy Sauce
  • 20g Rock Sugar
  • 30ml Water
  • 50ml Dark Soya Sauce
Dressing for the chicken
  • ½ thumb sized Rock Sugar (Trade secret)
  • 2 tbsp Light Soy Sauce
  • 1 tbsp Shao Xing Wine (绍兴酒), also known as Hua Tiao Wine
  • 1 tbsp Sesame Oil
Garnishing
  • Coriander
  • Sping Onions
  • Cucumber, sliced
Alot of effort goes into the preparation of this flavorful dish yea.

Method - The Chicken
  1. Wash and trim any visible fat from the chicken. Cut away the chicken feet. Stuff old ginger, garlic, spring onions into the cavity of the chicken. 
  2. Bring water to a boil. Once water is boiled, hold the chicken head (refer to photo), soak the chicken body into the boiling water. With your hand still holding the chicken head, lift the chicken up, and soak it into the boiling water again. Do this for 4 times before you release the chicken head and let the chicken soak into the water completely. By doing this, water will go into the chicken cavity completely. This is to ensure that the whole chicken is well cooked.
  3. Keep an eye on the pot. Once you see the water is boiling again, turn to very low heat for 5 mins, and then heat off. Let the chicken sit inside the hot water untouched and covered for 30mins. If your chicken is big, you might need another 5 mins or so. For this part, you have to gauge it on your own. Prepare a tub of ice-cold water, preferably with ice cubes. 
  4. Once chicken is cooked, using chopsticks, gently remove the chicken from the water and place the chicken into a tub of tap water, let the tap water running for 10mins. And then, transfer the chicken to the tub of ice-cold water.
  5. Once chicken is completely cooled, drain. Apply 1 tbsp Sesame Oil on the chicken skin. Set aside.

Method - Rendering Chicken Fats
  1. Roughly chop the chicken fats and skin. 
  2. In a small sauce pan, heat up peanut oil, and add in the chicken fats and skin. Let it cook over very low heat for 30 mins (or upto 1 hour) until the liquid fat renders away. Pour off and keep the liquid fats for later use. You may discard the crispy chicken fats.

Method - The Rice
  1. Wash the rice well, and soak it for 1.5hrs, drained.
  2. In a large saucepan over medium heat, heat up 8 tbsp rendered chicken fats. 
  3. Add the garlic, ginger, lemongrass. Fry till fragrant and golden brown. Remove from the oil. 
  4. Add one knot of pandan leaf. Fry till fragrant. Remove from the oil. 
  5. Turn off the heat. Add in Planta (Optional), drained rice. Give it a good mix, until the rice are all well coated with the flavorful oil. 
  6. Transfer the rice into rice cooker. Add in 500ml reserved chicken stock and salt. Stir well. Throw in the 2nd Pandan leaf knot. Cook the rice in a rice cooker or by your preferred method of cooking rice. 
  7. Once rice is cooked. Remove pandan leaf knot. Loosen the rice with chopsticks and give it a mix. Cover the rice, and let it sit in the rice cooker for another 10mins before serving. The texture of rice is important and it takes quite a bit of experience to get it done properly. 
Method - The Chilli
  1. Combine all chillies, ginger, garlic, sugar, salt in a food processor and blitz away.
  2. Add in calamansi juice and 1 to 2 tbsp chicken stock to dilute it. But I prefer to use 2 tbsp hot Rendered Chicken Oil instead.
  3. Add in MSG and DelMonte Ketchup. Stir well. Set aside.
Method - Spring Onion and Ginger Oil
  1. Blitz ginger into paste in a food processor. 
  2. Heat the rendered chicken oil and sesame oil in a small frying pan. 
  3. When the oil is hot enough (at it's smoking point), add in ginger paste. Fry well for 2 to 3mins. 
  4. Add in spring onion, salt, sugar, chicken powder. Give it a quick stir. Heat off. Set aside and leave to infuse. 
Method - Dark Soy Sauce
  1. In a small saucepan, boil rock sugar and water under low heat till completely melted and viscous. 
  2. Add in dark soy sauce, continue to cook till it thickens. Remove and leave it till completely cooled.
Method - Dressing for the chicken
  1. In a small saucepan, boil rock sugar, soy sauce and Shao Xing wine under low heat till completely melted and viscous. Heat off.
  2. Add in sesame oil. Stir well. Remove and set aside. 
To Serve
  1. Chop the chicken, Chinese-style. Arrange it on a plate. Pour the dressing over it. Scatter with a little coriander. 
  2. Serve with hot chicken rice, condiments, broth and garnishes.

Here's some notes that you need take into consideration. 
  1. Use a tall and slim pot to cook the water for blanching chicken. This is to ensure you use the minimum amount of water, just enough to submerge the chicken. Like that, you will have a better flavor chicken stock to cook the rice later. 
  2. Try to buy Kampong Chicken from Sheng Siong. They sell good and genuine black leg Kampong Chicken.
  3. If you think rendered chicken fats is unhealthy, you'd probably didn't know that you actually ate loads of them when you eat chicken rice at the hawker centre. Without them, you won't like your chicken rice. So, just do it. You can get chicken fats / skins from Sheng Siong super mart. Or simply ask the chicken seller at the wet-market. Sometimes they gave it away for free. 
  4. 95% Jasmine Rice + 5% Glutinous Rice is really a trade secret. Rice suppliers pre-mixed the rice ratio before they send to the chicken rice stall. 
  5. Planta / Margarine too, is another trade secret. It gives the chicken rice a nice color. However, I didn't use it because I'm cooking it for my family. I don't need them. And this also explains why the color of my chicken rice looked abit to the pale side. 
  6. It's not surprising that there's MSG in the chilli sauce. But I was amazed when my mom told me that DelMonte Ketchup is used for the chilli sauce. But well, this is for chicken rice stall to do business tho.
  7. Spring Onion and Ginger Oil is NOT AVAILABLE in every chicken rice stall in Singapore. Only bare minimum of them is still having this condiment. Some only serve ginger paste with oil. Cost is also one of the factor for them for not maintaining it. Hence, till now, there's an argument point that Spring Onion and Ginger Oil shouldn't exist in Hainanese Chicken Rice dish. Oh well. It's up to you :)
  8. Some says dark soya sauce plays an important part for Singapore Hainanese Chicken Rice. I confess, and I admit. I forgot to prepare the dark soy sauce. Too busy and too focused on the chicken and the rice. Damn it!
  9. Rock sugar makes a difference to the dressing for the chicken. If you could, please stick to rock sugar.
  10. The rest is just a matter of blending the ingredients and then adding seasonings, oil and stock. Making these sauces from scratch gives full authenticity to the recipe.

Although Hainanese Chicken Rice stalls in Singapore is selling lip-smacking delicious chicken rice. I'd tried my very best to note down every single thing my mom told me. This recipe may not produce exactly the same result as store-bought chicken rice. This might be due to the recipe that I've written above might have tweaked to adjust to my own agaration (estimation). I see a room to evolve further in years to come.There are some ingredients (eg. Planta/Margarine or MSG or DelMonte Ketchup) is an optional. Since we are cooking for our family, just do it whenever you feels comfortable. If you feel that there's no need to add them, just go without them. I'd prefer original taste.


I personally quite happy with it for now. Maybe I should find a day to try some other well known chicken rice in Singapore (eg. Chatterbox?), or until I found another inspiration for further modifications to it.

Do share with me if you have any better recipe :)


I am submitting this post to Asian Food Fest (Singapore) – September Month hosted by Grace Phua of Life can be Simple

Thursday, October 24, 2013

Chicken Teriyaki Don (照り焼き丼) - (AFF - Japan #4)

I have special love over Chicken Teriyaki. Especially when I'm visiting Yoshinoya (吉野家) for a quick donburi when I'm hungry, I will definitely order Chicken Teriyaki-Don(照り焼き丼), and Gyūdon (牛丼) was my second choice. 

This recipe is absolutely fast, delicious and sexy looking kinda meal that you won't wanna miss!    


Don (丼) literally means "bowl", while Donburi means Japanese rice bowl dish, usually a bowl filled with rice, and topped with fish, or meat, or vegetables or other ingredients.

Donburi started to appear in the Edo era (江戸時代 Edo jidai - 1603-1867). The first donburi dish was Unadon (鰻丼) . Since the meal was very easy to prepare and taste good, it becomes very popular in such a short time. Dishes such as Oyakodon (親子丼), Tendon (天丼) and Gyūdon (牛丼) was later introduced and becomes popular donburi dishes after Meiji era (明治時代 Meiji-jidai - 1868-1912) in Japan.

If you've heard Yoshinoya's history before, in 1899, Eikichi Matsuda (松田栄吉) opened his 1st Yoshinoya (吉野家restaurant, featuring wholesome and delicious meals with the convenience of modern-day fast food. It was a new concept in Japanese culture back then and they serves their original Gyūdon, and it was an instant hit. 


Marinated chicken tights are broiled or grilled in the oven, then it is brushed with Teriyaki sauce, grill it again, and brush it with Teriyaki sauce again to give it a finishing. This cooking technique means yaki (焼き). The shine or luster sauce means teri (照り). And that's what Teriyaki (照り焼き).

Alan cooked Gyūdon for AFF. Do hop over to his blog to look at his awesome recipe. I wanted to cook Gyūdon initially, because that's Max request. But I have no luck in getting any good marbled beef slices. And so, I decided to cook Chicken Teriyaki-Don then.

Ingredients (Serves 2)
(Source : No Recipes with modification)
  • 230 grams Japanese Rice, preferably Koshihikari, cook it accordingly
  • 2 boneless chicken tights, skin on. Preferably fresh chicken. 
  • some par-boiled vegetables of your choice (Carrots, Brocolli, Cabbages, it's up to you)
  • some toasted sesame seeds for garnishing
Brine for marinating
  • 60ml Water
  • 1½ tbsp Japanese Soy Sauce
  • 1½ tbsp Dark Brown Sugar
  • 1½ tbsp Mirin (味醂
Teriyaki Sauce
  • 1½ tbsp Honey, preferably mild flavored (or Maltose)
  • 1½ tbsp Dark Soy Sauce
  • 1½ tbsp Mirin (味醂)
  • 1½ tbsp Sake (日本清酒)
  • 1½ tsp Ginger Juice or ½ tsp Ginger Powder
  • 1 tsp Corn Flour + 2 tbsp Water, to thicken the sauce (Optional)  
Method
  1. Combine all brine ingredients into a ziploc bag. Add in the chicken tights. Press out the air and seal the bag. Let it sit in the fridge for at least 1 hour, preferably 2 hours or more. 
  2. To make Teriyaki sauce - In a small saucepan, add all Teriyaki sauce ingredients and boil over medium heat until the sauce is glossy and slightly viscous. The sauce won't get thick, unless you thicken it with corn flour + water. It should take on a caramelized taste, but don't to burn it.
  3. When chicken is ready to grill, turn the broiler on and move the oven rack up to the upper position. Put a wire rack on a baking sheet or foil paper. Put the chicken tights skin side down onto the rack (so as to keep the meat elevated off the pan).
  4. Grill the chicken tight until brown, then flip to the skin side face up. Baste the skin side with Teriyaki sauce and continue to broil until the skin is golden brown.
  5. Take the chicken out of the oven, baste another layer of Teriyaki sauce, grill it again, until you see a few charred spots.
  6. Give the chicken one final baste with Teriyaki sauce, let the chicken rest for 3 to 5mins. Chop them into 4 pieces. 
  7. To serve - with an over-sized bowl, add a portion of japanese rice, a portion of Chicken Teriyaki, a portion of par-boiled vegetables. Drizzle with some extra Teriyaki sauce, topped with some toasted sesame seed and serve.

For those who doesn't know me in person, I'm actually allergic to Broccoli. Yes! You hear me! It's Broccoli! It may sounds like I'm just joking, but no. Broccoli  is a poisonous food. I love Broccoli, but hell! I can't eat em'. When my friend saw this photo, she asked "Ehh!! You eat BROCCOLI?! "....... Hahaha! Nope! I didn't! Those green freak are for Max only. 


Look at this chicken tights. It looked pretty good eh? Always remember to line foil paper at the bottom. It will makes your washing easier :)


I'm only cooking for two. So, it's pretty easy work. Japanese donburi usually served in over-sized rice bowl. For my case, I did the same. Guarantee gives 100% satisfaction with just one bowl of rice. Easy meal :)


Oh! My best Chicken Teriyaki Don recipe!!! Haha... I hope you like it. Do give it a try!


I am submitting this post to Asian Food Fest #1 Oct 2013 : Japan, hosted by Alan from travelling-foodies 

Wednesday, October 2, 2013

Kurigohan / Japanese Chestnut Rice (栗ご飯) - (AFF - Japan #1)

Malaysian Food Fest (MFF) has ended last month, and Asian Food Fest (AFF) kicked in this month. If time allows, I will definitely give my full support to Asian Food Fest.

In October, fresh chestnuts appear in Japanese market, and Kurigohan (栗ご飯) is one of the way to enjoy Chestnuts. It's autumn now, and this steaming hot bowlful of kurigohan is perfect autumn flavors that made my kitchen smells really great! :)


Kuri means Chestnuts in Japanese. Today I'm gonna introduce you this popular Japanese autumn dish. Autumn is Kuri's season. And this probably explains why this dish is so popular in Japan. It is simple home cooking, basically a flavored steamed rice with chestnuts. Japanese home cooked food is all about cooking with what's in season, and it can be cooked in a variety ways.


I had been wanting to cook this for the longest time. But I have always no luck in getting Japanese Kuri at Japanese store because Japanese kuri only appears somewhere autumn. Disappointing. So, one fine day (that's few months ago), I saw some nice chestnuts from the wet market. Having fresh chestnuts selling at the wet market is not common here. I can't help but to buy first, and think later. No Japanese chestnuts, normal chestnuts also good la :)

Ingredients
(Recipe Source : About.com, with slight modification)
  • 420g or 2 cups Japanese Rice. Preferably Koshihikari
  • 52g or 1/4 cups Glutinous Rice
  • 20pcs Small Chestnuts / Kuri
  • 1 pc Dried Konbu
  • 1 tsp Soy Sauce
  • 1 tbsp Mirin
  • 1 tbsp Sake
  • 1 tsp Sugar
  • 583ml or 2 2/3 cup Water
Garnishing option
  • Some black sesame seeds
  • Some spring onions
Method
  1. Soak kuri in hot water for about 30 minutes. Crack open the chestnuts and discard the shells. Soak peeled chestnuts in hot water for another 10 minutes. Drain the chestnut in a colander.
  2. Wash and soak dried konbu for 10mins or until the konbu is soft. 
  3. Wash rice till water turns clear and soak the rice in room temperature water for 30 minutes and then drain it in a colander. The preparation is just like how you usually cook Japanese rice. Not difficult.
  4. Put rice, water, soy sauce, mirin, soft konbu, sugar and sake in a rice cooker. Lightly mix them. Place chestnuts on top and start cooking. 
  5. When rice is cooked, keep the rice warm in the rice cooker for about 10 minutes before opening the lid. Garnish and serve.
If you have all the ingredients ready, it's really easy to make Kurigohan at home.


The rice is cooked with chestnut, sake, mirin, soya sauce, konbu and abit of sugar. I used my mighty Zojirushi rice cooker to do the work. It cooks up perfectly! This is total life-saver for me. If you don't have one, go get it. Immediately!


As the rice is cooking, you'll start to smell a heavenly nutty aroma. At that moment, I start to understand why this dish is such a popular dish during chestnut season in Japan.

The existence of konbu and soy sauce makes the rice really umami. A pinch of sugar is to add a touch to bring out the flavor of the chestnuts and to contrast the salty soy flavor. Yumms~!!!


Chewing the soft and bouncy rice grain texture, taking that bite of soft and nutty chestnut is an incredibly satisfying and comforting moment. Look at the nice color. Isn't it beautiful?


I definitely will cook this again. I love it! :)


I am submitting this post to Asian Food Fest #1 Oct 2013 : Japan, hosted by Alan from travelling-foodies 

Sunday, August 18, 2013

Kampar Claypot Chicken Rice (金宝瓦煲鸡饭) - (MFF - Perak)

Fluffy rice, cuts of flavorful marinated chicken meat, slices of waxed sausages, a generous thick slice of salted fish for that extra oomph! And then served with liberate amount of dark soy sauce mixture condiment and sprinkle some spring onions over. Fwoooh!!!


A good claypot chicken rice must have fluffy grains of rice, cooked in claypot under raving hot charcoal fired pits, so as to produce an aroma and rice crusts that gas stove can't produce. For those who stayed in Kampar, you guys should know charcoal fire claypot chicken rice is one of the signature dish in Kampar.


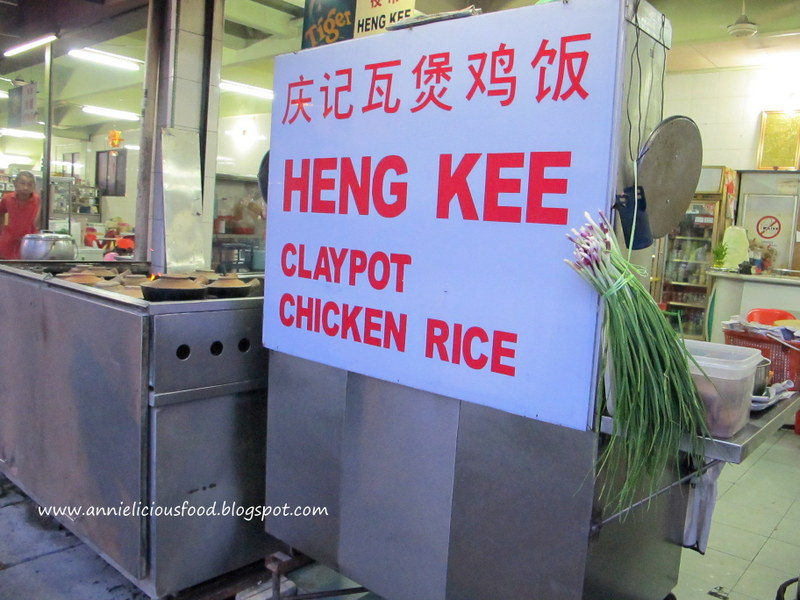
Claypot chicken rice is my 3rd featured dish for Perak's Malaysian Food Fest, focusing on Wing Lok Yuen coffee shop's delicacies located in the heart of Kampar. And yes! That's the legendary and the original Heng Kee claypot chicken rice (庆记瓦煲鸡饭) that I'm talking about.


With the 50 years of history, this is the 3rd generation of the original Heng Kee Claypot Rice in Wing Lok Yuen coffee shop in Kampar. I make a trip back to Kampar last month and I purposely pay a visit to this coffee shop. Look at those claypots, look at those charcoal fire, and look at the 3rd generation boss at work. I intentionally took some photos to post it here.


I've ordered a pot of rice to share with my mom, hoping to find back the old memory. Unlike before, the rice grain that they used is rather ordinary long grain. I seen lots of broken rice grain in there. It's at the lumpy and sticky side. I think, they probably not even jasmine rice or thai hom-mali type of fragrant rice. But well, it's not surprising. Doing business nowadays, cutting cost for raw materials is one of their priority I guess.


The verdict of this pot of this original claypot chicken rice? Just like the olden times, Heng Kee's claypot chicken rice still gives the layer of crusted burnt rice at the bottom of the pot. But I'd wished if they could use better rice grain just like last time. The sauces may be a little underwhelming than before. Hence, the rice is not as flavorful and fragrant as before already. And after this experience, I tell myself, I wanted to find back the childhood taste of Heng Kee style claypot chicken rice!

Seriously, when I decided to cook this, I'm actually very stressed up! I'm so so so worried that I won't get it right.

For the sake of finding the right taste, feel and texture, I've gone through 3 attempts. The 1st time, the taste is right, but rice is too wet and lumpy. No feel. I complaint to my mom then. So, after I gather my mom's input, I challenge for the 2nd time. I finally got the taste and the feel right. I managed to get the lup-lup-fan-heong (粒粒饭香) fluffy rice! But still, I think the gees of it is not yet there. I want to make sure the whole texture is right too. So, I cooked the 3rd time, and I finally get it! The childhood time Heng Kee style claypot chicken rice!

So, here's the fine-tuned and final recipe...

Ingredient (Serves 2 to 3)
(Source : My Mother Mdm. Chai's input + Scrumptious rice and porridge cookbook as a reference and comparison)

the rice
  • 140g Jasmine Rice / Fragrant Rice
  • 70g Basmati Rice 
  • 260g Water
  • 1 tbsp Pork Oil / Lard
the meat
  • 1 Chicken Leg, about 200g (Refer to below for chicken marinade)
  • 1 Chinese Waxed Sausage
  • 1 generous thick slice of mui-heong salted fish 梅香咸鱼
the chicken marinade
  • 30g finely chopped ginger
  • ½ tsp Salt
  • ½ tsp Sugar
  • 1 tsp Oyster Sauce
  • ½ tsp Dark Soy Sauce
  • ½ tbsp Shao-Xing Wine 
  • 1 tsp Tapioca Starch
  • 1 tsp Sesame Oil
  • a dash of pepper
the seasoning and garnishing
  • 2 tbsp Pork Oil / Lard
  • 1 tbsp White Rice Wine (or Shao-Xing Wine)
  • 1 tbsp Soy Sauce
  • 1 tbsp Dark Soy Sauce (depends on how dark you want your rice to be)
  • ½ tsp Chicken Powder or a pinch of MSG (optional)
  • 1 tsp fried shallots (optional)
  • some chopped spring onions (garnishing)
Note
  1. The claypot size that I'm using is 8.5 inch for external measurement, and about 6.5 inch for internal measurement. 
  2. Chicken meat gives moisture to the rice. If you add more chicken meat, the cooking time would be different, and the wetness of your rice would be different too.
  3. You can substitute pork oil / lard with fried shallot oil. However, without pork oil / lard, you won't be able to achieve the right taste. Pork oil / lard is one of the important ingredient for this claypot rice.
  4. Go ahead and opt out the chicken powder or MSG. But I'm very sure that commercial ones have either chicken powder or MSG in it. That's why I stated on my recipe. 
  5. Prepare pork oil / lard in advance. I always did that, and keep them in air-tight container, and kept in the fridge. It comes in handy when I need it. It stored well in the fridge for up to a month or more. 
Preparation
  1. Wash rice, soak in water for 30mins. Drain thoroughly. Mix well with pork oil / lard. Set aside for another 30mins.
  2. Meanwhile, clean and cut chicken into pieces. Marinade chicken for 30mins. 
  3. Soak chinese waxed sausage in hot boiling water for 10 mins. Slice, and set aside.
Method
  1. In a claypot, add in rice and 260g of water. Lid on, and cook over medium high heat until water almost dried up, but still wet and small holes starts appearing. This takes about 6 to 7mins.
  2. Open lid, arrange chicken pieces, salted fish and sausages on top of the rice. Cover the lid. Lower the flame to low heat. Place a piece of tin cover on top of the flame. Put the claypot on top and let it cook for another 13mins or so. Or if you want thicker layer of crust, you may want to consider to leave it there for another minute. 
  3. To serve, remove claypot from heat, pour over seasoning and garnish with spring onions. Mix thoroughly and serve IMMEDIATELY. 
Cut chicken legs into chunks, marinade well. Prepare everything before you start cooking.


This is the trick that my mom taught me. Go hunt for a piece of tin cover (Milo tin or Milk powder tin or whatever tin cover you can find). Place it on top of the flame. Put the claypot on top of the tin cover and let it cook for another 13mins. This will guarantee nice rice crust at the bottom without over-burning them. This trick is workable on the stove-top too. 


My 1st attempt. Used only jasmine rice. It taste good, but rice too soft and at the wet side. It doesn't achieve the fluffiness that I used to eat during the old times. Nope! Not right! Max complained that this shouldn't be the way. And hell, I know. Sigh!


Claypot rice is cooked! This is photo is my 2nd attempt. My mother is very true about the mixing of jasmine rice and basmati rice. Without mixing in the basmati, it won't able achieve this.


Yumms! Fluffy and fragrant claypot rice! This is the lup-lup-fan-heong 粒粒饭香 feel that we used to had during our childhood times. The good old times feel is back!


Take a closer look...


If you are a claypot chicken rice lovers, I'm sure you would attest to the fact that the layer of rice crust at the bottom is absolutely heavenly treasure to you. The truth is that, in order to achieve that layer of crust, certain level of technique is needed. Rice must not be too wet (but must not under cooked), fire must be nicely controlled to avoid overly-burnt aroma that mars the whole experience.


For my rice crust, I'm glad that I did it pretty well, although it is not perfect, not as good as Heng Kee's one maybe. But oh well, I'm pretty satisfied for this 2nd attempt result. I didn't take photo for the 3rd attempt. At least, from foodie to amateur cook like me, this very close to what I'm looking for. I'm happy enough :)

Unlike amateurish version of claypot chicken rice out there, some with sticky and lumpy overcooked rice, or some under-cooked grains (which I will curse when I ate them), this method of cooking claypot rice is really worth a try as the texture of the rice is just perfect. You don't need chopped bird's eye chillies or extra dash of soy sauce. The fluffy and flavorful rice was a joy to be relished on its own. And when complemented with the meats, needless to say, the excitement was heightened by a few notches!


Do give this a try. I'm sure you will love it :)


I am submitting this post to Malaysian Food Fest Perak month hosted by WendyinKK of Table for Two….or more.

Monday, June 10, 2013

Lye Water Rice Dumplings / 鹼水粽 (aka Kee Zhang)

Oh! I just couldn't tell you how much I love this! Cantonese called this Gan Sui Joong (鹼水粽), also known as Kee Chang in Hokkien is one of the most basic rice dumplings during the Chinese Rice Dumplings Festivals. But I also knows that this lye water rice dumpling is the least favorite to most modern people nowadays. Some don't even wanna look at it.

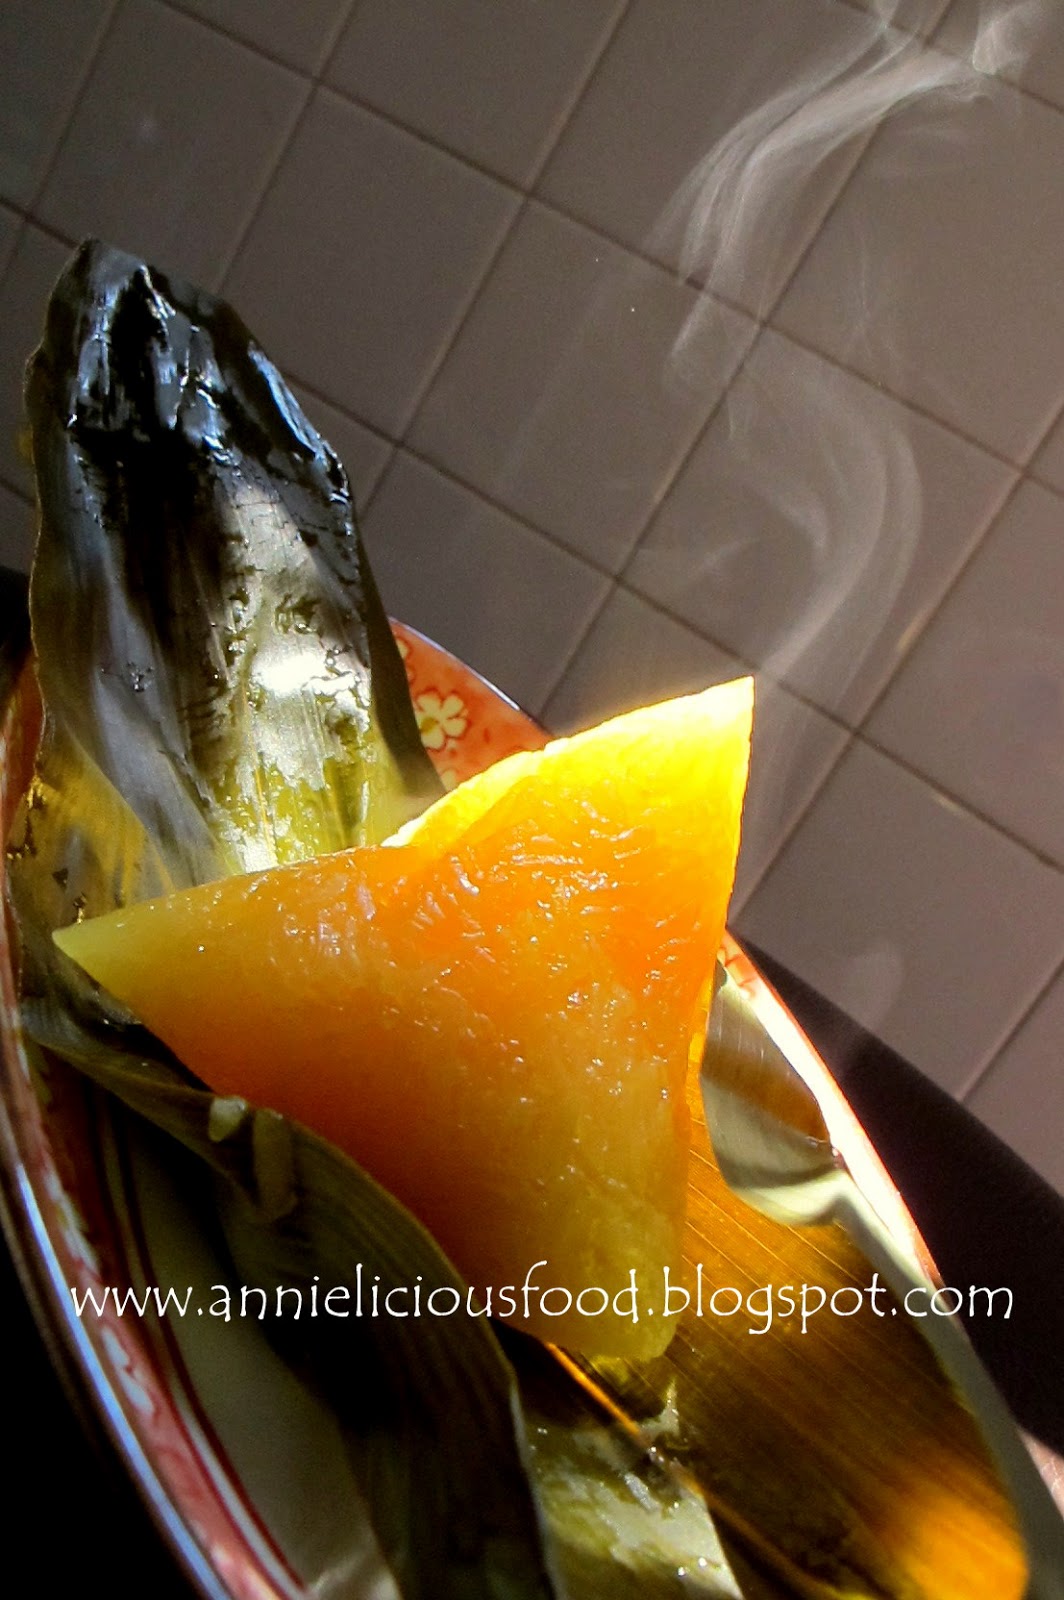
But Woohhhh!!! Look at my Kee Chang! The smokey effect! Hehehe...


Last year, I posted My Mama's Savory Rice Dumpling (我妈妈的咸肉粽) recipe and Nyonya Rice Dumpling (娘惹粽子) recipe. This year, I'm gonna post Lye Water Rice Dumplings (鹼水粽) recipe.

This rice dumpling may appear to be boring and taste bland. But hey! When you get the dipping right, you will fall in love with it! It can be anything sweet! I love to dunk my Kee Chang in Gula Melaka (Palm Sugar), or Kaya (Coconut Jam), or some really good Honey, or even just plain fine grain white sugar! One dumpling, but many ways of enjoying it :)


I want my Kee Chang to have golden effect. So, I used some really nice Honey to do the photography work :)

This recipe makes about 35 to 40 rice dumplings. Depends on how big you want your rice dumplings to be. I've got 37pcs if I'm not wrong. If you are not feeding a village or giveaway, half of the recipe will do :)

Ingredients
  • 1 kg Glutinous Rice
  • 1 Lye Rock (鹼水头)
  • 40 to 50pcs of Dumpling Leaves (or more, incase some leaves are not in good shape)
  • some grass strands to tie the dumplings

Method

  1. Prepare dumpling leaves. Boil the dumpling leaves for 20mins or upto 30mins if you are boiling alot of leaves. Remember to add in the grass strands and boil together. Let the whole pot of leaves cool down on it's own. Use water to kinda gently wash them, drained. Use a cloth to wipe the leaves piece by piece. Set aside for later use. 
  2. Use mortar pestle to break the lye rock into small pieces. Add broken lye bits into a bowl of water, stir until dissolved. Some people says it will speed up this process if hot water is used. I never try it before. I just use room temperature water. It worked fine. It dissolves well.
  3. Wash glutinous rice for few times until water runs clear. Add enough water to cover the rice by 5cm or so. Pour in the bowl lye water into the rice and give it a good stir. Make sure it is mixed evenly. Leave it soaked overnight thoroughly.
  4. The next day, drain the rice using colander. Once rice well drained, you could start wrapping the dumplings. 
  5. Once dumplings are wrapped, using a big pot, cook half pot of water. Once water is boiled, add in the rice dumplings and let it cook for at least 2 hours (if you have 20+pcs in the pot), or upto 3 hours or more (if you have more dumplings in the pot).
  6. To check if dumplings are done, simply dish up one dumpling, unwrap it and check if the inside of the dumpling is soft enough. If it is hard or bitter, continue to boil for another 20 or 30 mins. 
  7. Once dumplings are cooked, remove dumplings from water and hang it up. Let it air dry and cool down for at least 1 hour before eating. 

The most painful part about making nice Kee Chang is the rice picking work. Nope! I'm not asking you to go to the paddy field to harvest glutinous rice yourself. But you have to pick the jasmine rice out of the bag of glutinous rice! For dunnowot reason, glutinous rice available in Malaysia and Singapore somehow mixed with a little bit of jasmine rice. I hate it! And this is where all the "rice-picking" work came in. You could skip this step if you are feeling lazy. But in order to make some really good Kee Chang that gives you every good mouthful of gooey and waxy feel, you really have to do this "pain-in-your-arse" work if you want quality Kee Chang. Last year, I get my MIL and Max to help me. This year, I've got Henny and Linda! Haha :)


This is the lye rock 鹼水头 (a.k.a Kee in Hokkien). Easily available at any grocery shops or even supermarket during rice dumpling festivals. It should cost about 20cts to 30cts per piece. If you are staying in Malaysia, usually they sell lye water instead. After soaked for 2 hours. The lye water gives really nice color to the glutinous rice. But NO... 2 hours isn't enough. You got to soak this overnight! :)


Ooohhhh!!! Look at this sexy shiny and waxy looking Kee Zhang! Yumms!!!


If you intend to learn how to make rice dumplings, Kee Chang is the 1st rice dumpling you should try making. They are the easiest of all and they are the best rice dumpling for you to practice wrapping because if you failed to shape your dumpling, you could always re-wrap it again and again as long as the dumpling leaf is still in good shape. And yes! Henny and Linda picked up rice dumpling skills through wrapping Kee Chang too!

Don't forget to take a look at My Mama's Savory Rice Dumpling (我妈妈的咸肉粽) recipe and Nyonya Rice Dumpling (娘惹粽子) recipe too!


Happy Rice Dumpling Festival everyone! :)

Thursday, November 29, 2012

Thunder Tea Rice (河婆擂茶)

Thunder Tea Rice 擂茶 is a traditional dish among the Hor Poh 河婆 clan which is part of the Hakka's 客家. This dish bound to have mixed responses. If you don't like it, you'd rather settle your meal with a pack of instant noodle. But if you are the person who know how to appreciate this dish, you will get hooked on it and started to tell others how wonderful this dish is.

Lower cholesterol, detoxify the body, aid digestion, lose weight, clear complexion and the list goes on. My maternal grandma 外婆 always told me about the goodness of eating Thunder Tea Rice. Lose weight is something that she always highlight to me. Haha..

I grew up  Hor Poh Family. My mother is Hor Poh 河婆, and now, my husband's family too.


That's when my parents working overseas to make a living, I was taken care by grandma since young. My grandma used to cook this often. This is how my knowledge of Thunder Tea Rice comes from.

My grandma has 12 childrens (5 sons and 7 daughters). All my uncle and aunts will gather at my grandma's house and cook this dish together. The last time was during my teenage time, should be somewhere around 13 years old I guess. And that was the last time. I suddenly miss my grandma so much. Sigh!

People don't make this at home anymore. Because they think this dish is too troublesome. Too much ingredients to buy, and youngsters don't really appreciate such traditional food as we do. Another reason why this dish is being slowly forgotten is probably due to the complexity of preparations. Modern people tends to measure the amount of ingredients purchased and prepared vs the amount of people gathered at home to enjoy this dish. Small families? It's just not worth the effort of preparing. That's sad.