Friday, September 19, 2014

BEST Singapore Chilli Crab (辣椒螃蟹) - (AFF - Singapore #2)

When one mention Singapore, who doesn't know Chilli crab? This popular seafood dish had been around since 1956. Fresh crabs stir-fried in a semi-thick. sweet, tangy, savory, tomato and chilli based sauce which will electrify your palate and satisfy your tastebuds.

Arguably one of Singapore's greatest culinary inventions. If you are a fan of seafood, this is one dish that you must try while you're in Singapore.


Don't get cheated by it's red and spicy look. Despite its name, chilli crab is NOT a very spicy dish.

The spicy and tangy sauce is made deliciously fragrant with rempah (spices) and lime or calamansi juice, while corn starch and egg ribbons are added to give the chilli crab dish the fluffy texture at the end of the cooking process. For extra oomph, order some fried mantou to scoop up the thick gravy, which will leave you hankering for more.


I adapted this recipe from Chef Master Classes on his World's BEST Singapore Chilli Crab Recipe, which he mentioned that his recipe is based on a food trip to Punggol Point, Singapore. I don't know how BEST this recipe would be. But by reading the recipe list, I think I wanna use this recipe as a reference. Also, Violet Oon is the brand ambassador of Singapore Food. So, her recipe as a guide will never go wrong I guess.

Ingredients
(Source : Chef Master Classes & Violet Oon's recipe, as a guide, with modification)
  • 2 Mud Crabs or Meat Crabs (or Roe Crabs if you wish) - about 800g each
  • 1 portion Rempah (Refer to below for recipe)
  • 6 tbsp Tomato Ketchup
  • 3 tbsp Sugar
  • ½ tsp Salt
  • 1 tsp Tau Cheo (fermented bean paste)
  • 1½ tsp Corn Flour / Tapioca Flour + 1½ tbsp Water
  • 5 tbsp Peanut Oil
  • 1 cup Water (or more)
  • 2 eggs, beaten
  • some chinese parsley (garnishing)
  • some chillies (garnishing)
  • some spring onions (garnishing)
Accompaniment 
  • Mantous (馒头)  from the supermarket frozen section, thawed. 
  • Enough oil for deep-frying the Mantous (Mixture of 1 : 1 ratio of Butter + Peanut Oil)  


For the rempah (Spices)
  • 6 Shallots
  • 6 Garlic
  • 5 Red Chillies
  • 2 to 3 Bird Eye Chillies, depends on individual
  • 2 Candle Nut
  • 1 thumb sized Galangal (or replaced by Ginger if you don't have Galangal)
  • ½ Green Lime, extract the juices (or use calamansi as alternative)
  • 2 tbsp Belacan Powder (toast your own belacan if you can't find belacan powder)
To prepare the rempah : Put everything in the chopper and blitz away until fine texture is achieved.


To prepare the crab, I'd posted How to clean crabs video last month. Or, below photos shows you roughly how it is cleaned and prepared. And preparing crabs is NOT as difficult as what you imagined. Be COURAGEOUS!!!


Get everything ready before start cooking is the rule. Always remember. Cooking chilli crab is not difficult. But preparing needs time.

Cooking Method 
  1. Heat oil in a wok until very hot. Fry rempah until fragrant. 
  2. Add tau cheo, sugar, salt and tomato ketchup. Stir well. 
  3. Add in crabs, stir well. Then, add water, stir, cover until crab shells turned bright red, indicating that the crab is cooked. 
  4. Beat 2 eggs in a bowl, pour into the sauce at the side, gently mix well. Simmer for another 10 seconds, 
  5. Heat off, dish up, garnish with coriander, spring onions and chillies. Serve with hot deep fried mantous.

This recipe is good. It's a little messy, but worth it for sure. And you can always vary the recipe to your taste. You want it sweeter? Spicier? It's up to you! :)

Max and I scarfed the whole plate of crabs down with all the mantous. It tastes so good with deep fried mantous and it is also good with a bowl of hot rice!


Yummmss!!! Definitely recommended!


Do share with me if you have any better recipe :)


I am submitting this post to Asian Food Fest (Singapore) – September Month hosted by Grace Phua of Life can be Simple

Sunday, September 7, 2014

Hainanese Chicken Rice (海南鸡饭) - (AFF - Singapore #1)

In conjunction with this month's Asian Food Fest, I cooked Hainanese Chicken Rice (海南鸡饭) for weekend lunch. This dish is very well known here in Singapore and it is considered one of the national dishes. You can find Hainanese Chicken Rice almost everywhere in Singapore!


Hainanese Chicken Rice is a dish adapted from early Chinese immigrants originally from the Hainan province in southern China. It is based on a well-known Hainanese dish called Wenchang Chicken (文昌雞), due to its adoption by the Hainanese overseas Chinese population in the Nanyang area. (Source : Wikipedia)


Bite-sized pieces of blanched white chicken, fragrant rice cooked in chicken broth, delicious ground chilli and spring onion ginger oil. And some likes going with dark soy sauce, some don't. These are common way of eating Hainanese Chicken Rice in Singapore.

This dish can be simple. But to make it good, you need some patience here. Everything starts from stepping into the market and select the freshest ingredients, picking the right Kampong Chicken (or Free Range Chicken), ensuring the rice is well cooked, and to prepare the condiments well.

My mom always says, Chicken Rice is a simple dish, but this probably can categorized as Kungfu dish (功夫菜). It means the dish is using simple ingredients, but to make it good, it needs alot of attention and every details must be well taken care of.

Chicken should be cooked very lightly, pink inside the bones, not too bloody, and with a gelatinous skin. I'm still learning :)


A lot of effort goes into the preparation of this flavorful dish, with effort of slowly blanching the chicken until it is fully cooked, before immediately soaking it in cold water. This stops the cooking process and ensures that the meat remains tender, and is also why the meat is usually served at room temperature. 

Ingredients 
(Source: My mother-Mdm Chai, her source is from a Hainanese Chicken Rice Stall's owner in SG)

The Chicken
  • 1 Kampong Chicken (or Free Range Chicken), estimated 1kg
  • 5 thick slice Old Ginger, about 35g
  • 2 cloves Garlic, bruised
  • 1 sprig Spring Onion, tied into a knot
  • 2300ml Water (or more)
  • 1 tbsp Sesame Oil
Rendering Chicken Fats 
  • 150g Chicken Fats / Skins
  • 1 tbsp Peanut Oil / Cooking Oil
The Rice
  • 475g Jasmine Rice (95%)
  • 25g Glutinous Rice (5%) (Trade secret)
  • 500ml Chicken Stock
  • 1 tsp Salt
  • 8 tbsp Rendered Chicken Fats (Or you can use shallot oil as alternative)
  • 4 strands of Pandan Leaf (Screwpine Leaf), tied into 2 knots
  • 1 stalk Lemon Grass, lightly bruised
  • 4 cloves Garlic, bruised
  • 2 thumb sized Old Ginger, sliced
  • 2 tsp Planta / Margarine (Optional. I didn't use and I don't recommend) (Trade secret)
The Chilli
  • 3 cloves Garlic
  • 3 Red Chilli
  • 2 Bird Eye Chilli / Cili Padi
  • 1 thumb sized Young Ginger
  • Juice from 3 to 4 Small Calamansi
  • ½ tsp Salt, or more to taste
  • ½ tsp Sugar, or more to taste
  • ¼ tsp MSG (Optional - I didn't use)
  • 1 to 2 tbsp Chicken stock to dilute it. But I'd prefer 2 tbsp Rendered Chicken Oil
  • 1 tsp DelMonte Ketchup (Optional) (Trade secret)
Spring Onion and Ginger Oil (Optional)
  • 100g Old Ginger
  • 25g Spring Onions (or more)
  • 2 tbsp Rendered Chicken Oil
  • 1 tbsp Sesame Oil
  • ½ tsp Salt, or more to taste
  • ½ tsp Sugar, or more to taste
  • ¼ tsp Chicken Powder (Optional - I didn't use)
Dark Soy Sauce
  • 20g Rock Sugar
  • 30ml Water
  • 50ml Dark Soya Sauce
Dressing for the chicken
  • ½ thumb sized Rock Sugar (Trade secret)
  • 2 tbsp Light Soy Sauce
  • 1 tbsp Shao Xing Wine (绍兴酒), also known as Hua Tiao Wine
  • 1 tbsp Sesame Oil
Garnishing
  • Coriander
  • Sping Onions
  • Cucumber, sliced
Alot of effort goes into the preparation of this flavorful dish yea.

Method - The Chicken
  1. Wash and trim any visible fat from the chicken. Cut away the chicken feet. Stuff old ginger, garlic, spring onions into the cavity of the chicken. 
  2. Bring water to a boil. Once water is boiled, hold the chicken head (refer to photo), soak the chicken body into the boiling water. With your hand still holding the chicken head, lift the chicken up, and soak it into the boiling water again. Do this for 4 times before you release the chicken head and let the chicken soak into the water completely. By doing this, water will go into the chicken cavity completely. This is to ensure that the whole chicken is well cooked.
  3. Keep an eye on the pot. Once you see the water is boiling again, turn to very low heat for 5 mins, and then heat off. Let the chicken sit inside the hot water untouched and covered for 30mins. If your chicken is big, you might need another 5 mins or so. For this part, you have to gauge it on your own. Prepare a tub of ice-cold water, preferably with ice cubes. 
  4. Once chicken is cooked, using chopsticks, gently remove the chicken from the water and place the chicken into a tub of tap water, let the tap water running for 10mins. And then, transfer the chicken to the tub of ice-cold water.
  5. Once chicken is completely cooled, drain. Apply 1 tbsp Sesame Oil on the chicken skin. Set aside.

Method - Rendering Chicken Fats
  1. Roughly chop the chicken fats and skin. 
  2. In a small sauce pan, heat up peanut oil, and add in the chicken fats and skin. Let it cook over very low heat for 30 mins (or upto 1 hour) until the liquid fat renders away. Pour off and keep the liquid fats for later use. You may discard the crispy chicken fats.

Method - The Rice
  1. Wash the rice well, and soak it for 1.5hrs, drained.
  2. In a large saucepan over medium heat, heat up 8 tbsp rendered chicken fats. 
  3. Add the garlic, ginger, lemongrass. Fry till fragrant and golden brown. Remove from the oil. 
  4. Add one knot of pandan leaf. Fry till fragrant. Remove from the oil. 
  5. Turn off the heat. Add in Planta (Optional), drained rice. Give it a good mix, until the rice are all well coated with the flavorful oil. 
  6. Transfer the rice into rice cooker. Add in 500ml reserved chicken stock and salt. Stir well. Throw in the 2nd Pandan leaf knot. Cook the rice in a rice cooker or by your preferred method of cooking rice. 
  7. Once rice is cooked. Remove pandan leaf knot. Loosen the rice with chopsticks and give it a mix. Cover the rice, and let it sit in the rice cooker for another 10mins before serving. The texture of rice is important and it takes quite a bit of experience to get it done properly. 
Method - The Chilli
  1. Combine all chillies, ginger, garlic, sugar, salt in a food processor and blitz away.
  2. Add in calamansi juice and 1 to 2 tbsp chicken stock to dilute it. But I prefer to use 2 tbsp hot Rendered Chicken Oil instead.
  3. Add in MSG and DelMonte Ketchup. Stir well. Set aside.
Method - Spring Onion and Ginger Oil
  1. Blitz ginger into paste in a food processor. 
  2. Heat the rendered chicken oil and sesame oil in a small frying pan. 
  3. When the oil is hot enough (at it's smoking point), add in ginger paste. Fry well for 2 to 3mins. 
  4. Add in spring onion, salt, sugar, chicken powder. Give it a quick stir. Heat off. Set aside and leave to infuse. 
Method - Dark Soy Sauce
  1. In a small saucepan, boil rock sugar and water under low heat till completely melted and viscous. 
  2. Add in dark soy sauce, continue to cook till it thickens. Remove and leave it till completely cooled.
Method - Dressing for the chicken
  1. In a small saucepan, boil rock sugar, soy sauce and Shao Xing wine under low heat till completely melted and viscous. Heat off.
  2. Add in sesame oil. Stir well. Remove and set aside. 
To Serve
  1. Chop the chicken, Chinese-style. Arrange it on a plate. Pour the dressing over it. Scatter with a little coriander. 
  2. Serve with hot chicken rice, condiments, broth and garnishes.

Here's some notes that you need take into consideration. 
  1. Use a tall and slim pot to cook the water for blanching chicken. This is to ensure you use the minimum amount of water, just enough to submerge the chicken. Like that, you will have a better flavor chicken stock to cook the rice later. 
  2. Try to buy Kampong Chicken from Sheng Siong. They sell good and genuine black leg Kampong Chicken.
  3. If you think rendered chicken fats is unhealthy, you'd probably didn't know that you actually ate loads of them when you eat chicken rice at the hawker centre. Without them, you won't like your chicken rice. So, just do it. You can get chicken fats / skins from Sheng Siong super mart. Or simply ask the chicken seller at the wet-market. Sometimes they gave it away for free. 
  4. 95% Jasmine Rice + 5% Glutinous Rice is really a trade secret. Rice suppliers pre-mixed the rice ratio before they send to the chicken rice stall. 
  5. Planta / Margarine too, is another trade secret. It gives the chicken rice a nice color. However, I didn't use it because I'm cooking it for my family. I don't need them. And this also explains why the color of my chicken rice looked abit to the pale side. 
  6. It's not surprising that there's MSG in the chilli sauce. But I was amazed when my mom told me that DelMonte Ketchup is used for the chilli sauce. But well, this is for chicken rice stall to do business tho.
  7. Spring Onion and Ginger Oil is NOT AVAILABLE in every chicken rice stall in Singapore. Only bare minimum of them is still having this condiment. Some only serve ginger paste with oil. Cost is also one of the factor for them for not maintaining it. Hence, till now, there's an argument point that Spring Onion and Ginger Oil shouldn't exist in Hainanese Chicken Rice dish. Oh well. It's up to you :)
  8. Some says dark soya sauce plays an important part for Singapore Hainanese Chicken Rice. I confess, and I admit. I forgot to prepare the dark soy sauce. Too busy and too focused on the chicken and the rice. Damn it!
  9. Rock sugar makes a difference to the dressing for the chicken. If you could, please stick to rock sugar.
  10. The rest is just a matter of blending the ingredients and then adding seasonings, oil and stock. Making these sauces from scratch gives full authenticity to the recipe.

Although Hainanese Chicken Rice stalls in Singapore is selling lip-smacking delicious chicken rice. I'd tried my very best to note down every single thing my mom told me. This recipe may not produce exactly the same result as store-bought chicken rice. This might be due to the recipe that I've written above might have tweaked to adjust to my own agaration (estimation). I see a room to evolve further in years to come.There are some ingredients (eg. Planta/Margarine or MSG or DelMonte Ketchup) is an optional. Since we are cooking for our family, just do it whenever you feels comfortable. If you feel that there's no need to add them, just go without them. I'd prefer original taste.


I personally quite happy with it for now. Maybe I should find a day to try some other well known chicken rice in Singapore (eg. Chatterbox?), or until I found another inspiration for further modifications to it.

Do share with me if you have any better recipe :)


I am submitting this post to Asian Food Fest (Singapore) – September Month hosted by Grace Phua of Life can be Simple

Sunday, August 17, 2014

How to clean crabs

A small demonstration on one way to clean and cut a crab. 

Everyone has their own method to do. But this is how I did it for my Chilli Crab dish today.


Friday, July 25, 2014

Simple Sous Vide Chicken Legs

Recently, I'm learning Sous Vide cooking techniques at home. All thanks to Alan for encouraging me and connect me to this awesome Polyscience product. Also, I chance up to have a great lunch at Heston Blumenthal's restaurant on my recent trip to London. I witnessed how they cook my lunch using sous vide techniques!

After I came back from my 3 weeks Europe trip, I tied up my hair, put on my apron, take a deep breath and start exploring my sous vide machine, starting with the most simple recipe. Simple Sous Vide chicken legs, and then I roasted the chicken legs into perfection before serving.


For those who doesn't know what sous vide is - Sous vide (literally under vacuum in French) is one of the most popular modernist cooking techniques. If you've ever heard or watched famous chefs like Thomas Keller and Heston Blumenthal from hit television shows, they are the people who usually seen promoting sous vide cooking on TV.

Sous vide is very different from traditional cooking method. It needs alot of reading and understanding, as conceptually, it can be very difficult. From the various types of sous vide equipment, questions about vacuum sealing, the food science on the safety of sous vide can be quite confusing at the beginning. It takes me quite sometimes to explore and understand sous vide before I finally decided to invest on the equipment a year later. It's expensive! Of course I have to understand a few basics sous vide cooking before I invest on one.

I won't write too much to introduce on sous vide here, because all infos about sous vide is easily available on google. Once you understand a few basics, sous vide cooking is one of the easiest and most foolproof ways to cook. It saves me alot of time preparing my weekday dinner ahead!


My Sous Vide Professional Series machine, clamped on a big and tall stock pot, vacuum sealer made in Italy, vacuum bags, and some basic ingredients.


How simple? I just rubbed the chicken legs with salt and freshly ground black pepper. Put the legs into the vacuum bags, add a few dashes of olive oil, throw in a clove of garlic and some thymes. Seal it.

Ingredients
  • 4 Fresh Chicken Legs
  • 4 Cloves Garlic
  • 4 strands of Thymes
  • 1 tsp Kosher Salt
  • 1 tsp Freshly ground black pepper
  • Olive Oil 
Method
  1. Pat dry chicken legs with kitchen towels. Rub chicken legs with salt and pepper. 
  2. Put the legs into the vacuum bags, add a few dashes of olive oil, throw in a clove of garlic and thymes.
  3. Vacuum seal the bag. Sous vide for 4 hours at 70C. 
  4. To serve : Pre-heat oven at 270C, fan ON.
  5. Gently remove the chicken leg from the vacuum bag. Put the chicken leg into the oven for 10mins.
  6. Remove from oven and serve immediately. Incase if you wants better appearance, you can either leave the chicken leg into the oven for another 3 to 5mins or blowtorch it as a finishing. 
Here, they are all nicely vacuum sealed and ready to go into the water-bath.


Knowing that I need to crisp the chicken leg skin under a very hot oven before serving and thus the meat will be cooked slightly more from sous vide treatment, I sous vide the chicken leg at temperature 70C, which is slightly lower than the desired core temperature (74C).

The actual process of cooking sous vide is simple. You just need to determine the temperature you'd like to cook your food. Press the button, sous vide machine will heat up the water up to that temperature you want. Place the bag of sealed food in the water-bath until it is done.


When they came out of the sous vide waterbath, there are two options :

1st Options (To eat immediately)
  1. Slightly pat dry the chicken leg with paper towels. Remove garlic and thymes. 
  2. Put the chicken legs into a very hot oven and roast for 10mins or upto 15mins. Or as I mentioned above, blowtorch up to it's perfection. 
2nd Option (To Keep)
  1. Prepare a large bowl of ice-cubed water. Remove the vacuum sealed chicken legs from the water bath. Shock in cold by putting the bags into the ice water until the chicken legs are completely cooled. 
  2. Place the chicken legs bags into the freezers and freeze away. 
  3. To serve - Put the frozen bags of chicken legs into the sous vide machine with the same setting (70C) and let it sous vide for about 30mins (or more) while you pre-heat your oven.
  4. Repeat 1st Options steps.
Blow-torching your food is another awesome cooking method. If you are trying to get your guys to help out more in the kitchen? Buy a blowtorch. No kidding. I know blowtorch isn't really necessary, but it does make the process easier (and way more fun for the guys). It browned the meat very well :)


The thing about sous vide is that the temperature should ideally be the exact temperature you want the food to be when it is done. The result is a piece of meat that has retained the maximum amount of its juices, while still being done. It's an astonishing technique, but all my rambling has done miraculously little to convince anyone. Not many friends around me is into sous vide actually. Even my mother-in-law gave me the weird look when she first saw what I'm doing. I can understand that. Sous vide is not common in Asia tho.

Prepare some salad to go along. I did mine simple. Some Oak Leaves Salad, dressed with Balsamico di Modena. No fuss!


The appearance of the meat on the photo doesn't speak how good it is. Instead of stringy tough (I mean overcooked), the knife can effortlessly cut through the meat. The chicken leg is cooked juuuuust nice! This is a simple recipe that requires very minimum ingredients. But if you'd tried this, it's enough to make anyone convert.


Max ate the chicken leg happily. My only questions was whether was it the cook (me) or the machine? When I tasted the chicken meat, obviously the machine had a hand in what happened.

To say the food that came out of the machine tasted good, is something of an understatement.

I'm still a noob in sous vide cooking. More to explore, more to learn. Do share with me if you are into sous vide. I'm looking forward to make improvement.

Saturday, July 19, 2014

Totally Chocolate Chocolate Chips Cookies

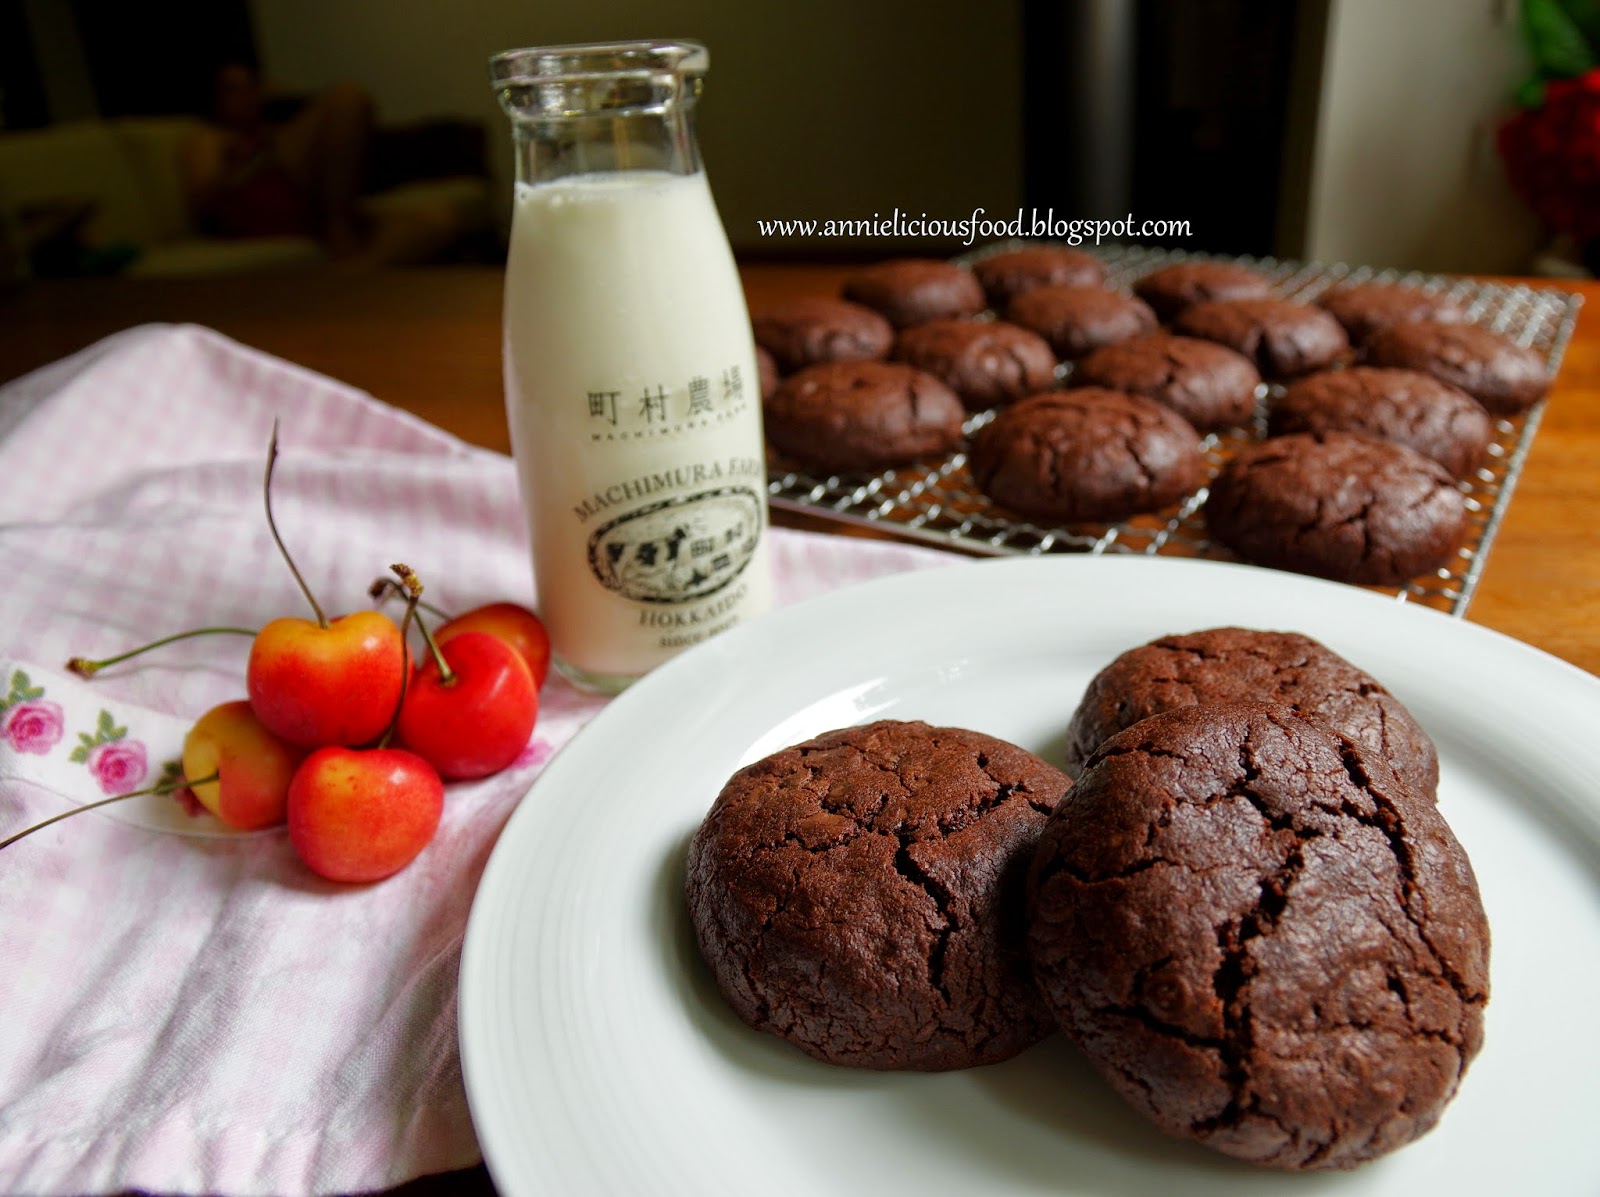
A whopper of a deep dark chocolate cookie packed with chock full of chocolate chips. There's no reason to resist eating this cookies. Absolutely delicious, and by far the best cookie recipe I've ever used! There's nothing short of SENSATIONAL!!!

Incase you don't know.... Now this, my friends, is what I called chocolate cookies :)


The glass of milk is not just a prop. It is a necessity for this. A bite of chocolate chips cookies and a sip of milk? I'm totally on board. It's just heavenly! These are the chocolatiest cookies I'd ever come across.


I adapted this recipe from Nigella Lawson, but tweaked abit. It makes 12 big cookies or make it 14 if you want your cookies to be slightly smaller. I urge you to make full recipe. Because this is so good, I guarantee you, it won't keep long. But if you are only feeding 2 to 3, you can bake half the dough and freeze the other half. Just form the cookies dough into balls, freeze the cookies balls on a little tray. Once they're hard, just bung them in a freezer bag, seal, and stash it back in the freezer. You could bake them unthawed at a later date.

Using good chocolate is important. The logic is simple. If you use good chocolate, you will get good quality chocolate cookies. This is what I call an investment. And it's worth it. I used Hershey's brand chocolate chips and chocolate powder for this.

Recipe
  • 125g Dark Chocolate (minimum 70% cocoa solids)
  • 150g Plain Flour
  • 30g Cocoa Powder (Sieved)
  • ½ tsp Salt
  • ½ tsp Bicarbonate Soda
  • 1 tsp Baking Powder
  • 125g Soft Unsalted Butter
  • 75g Soft Light Brown Sugar
  • 50g White Fine Sugar
  • 1 tsp Vanilla Extract
  • 1 Large Egg (cold from the fridge)
  • 320g Dark Choocolate Chips (semi sweet is preferred)
Method 
  1. Preheat the oven to 170°C, fan ON. 
  2. Melt the 125g dark chocolate in a heatproof dish over a pan of simmering water. Set aside to cool. 
  3. Put the flour, cocoa, bicarbonate soda, baking powder and salt into a bowl. 
  4. Cream the butter, fine sugar and brown sugar in another bowl. Add the melted chocolate and mix together. 
  5. Beat in the vanilla extract and cold egg, and then mix in the dry ingredients. Finally, stir in the chocolate chips, mix well. 
  6. Divide the cookies dough into two portion. Wrap them with cling wrap, and shape them. (Refer pics below)
  7. Put the shaped cookies dough into the fridge and refrigerate it for 20 mins.
  8. Cut the dough into equal piece, remove the cling wrap layer and shape the cookie dough. (Refer pics below) Place shaped cookie dough on a lined baking sheet about 6cm apart. Do not flatten them. 
  9. Cook the cookie dough for 18 to 19 minutes, testing with a cake tester to make sure it comes out semi-clean and not wet with cake batter. If you pierce a chocolate chip, try again. 
  10. Leave to cool slightly on the baking sheet for 4 to 5 mins, then, transfer them to a cooling rack to harden as they cool.  
The secret of this recipe is simplicity and good quality ingredients. Do bear in mind.


Step 5 - Mix wet and dry ingredients together, and stir in the chocolate chips. Look at the sinful mess!


Step 6 -  Divide the cookies dough into two portion. Wrap them with cling wrap, and shape them.


Step 8 - Cut the dough into equal piece, remove the cling wrap layer and shape the cookie dough. No mess!


Place shaped cookie dough on a lined baking sheet about 6cm apart. Do not flatten them.


You cannot go wrong with this recipe. They are so easy and absolutely delicious! Max requested me to bake 30 pcs for him to bring to work next time.


Do I have to say more? It look and taste nothing short of perfection. This is definitely a MUST TRY recipe.

Update : Sorry that I forgot to mention, this is a crispy cookies :)

Thursday, June 12, 2014

Hakka Abacus Beads (客家算盘子)

I love Hakka Abacus Beads (客家算盘子). Not only that, I love everything else that has springy and chewy food. If you are as much of a taro fans as I am, then, you will find these an absolute delight in a way they're served.

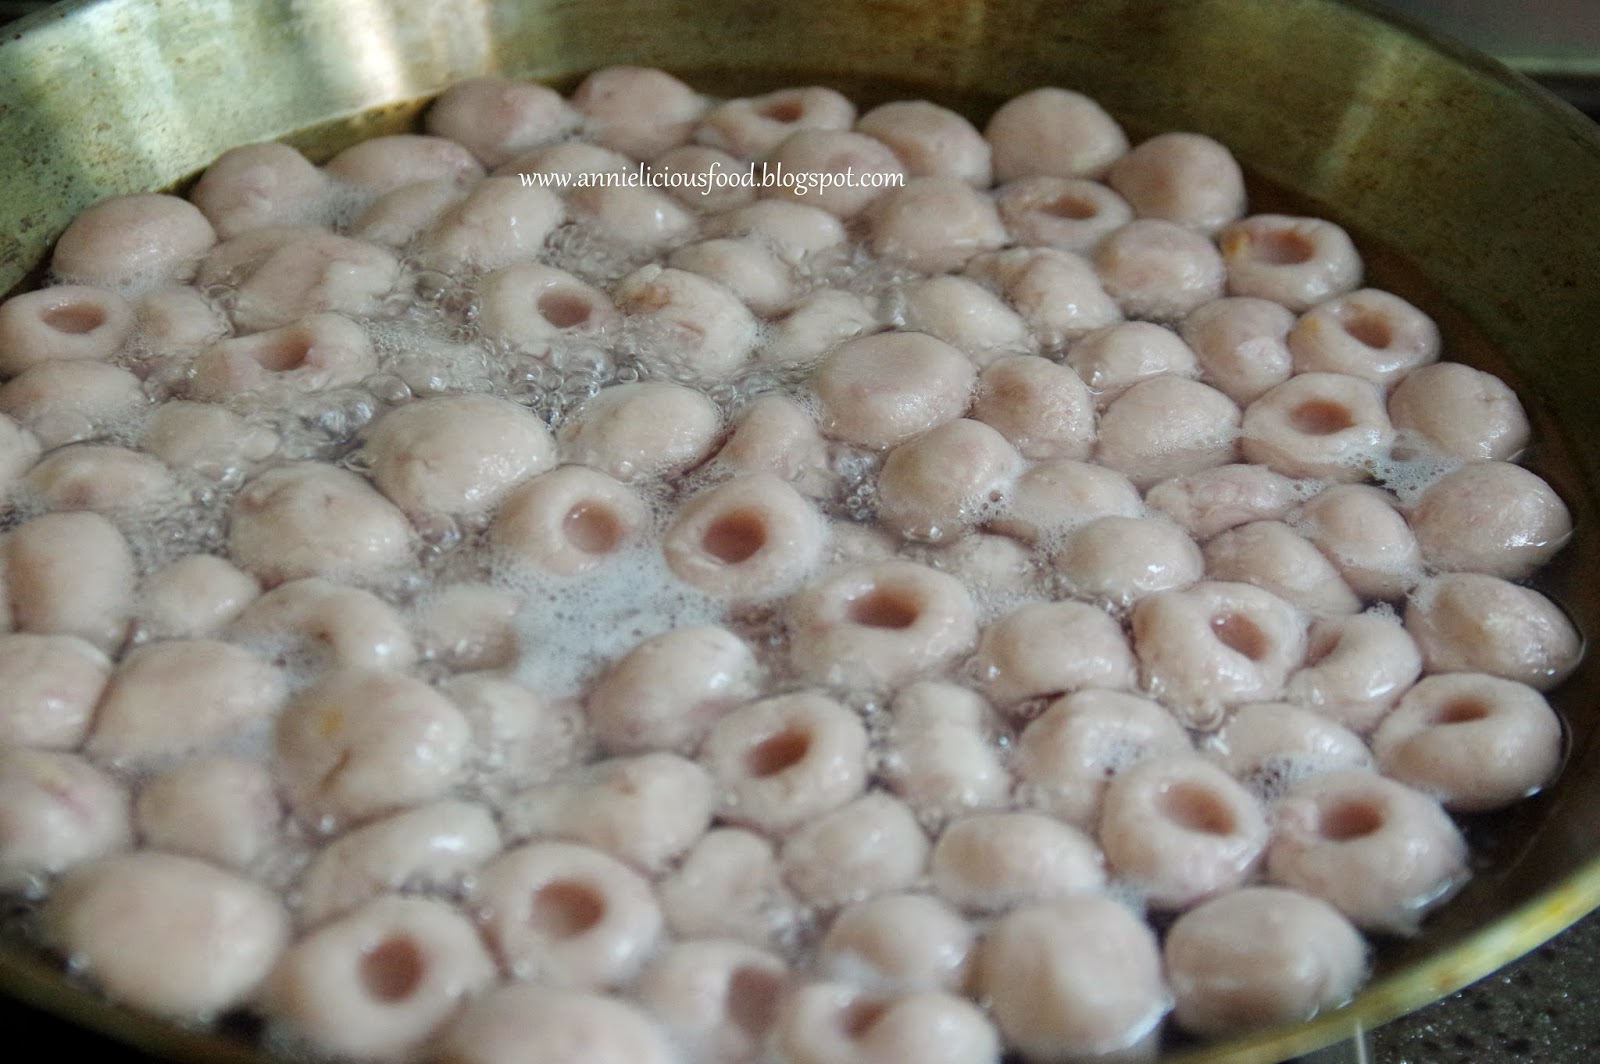
Abacus Beads, literally Taro Gnocchi, with a dimple in the centre resembles abacus beads shape. This dish has symbolic wealth meaning and Chinese loves to prepare this dish during Chinese New year. When abacus beads stir fried with other ingredients and condiments, the dimple in the middle also helps contain the ingredients that flavour it. This traditional is really delicious.

Last year's Chinese New Year, I wanted to make this dish. But you know, CNY task is overwhelmed and I barely have time to rest. So, I only get to cook this dish about 2 months ago. 

If you have eaten Hakka abacus beads or you know how to make them, you will know that this dish requires alot of manual labour and patient. But, when you see your family dig in with their happy smile, I think it is all worth-while.


Ingredients are easily available at the market. You don't have to worry too much. Most Hakka family will add pork into the stir-fry. I want to keep it simple and I didn't wan't to make it a heavy meal. So, I'd just go along with the basic ingredients. If you choose to use pork, you may remove caipu  (菜谱). The sweetness of caipu is to replace the missing minced pork.

Of course, you can add or take away any stir-fry ingredients which you don't like. But for abacus beads recipe, please try to stick to it. It's abacus beads. We use taro for the gnocchi. Pls don't ask me questions like "Hi, can I use sweet potatoes instead?" or "Hi, I don't like taro. What about using Potatoes as a substitute? Do you think it works?"

Sorry ah. To me, traditional is traditional. I never try fusion style before. As much as I could, I will try to stick to original way. And I love originals. In olden days, no minced pork were added due to less resource in the village. Minced pork were added for enhancement only at the latter.


This recipe serves 2 as lunch, or upto 3 as a starter or tea-break snack. But if you see the pictures on this post, I double up the recipe portion during cooking.

For the Abacus Beads
  • 330g Taro
  • 100g Tapioca Flour
  • 70g ~ 80g Hot Boiling Water (estimation)
  • 1/4 tsp Fine Salt
For Stir-Frying
  • 4 Garlic Cloves, minced
  • 3 Shallots, minced 
  • 1 tbsp Cai Pu / Choi Po (菜谱)
  • 20g Dried Shrimps, soaked, minced
  • 8g Dried Cuttlefish, cut into thin strips, and soaked till soften 
  • 4 pieces Dried Mushrooms, soak till soften and sliced 
  • 10g Wood Ear / Dried Fungus, soaked, julienned 
  • pinches of Salt and Pepper to taste
For Garnishing
  • 1 Red Chilli, julienned
  • some Coriander 
  • some Spring Onions
Method - For the Abacus Beads
  1. Taro - Skinned, washed, cut into cubes. Steam the taro for 15mins until they are soft and well cooked. You may use a chopstick to poke through the taro to check if it is cooked or not.
  2. Once taro cubes are cooked, transfer the taro cubes into a large mixing bowl, add in few pinches of salt and with your quick motion, roughly mash the taro with the potato masher. I didn't mash my taro thoroughly. Because I want to remain the "bite" taro texture for my abacus beads.
  3. Add in half the tapioca flour, continue to mash and mix them while the taro is still hot.
  4. You will soon realized that it's getting tough to mix it with potato masher. This is the time when you need to use your palms into it and give it some mixing and kneading.
  5. Add half amount of boiling water, continue the the kneading, add in the remaining tapioca flour, knead, add remaining boiling water, knead so as to form a nice dough.
  6. Make dough into small but even balls. Use your tiniest finger to make a dimple in the centre of each ball to resemble abacus beads. My finger is rough and big. So, I use the edge of the sieve as a tool to create those nice dimples on the dough to achieve evenly sized and can be evenly cooked later.
  7. Boil a large wok / pot of water. Slowly and gently, dd the abacus beads into the boiling water, VERY gently, stir to prevent them from sticking together. Boil for about 15mins to 20mins or until the batch floats on the boiling water.
  8. Prepare a pot of ice cold water. Remove the cooked abacus beads from the boiling water with a strainer, put the abacus beads into the cold water.
  9. Drain the abacus beads with a colander. Coat the abacus beads with 2 to 3 tbsps of cooking oil to prevent sticking. 
Method - Frying the Abacus Beads
  1. Heat cooking oil in wok on high heat
  2. Add garlic, shallots, dried shrimps and dried cuttlefish, stir fry until fragrant. 
  3. Add Cai Pu, mushrooms, wood ear and continue to fry for 2 to 3 minutes until fragrant. 
  4. Add salt and pepper to taste and give it a quick stir. 
  5. Add in the abacus beads and gently stir-fry for about 2 minutes. 
  6. Add in half portion of spring onions, coriander and red chilli. Stir through for another minute. 
  7. Taste and adjust salt and pepper if needed. Stir through. 
  8. To serve, dish abacus beads in a shallow serving dish or casserole. Garnish with the remaining chilli, spring onions and coriander.
Note : The success to make the abacus beads is to mix and knead it while it's hot. I know kneading the abacus dough while it's hot may be challenging. But when you get the hang of it, your hand will somehow immune to the heat and you will be able to do it pretty fast.

Step 6 - Make dough into small but even balls. Use your tiniest finger to make a dimple in the centre of each ball to resemble abacus beads. My finger is rough and big. So, I use the edge of the sieve as a tool to create those nice dimples on the dough to achieve evenly sized and can be evenly cooked later.


The texture of the abacus beads that I'm trying to achieve is springy, but with the starchy fragrance of taro on every bite. My abacus beads looked rough, as I only roughly mash my taro. This is how I maintain the taro "bite" texture for each gnocchi.


Step 7 - Boil a large wok / pot of water. Slowly and gently, dd the abacus beads into the boiling water, VERY gently, stir to prevent them from sticking together. Boil for about 15mins to 20mins or until the batch floats on the boiling water.


Stir fry the abacus beads as per instruction. Remember - Keep it simple. DO NOT add too much condiments or any ingredients that has heavy flavour. Or else, you won't be able to fully savour the fragrance of the taro when you eat them. Fish sauce is a good condiment to this dish if you wants to do some changes to it.


On a side note, do not let the cooked abacus beads stand in the cold water for too long. For best texture and flavour, stir fry the cooked abacus beads as soon as possible after they have been boiled. My friend told me that I can store cooked abacus beads in airtight container, keep it refrigerated until I need to stir fry them. I have not tried keeping them in refrigerator before. But I think it probably works.

Max loves it. He asked if I can cook this more often when I'm free. I think, his request could tell how good this dish is.


This dish is an absolute textural delight. The lightly chewiness of the abacus beads, loads of flavorful goodness and mushrooms and the sudden burst of crunchy freshness from the greens. I don't have to say more.

Friday, April 25, 2014

The Real Cream Of Mushrooms Soup

I've always loved cream of mushroom and I honestly think this is the best one I've ever had.

I love the intensely earthy flavours in this smooth cream of mushroom soup recipe. I wanted something thick and creamy, but not heavy. I've cooked this mushroom soup for at least 4 times. It's indeed a keeper.


Here, I used 4 types of mushrooms. From the left, fresh Shitake mushrooms, Portobello mushrooms, white button mushrooms and Chinese dried mushrooms. These are real stuff!


If you find it tedious of buying so many types of mushrooms, do consider to skip Portobello mushrooms and replaced by Brown button mushrooms. Whatever it is, please don't skip Chinese dried mushrooms. With the existence of Chinese dried mushrooms, this pot of mushroom soup will give absolutely wonderful depth of earthy flavour. Otherwise, I swear that fresh Cremini or Porcini mushrooms is the best alternative too.

Ingredients
(Source : Noobcook.com, as reference)
  • 50g Butter
  • 2 Yellow Onion, chopped finely
  • 1 Russet Potato (Optional)
  • 2 tbsp Plain Flour
  • 1L Chicken Stock
  • 300g Portobello Mushroom
  • 300g Fresh Shitake Mushroom
  • 250g Fresh White Button Mushroom
  • 5 to 6 pcs Dried Chinese Mushrooms, soaked overnight, chopped finely
  • 4 to 5 Sprig Thymes or Sage
  • 150ml White Wine
  • 150ml Double Cream / Dairy Whipping Cream
  • Salt and freshly cracked black pepper to taste
for garnishing
  • some extra whipping cream
  • some spring onions or fresh parsley
Method
  1. Do a quick rinse to the mushrooms. DO NOT soak the fresh mushrooms in the water. Chop Chinese mushrooms into fine pieces. Roughly chop the rest of the fresh mushrooms. 
  2. Heat a large stock pot over a medium heat and melt the butter. Add the chopped onions, give it a few stir. Add in diced potatoes and chopped Chinese mushrooms, give it a good stir, place a lid on top and let it sweat gently until the onions are softened, translucent and shrunken.
  3. Stir in the flour and cook for one minute more, then gradually stir in the stock. 
  4. Add the mushrooms and bring to the boil. Looking at the total amount of 1kg mushrooms, it may seems like mushrooms overwhelmed. But they will shrink considerably when they are cooked. 
  5. Reduce heat, cover and simmer gently for about 20mins, until the mushrooms are tender. Stir in the thymes.
  6. Remove 1/3 portion of the chunky mushroom soup, set aside. 
  7. Pour the remaining 2/3 portion of the mushroom soup into the blender or food processor, whiz until smooth. 
  8. Return the smooth blend and chunks back to the soup pot and stir in the white wine.
  9. Add cream and season with salt and pepper. 
  10. Warm through, without boiling. Ladle into bowls and garnish with drops or swirls of cream. Enjoy! 
Note :
  1. The existence of flour is to thicken the soup.
  2. By adding potatoes is to give the soup a good overall body, so as to reduce the usage of cream. However, adding potato is optional. 
  3. Remember to chop the Chinese mushrooms finely, so that it will cook well, as it takes longer time to cook and gives flavour faster.

Add the chopped onions, give it a few stir. Add in diced potatoes and chopped Chinese mushrooms, give it a good stir, place a lid on top and let it sweat gently until the onions are softened, translucent and shrunken.


Add the mushrooms and bring to the boil.


Remove 1/3 portion of the chunky mushroom soup, set aside. Pour the remaining 2/3 portion of the mushroom soup into the blender or food processor, whiz until smooth. After that, return the smooth blend and chunks back to the soup pot.


 Stir in the wine and finally, add cream and season with salt and pepper.


When Max's friend came to my house for lunch, I noticed that they stopped talking when they were having the soup. Hahaha... One of them couldn't raise her head to talk because she kept saying "Oh man@ This soup is so good!"

Another one, text Max and chase me for the recipe. She says "This is so so so much better than the one at The Soup Spoon!"

I'm glad that they liked it so much. 


Say NO to canned mushroom soups! No more salty and cream overload mushrooms soup! Say YES to the real thing!

Sunday, April 13, 2014

Bone Broth / Super Collagen Soup - (骨胶汤 / 胶原蛋白汤)

So you want to look young and radiant?

Forget about Botox! Drink Bone Broth for amazing skin! This magic pot of collagen soup could make your skin looks great!

This prolonged cooking of bones in water will give you results in a broth rich in nutritional constituents that promotes strength, nourish, help to prevent bone and connective tissue disorders and improves collagen level in your body!

Take a look at this real stuff. My bone broth produces a rubbery gelatin when chilled.


Home-made broth made from bones produces as much more nutritious gelatin that contains a wide range of minerals and amino acids. Most commercial gelatin products are made from animal skin and often contain MSG and something else that we might not know. Well. I'd prefer to consume real stuff, and cheaper too.

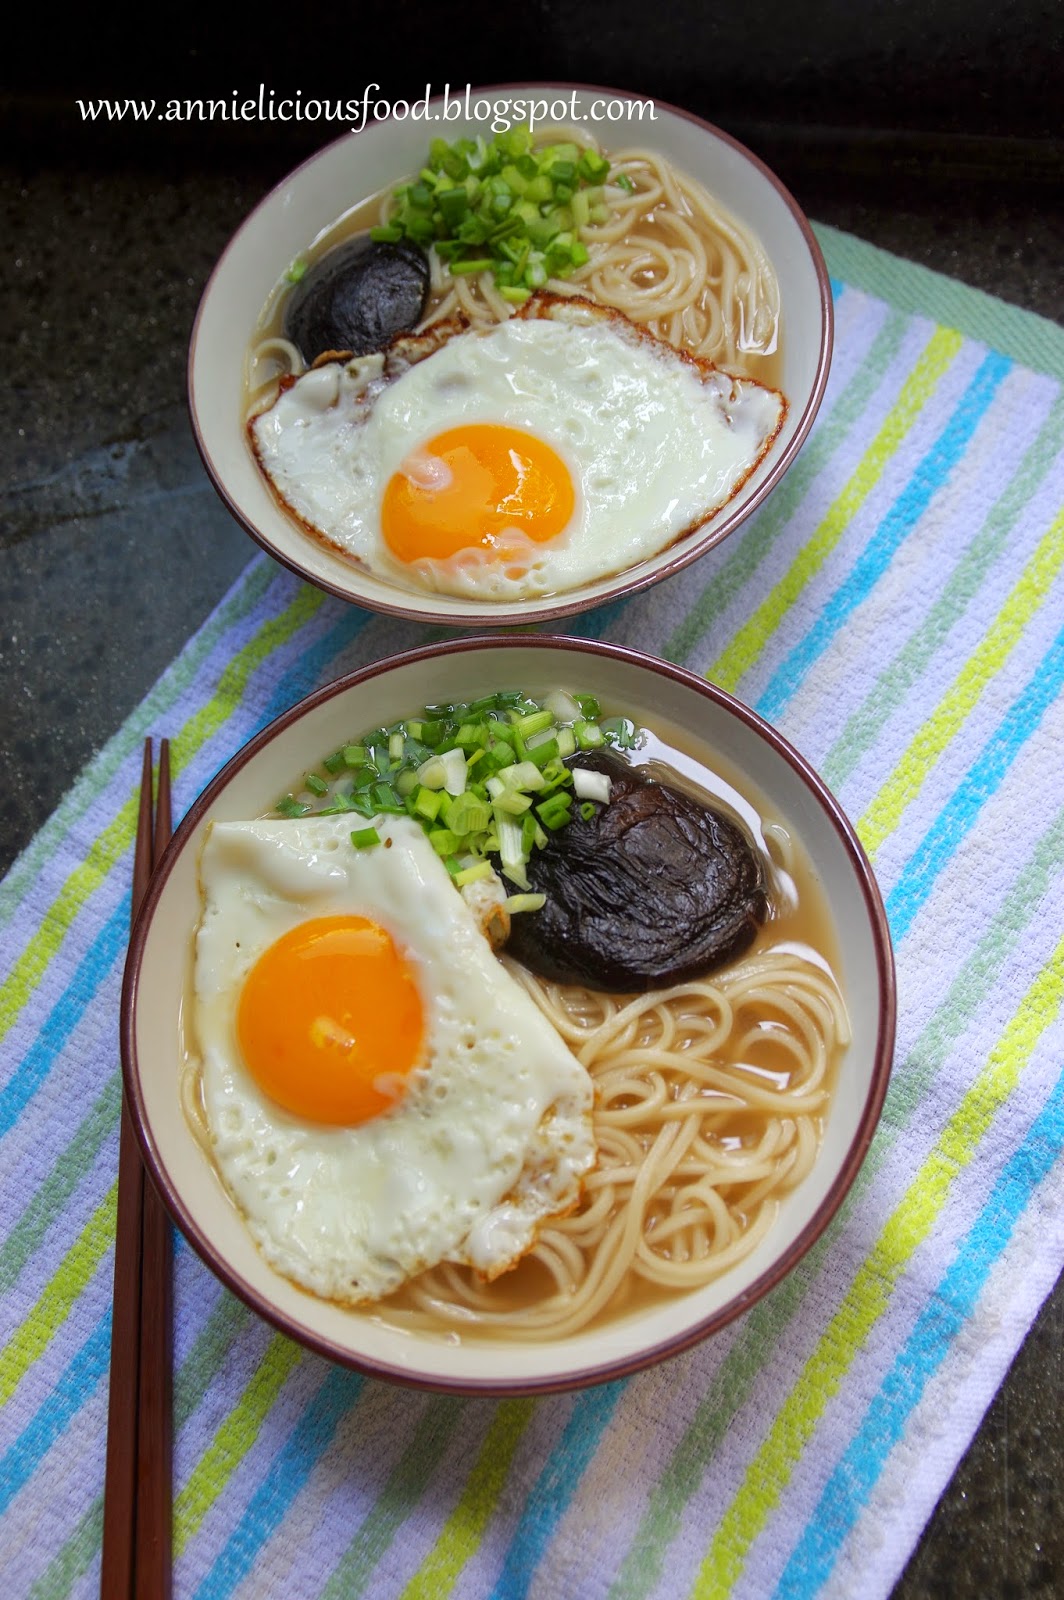
I prepared the soup in advance, chilled it. And I use the bone broth for some comforting noodles soup over the weekend. Of course, you could drink the soup just like that. Without noodles. It's up to you :)


Who doesn't know the goodness of collagen? I'd say, every woman should know! Collagen is the same as gelatin. It's just that the word Collagen used for its form when found in the body, and gelatin refers to the extracted collagen that is used as food. Gelatin is rich in amino acids. Although it is not a complete protein itself, it provides many amino acids and therefore decreases the amount of complete protein needed by the body.

Now, let me tell you where can you find collagen in nature and you could forget about botox. You see collagen almost everyday. It's in the skin, bones and joints of animals! For those people who say NO to pig skins, you totally have no idea how much collagen they have in there.

Ingredients
  • 2 Huge Pork Bones 大猪骨
  • 2 Chicken Carcass 鸡骨/鸡壳
  • 20pcs Chicken Feet 鸡脚
  • 200g Ground Nut / Raw Peanut, 花生 (Optional)
  • 4.5L Water 
  • Salt to taste (Optional)
Method
  1. Pre-soak the peanuts overnight (or at least 5 hours) before use. Remove the skin from soaked peanut by rubbing it hard with each other. The reason is because I would prefer my soup to have a clearer broth. Peanut skins gives your soup darker color. Rinse the peanuts until water runs clear.
  2. Rinse pork bones, chicken carcass, chicken feet, parboil them for 3 to 5mins. Rinse again.
  3. In a big soup pot, add in everything except salt. Bring to a boil for 10mins. Then reduce heat and simmer the soup over low heat for 4 hours. 
  4. After simmering the bones for several hours, remove all the bones and strain the broth. I wanted clear broth. So, I strained the broth 2nd time through a very fine hair sieve. You should get about 2L broth after strained. If you are drinking it fresh, lightly salt it. If you are keeping it as a stock for future use, it salt it only when you reheat it for consumption.
Let me tell you my way of sourcing collagen. This! All the bones here! Go ahead and add more bones if you want. No strict rules here. Adding pork hooves is awesome idea too. Trust me! :)


This is a pot of powerful soup. When you cook the bones, it breaks down the collagen and it becomes easily digestible. I added peanut in there, because peanuts gives extra nutrients. But if you are adding peanuts into the soup (like me), please please please pre-soak your peanut overnight and wash them well. If not, your soup will turn dark color. Peanut skin gives you dark soup.

If you have Crockpot or slow cooker at home, do use it. Cooking the broth on low setting is an easy way to cook broth for a prolonged time. Do bear in mind that it is a must to remove the surface scum that arises occasionally during the cooking process to achieve nicer tasting and clear looking broth.


NOTE
  1. Par-boiling and rinsing the bones before cooking and simmering the broth at low low heat is important. It helps to produce a clear broth as it greatly reduces the amount of residue in the liquid.
  2. The broth should be set to cool until the fat hardens on top. Then, remove the fat and refrigerate the broth. It will keep well in the refrigerator for a week, or upto a month in the freezer. 
  3. If your broth is properly prepared, it will gives you a rubbery, jellylike consistency broth due to the high gelatin content of the collagen. It is a great idea to prepare in advance, reheat it as a simple nutritious drink, or like me, use it for noodles.  
And if your broth looks like jello after it is chilled, YOU ARE A ROCK STAR!!! 


I reheat the jello-like bone broth to cook up some noodles here. It's simple, delicious, nutritious, and you don't need instant noodles anymore!


Ahhh!!! I love collagen! God knows how much! Look at the broth!


This is a super collagen soup. My grandma once told me... you drink this soup, you will become pretty. Oh well... olden days doesn't know what's collagen nor amino acid for sure :)
My grandma say it's beauty soup. Please drink more!!! Haha...


You may also like Chicken Feet Peanut Soup (花生鸡脚汤)