Thursday, June 12, 2014

Hakka Abacus Beads (客家算盘子)

I love Hakka Abacus Beads (客家算盘子). Not only that, I love everything else that has springy and chewy food. If you are as much of a taro fans as I am, then, you will find these an absolute delight in a way they're served.

Abacus Beads, literally Taro Gnocchi, with a dimple in the centre resembles abacus beads shape. This dish has symbolic wealth meaning and Chinese loves to prepare this dish during Chinese New year. When abacus beads stir fried with other ingredients and condiments, the dimple in the middle also helps contain the ingredients that flavour it. This traditional is really delicious.


Last year's Chinese New Year, I wanted to make this dish. But you know, CNY task is overwhelmed and I barely have time to rest. So, I only get to cook this dish about 2 months ago. 

If you have eaten Hakka abacus beads or you know how to make them, you will know that this dish requires alot of manual labour and patient. But, when you see your family dig in with their happy smile, I think it is all worth-while.


Ingredients are easily available at the market. You don't have to worry too much. Most Hakka family will add pork into the stir-fry. I want to keep it simple and I didn't wan't to make it a heavy meal. So, I'd just go along with the basic ingredients. If you choose to use pork, you may remove caipu  (菜谱). The sweetness of caipu is to replace the missing minced pork.

Of course, you can add or take away any stir-fry ingredients which you don't like. But for abacus beads recipe, please try to stick to it. It's abacus beads. We use taro for the gnocchi. Pls don't ask me questions like "Hi, can I use sweet potatoes instead?" or "Hi, I don't like taro. What about using Potatoes as a substitute? Do you think it works?"

Sorry ah. To me, traditional is traditional. I never try fusion style before. As much as I could, I will try to stick to original way. And I love originals. In olden days, no minced pork were added due to less resource in the village. Minced pork were added for enhancement only at the latter.


This recipe serves 2 as lunch, or upto 3 as a starter or tea-break snack. But if you see the pictures on this post, I double up the recipe portion during cooking.

For the Abacus Beads
  • 330g Taro
  • 100g Tapioca Flour
  • 70g ~ 80g Hot Boiling Water (estimation)
  • 1/4 tsp Fine Salt
For Stir-Frying
  • 4 Garlic Cloves, minced
  • 3 Shallots, minced 
  • 1 tbsp Cai Pu / Choi Po (菜谱)
  • 20g Dried Shrimps, soaked, minced
  • 8g Dried Cuttlefish, cut into thin strips, and soaked till soften 
  • 4 pieces Dried Mushrooms, soak till soften and sliced 
  • 10g Wood Ear / Dried Fungus, soaked, julienned 
  • pinches of Salt and Pepper to taste
For Garnishing
  • 1 Red Chilli, julienned
  • some Coriander 
  • some Spring Onions
Method - For the Abacus Beads
  1. Taro - Skinned, washed, cut into cubes. Steam the taro for 15mins until they are soft and well cooked. You may use a chopstick to poke through the taro to check if it is cooked or not.
  2. Once taro cubes are cooked, transfer the taro cubes into a large mixing bowl, add in few pinches of salt and with your quick motion, roughly mash the taro with the potato masher. I didn't mash my taro thoroughly. Because I want to remain the "bite" taro texture for my abacus beads.
  3. Add in half the tapioca flour, continue to mash and mix them while the taro is still hot.
  4. You will soon realized that it's getting tough to mix it with potato masher. This is the time when you need to use your palms into it and give it some mixing and kneading.
  5. Add half amount of boiling water, continue the the kneading, add in the remaining tapioca flour, knead, add remaining boiling water, knead so as to form a nice dough.
  6. Make dough into small but even balls. Use your tiniest finger to make a dimple in the centre of each ball to resemble abacus beads. My finger is rough and big. So, I use the edge of the sieve as a tool to create those nice dimples on the dough to achieve evenly sized and can be evenly cooked later.
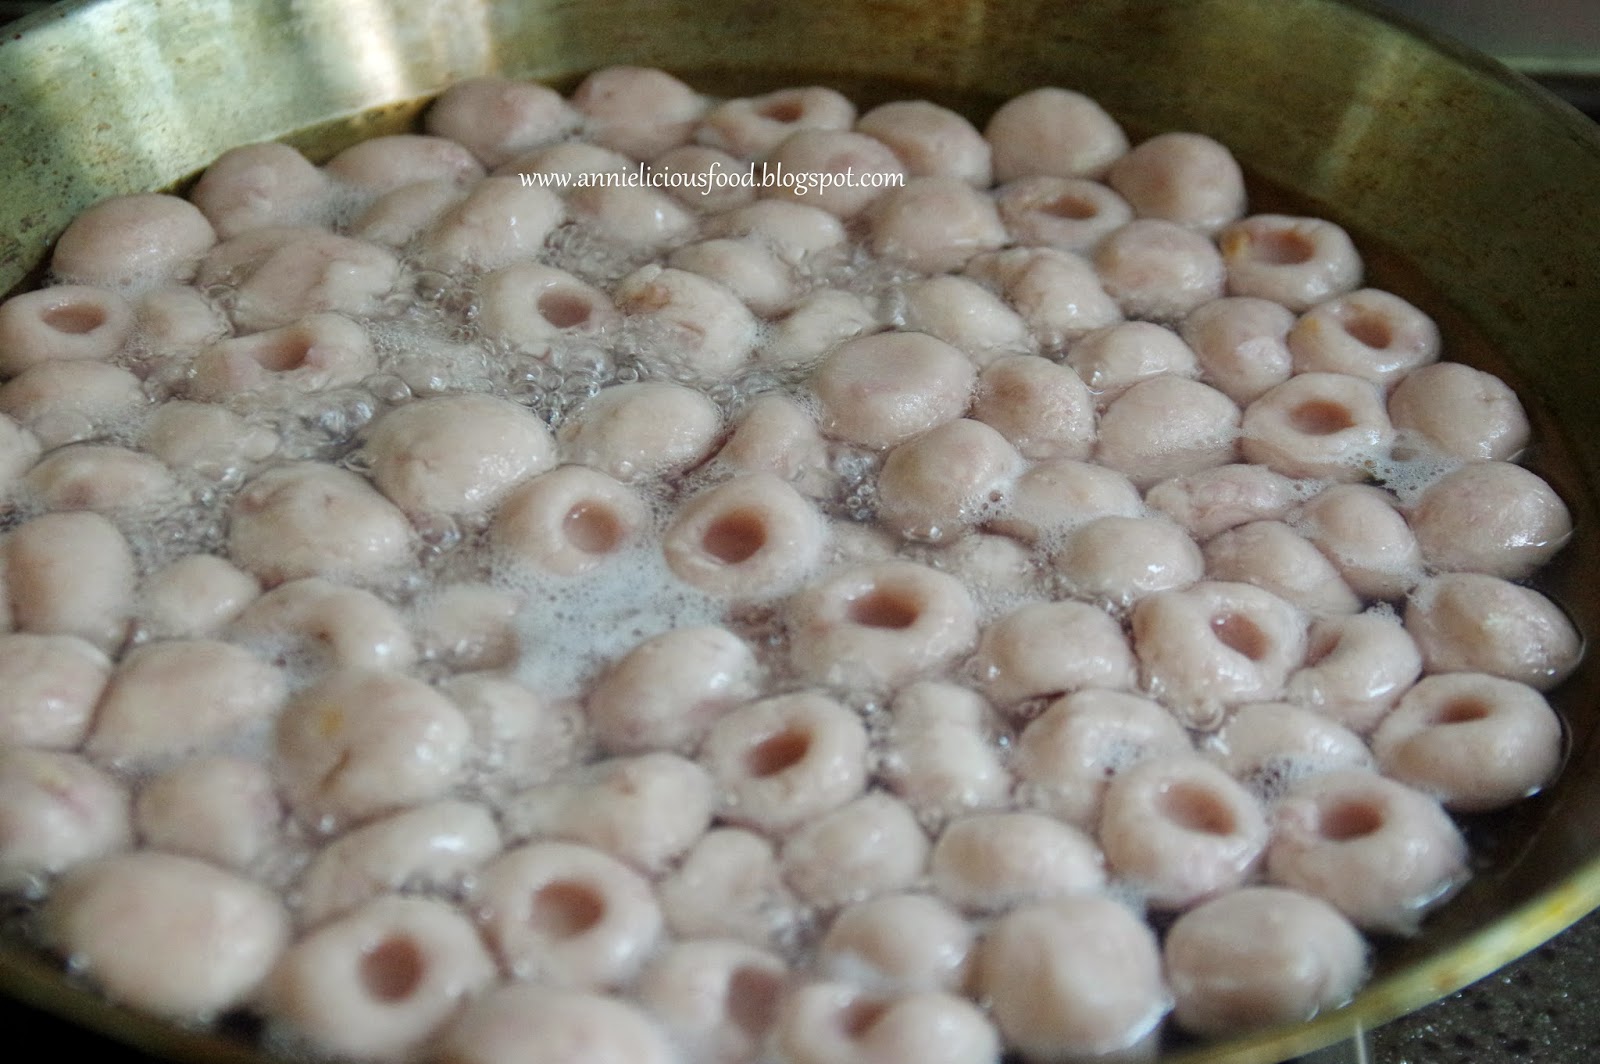
  7. Boil a large wok / pot of water. Slowly and gently, dd the abacus beads into the boiling water, VERY gently, stir to prevent them from sticking together. Boil for about 15mins to 20mins or until the batch floats on the boiling water.
  8. Prepare a pot of ice cold water. Remove the cooked abacus beads from the boiling water with a strainer, put the abacus beads into the cold water.
  9. Drain the abacus beads with a colander. Coat the abacus beads with 2 to 3 tbsps of cooking oil to prevent sticking. 
Method - Frying the Abacus Beads
  1. Heat cooking oil in wok on high heat
  2. Add garlic, shallots, dried shrimps and dried cuttlefish, stir fry until fragrant. 
  3. Add Cai Pu, mushrooms, wood ear and continue to fry for 2 to 3 minutes until fragrant. 
  4. Add salt and pepper to taste and give it a quick stir. 
  5. Add in the abacus beads and gently stir-fry for about 2 minutes. 
  6. Add in half portion of spring onions, coriander and red chilli. Stir through for another minute. 
  7. Taste and adjust salt and pepper if needed. Stir through. 
  8. To serve, dish abacus beads in a shallow serving dish or casserole. Garnish with the remaining chilli, spring onions and coriander.
Note : The success to make the abacus beads is to mix and knead it while it's hot. I know kneading the abacus dough while it's hot may be challenging. But when you get the hang of it, your hand will somehow immune to the heat and you will be able to do it pretty fast.

Step 6 - Make dough into small but even balls. Use your tiniest finger to make a dimple in the centre of each ball to resemble abacus beads. My finger is rough and big. So, I use the edge of the sieve as a tool to create those nice dimples on the dough to achieve evenly sized and can be evenly cooked later.


The texture of the abacus beads that I'm trying to achieve is springy, but with the starchy fragrance of taro on every bite. My abacus beads looked rough, as I only roughly mash my taro. This is how I maintain the taro "bite" texture for each gnocchi.


Step 7 - Boil a large wok / pot of water. Slowly and gently, dd the abacus beads into the boiling water, VERY gently, stir to prevent them from sticking together. Boil for about 15mins to 20mins or until the batch floats on the boiling water.

Stir fry the abacus beads as per instruction. Remember - Keep it simple. DO NOT add too much condiments or any ingredients that has heavy flavour. Or else, you won't be able to fully savour the fragrance of the taro when you eat them. Fish sauce is a good condiment to this dish if you wants to do some changes to it.


On a side note, do not let the cooked abacus beads stand in the cold water for too long. For best texture and flavour, stir fry the cooked abacus beads as soon as possible after they have been boiled. My friend told me that I can store cooked abacus beads in airtight container, keep it refrigerated until I need to stir fry them. I have not tried keeping them in refrigerator before. But I think it probably works.

Max loves it. He asked if I can cook this more often when I'm free. I think, his request could tell how good this dish is.


This dish is an absolute textural delight. The lightly chewiness of the abacus beads, loads of flavorful goodness and mushrooms and the sudden burst of crunchy freshness from the greens. I don't have to say more.

Friday, April 25, 2014

The Real Cream Of Mushrooms Soup

I've always loved cream of mushroom and I honestly think this is the best one I've ever had.

I love the intensely earthy flavours in this smooth cream of mushroom soup recipe. I wanted something thick and creamy, but not heavy. I've cooked this mushroom soup for at least 4 times. It's indeed a keeper.


Here, I used 4 types of mushrooms. From the left, fresh Shitake mushrooms, Portobello mushrooms, white button mushrooms and Chinese dried mushrooms. These are real stuff!


If you find it tedious of buying so many types of mushrooms, do consider to skip Portobello mushrooms and replaced by Brown button mushrooms. Whatever it is, please don't skip Chinese dried mushrooms. With the existence of Chinese dried mushrooms, this pot of mushroom soup will give absolutely wonderful depth of earthy flavour. Otherwise, I swear that fresh Cremini or Porcini mushrooms is the best alternative too.

Ingredients
(Source : Noobcook.com, as reference)
  • 50g Butter
  • 2 Yellow Onion, chopped finely
  • 1 Russet Potato (Optional)
  • 2 tbsp Plain Flour
  • 1L Chicken Stock
  • 300g Portobello Mushroom
  • 300g Fresh Shitake Mushroom
  • 250g Fresh White Button Mushroom
  • 5 to 6 pcs Dried Chinese Mushrooms, soaked overnight, chopped finely
  • 4 to 5 Sprig Thymes or Sage
  • 150ml White Wine
  • 150ml Double Cream / Dairy Whipping Cream
  • Salt and freshly cracked black pepper to taste
for garnishing
  • some extra whipping cream
  • some spring onions or fresh parsley
Method
  1. Do a quick rinse to the mushrooms. DO NOT soak the fresh mushrooms in the water. Chop Chinese mushrooms into fine pieces. Roughly chop the rest of the fresh mushrooms. 
  2. Heat a large stock pot over a medium heat and melt the butter. Add the chopped onions, give it a few stir. Add in diced potatoes and chopped Chinese mushrooms, give it a good stir, place a lid on top and let it sweat gently until the onions are softened, translucent and shrunken.
  3. Stir in the flour and cook for one minute more, then gradually stir in the stock. 
  4. Add the mushrooms and bring to the boil. Looking at the total amount of 1kg mushrooms, it may seems like mushrooms overwhelmed. But they will shrink considerably when they are cooked. 
  5. Reduce heat, cover and simmer gently for about 20mins, until the mushrooms are tender. Stir in the thymes.
  6. Remove 1/3 portion of the chunky mushroom soup, set aside. 
  7. Pour the remaining 2/3 portion of the mushroom soup into the blender or food processor, whiz until smooth. 
  8. Return the smooth blend and chunks back to the soup pot and stir in the white wine.
  9. Add cream and season with salt and pepper. 
  10. Warm through, without boiling. Ladle into bowls and garnish with drops or swirls of cream. Enjoy! 
Note :
  1. The existence of flour is to thicken the soup.
  2. By adding potatoes is to give the soup a good overall body, so as to reduce the usage of cream. However, adding potato is optional. 
  3. Remember to chop the Chinese mushrooms finely, so that it will cook well, as it takes longer time to cook and gives flavour faster.

Add the chopped onions, give it a few stir. Add in diced potatoes and chopped Chinese mushrooms, give it a good stir, place a lid on top and let it sweat gently until the onions are softened, translucent and shrunken.


Add the mushrooms and bring to the boil.


Remove 1/3 portion of the chunky mushroom soup, set aside. Pour the remaining 2/3 portion of the mushroom soup into the blender or food processor, whiz until smooth. After that, return the smooth blend and chunks back to the soup pot.


 Stir in the wine and finally, add cream and season with salt and pepper.


When Max's friend came to my house for lunch, I noticed that they stopped talking when they were having the soup. Hahaha... One of them couldn't raise her head to talk because she kept saying "Oh man@ This soup is so good!"

Another one, text Max and chase me for the recipe. She says "This is so so so much better than the one at The Soup Spoon!"

I'm glad that they liked it so much. 


Say NO to canned mushroom soups! No more salty and cream overload mushrooms soup! Say YES to the real thing!

Sunday, April 13, 2014

Bone Broth / Super Collagen Soup - (骨胶汤 / 胶原蛋白汤)

So you want to look young and radiant?

Forget about Botox! Drink Bone Broth for amazing skin! This magic pot of collagen soup could make your skin looks great!

This prolonged cooking of bones in water will give you results in a broth rich in nutritional constituents that promotes strength, nourish, help to prevent bone and connective tissue disorders and improves collagen level in your body!

Take a look at this real stuff. My bone broth produces a rubbery gelatin when chilled.


Home-made broth made from bones produces as much more nutritious gelatin that contains a wide range of minerals and amino acids. Most commercial gelatin products are made from animal skin and often contain MSG and something else that we might not know. Well. I'd prefer to consume real stuff, and cheaper too.

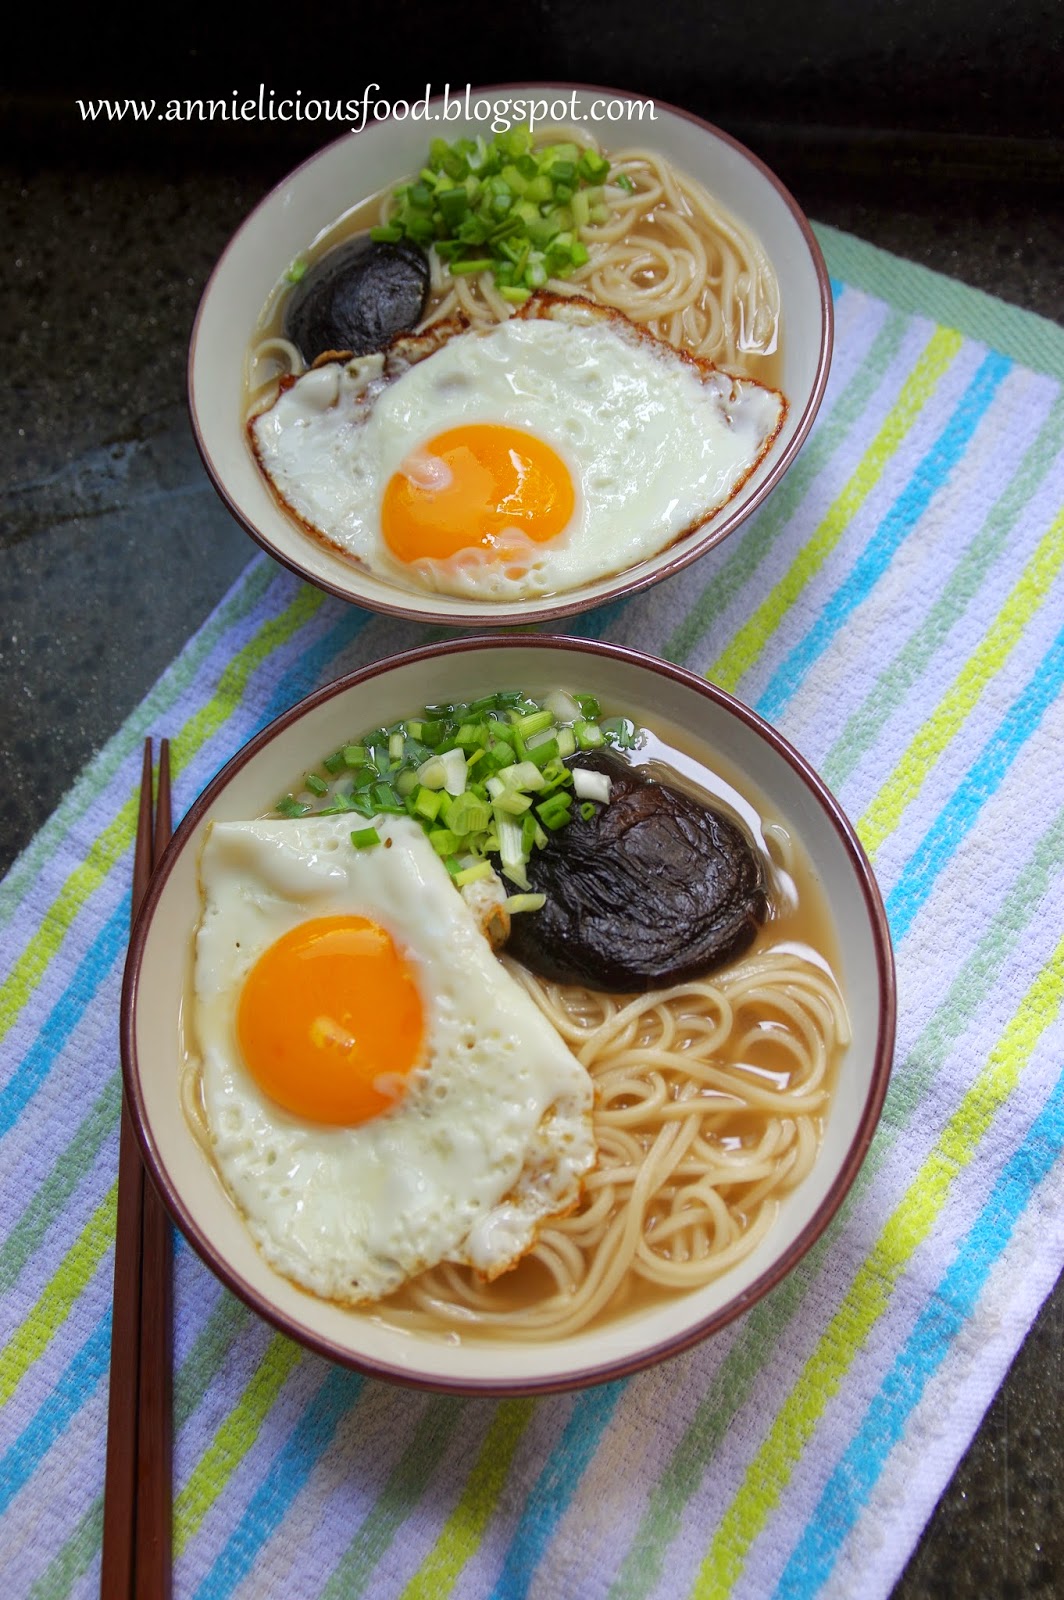
I prepared the soup in advance, chilled it. And I use the bone broth for some comforting noodles soup over the weekend. Of course, you could drink the soup just like that. Without noodles. It's up to you :)


Who doesn't know the goodness of collagen? I'd say, every woman should know! Collagen is the same as gelatin. It's just that the word Collagen used for its form when found in the body, and gelatin refers to the extracted collagen that is used as food. Gelatin is rich in amino acids. Although it is not a complete protein itself, it provides many amino acids and therefore decreases the amount of complete protein needed by the body.

Now, let me tell you where can you find collagen in nature and you could forget about botox. You see collagen almost everyday. It's in the skin, bones and joints of animals! For those people who say NO to pig skins, you totally have no idea how much collagen they have in there.

Ingredients
  • 2 Huge Pork Bones 大猪骨
  • 2 Chicken Carcass 鸡骨/鸡壳
  • 20pcs Chicken Feet 鸡脚
  • 200g Ground Nut / Raw Peanut, 花生 (Optional)
  • 4.5L Water 
  • Salt to taste (Optional)
Method
  1. Pre-soak the peanuts overnight (or at least 5 hours) before use. Remove the skin from soaked peanut by rubbing it hard with each other. The reason is because I would prefer my soup to have a clearer broth. Peanut skins gives your soup darker color. Rinse the peanuts until water runs clear.
  2. Rinse pork bones, chicken carcass, chicken feet, parboil them for 3 to 5mins. Rinse again.
  3. In a big soup pot, add in everything except salt. Bring to a boil for 10mins. Then reduce heat and simmer the soup over low heat for 4 hours. 
  4. After simmering the bones for several hours, remove all the bones and strain the broth. I wanted clear broth. So, I strained the broth 2nd time through a very fine hair sieve. You should get about 2L broth after strained. If you are drinking it fresh, lightly salt it. If you are keeping it as a stock for future use, it salt it only when you reheat it for consumption.
Let me tell you my way of sourcing collagen. This! All the bones here! Go ahead and add more bones if you want. No strict rules here. Adding pork hooves is awesome idea too. Trust me! :)


This is a pot of powerful soup. When you cook the bones, it breaks down the collagen and it becomes easily digestible. I added peanut in there, because peanuts gives extra nutrients. But if you are adding peanuts into the soup (like me), please please please pre-soak your peanut overnight and wash them well. If not, your soup will turn dark color. Peanut skin gives you dark soup.

If you have Crockpot or slow cooker at home, do use it. Cooking the broth on low setting is an easy way to cook broth for a prolonged time. Do bear in mind that it is a must to remove the surface scum that arises occasionally during the cooking process to achieve nicer tasting and clear looking broth.


NOTE : 
  1. Par-boiling and rinsing the bones before cooking and simmering the broth at low low heat is important. It helps to produce a clear broth as it greatly reduces the amount of residue in the liquid.
  2. The broth should be set to cool until the fat hardens on top. Then, remove the fat and refrigerate the broth. It will keep well in the refrigerator for a week, or upto a month in the freezer. 
  3. If your broth is properly prepared, it will gives you a rubbery, jellylike consistency broth due to the high gelatin content of the collagen. It is a great idea to prepare in advance, reheat it as a simple nutritious drink, or like me, use it for noodles.  
And if your broth looks like jello after it is chilled, YOU ARE A ROCK STAR!!! 


I reheat the jello-like bone broth to cook up some noodles here. It's simple, delicious, nutritious, and you don't need instant noodles anymore!


Ahhh!!! I love collagen! God knows how much! Look at the broth!


This is a super collagen soup. My grandma once told me... you drink this soup, you will become pretty. Oh well... olden days doesn't know what's collagen nor amino acid for sure :)
My grandma say it's beauty soup. Please drink more!!! Haha...


You may also like Chicken Feet Peanut Soup (花生鸡脚汤)

Sunday, March 30, 2014

Cheesy Dogs Stuffed in Spicy Wings

Fancy some fun and yummy finger food? What about cheesy dogs stuffed in spicy wings?

This cheesy dog stuffed wings is spicy, delicious, chewy, crunchy and appetizing.

This is a great party food for everyone. I did this a year ago and I only get to post it now. Max asked why didn't I make more. He says 8pcs is miserable. My response to him is "Good thing comes in a small package". Sounds like a diamond shop advert tho. Hahaha...


There are various types of stuffed chicken wings recipe online. Mine is the laziest. You don't have to work hard on the stuffing at all.  Just get a pack of cheesy dogs, and stuff em' into the boneless mid-joint wings. It's effortless! But of course, I won't pretend that this is easy. You have to put in effort to remove the bones from the mid-joint wings.


The only imperfection about this dish is that the cocktail cheesy dogs that I've got from the supermart is not as cheesy as I expected tho :(

To make the wings even more delicious, I mixed some spicy sauce, dumped the wings into a large mixing bowl and give it a toss, so that the chicken wings are well coated with spicy sauce to enhance it's taste.

Ingredients
(Source : Annie of Annielicious Food)

  • 8 pcs Mid-Joint Wings
  • 8 pcs Cocktail Cheesy Dogs

for marinade

  • 1 tbsp Corn Flour
  • 1 tbsp Soy Sauce
  • 1 tbsp Sesame Oil
  • dashes of Pepper 

for frying

  • 1 Egg, beaten
  • 6 to 8 tbsp All-Purpose Flour

for sauce

  • 1 tbsp Nando's Chilli Sauce (I think Thai chilli sauce would be a very good alternative too)
  • 1 tbsp Tomato Sauce
  • 2 tsp Worcestershire Sauce
  • 1 tsp Mayonnaise
  • 1 tbsp Honey

for garnishing

  • Sesame Seed 
  • Parsley
  • Lemon slice / wedge

Note : 
You can adjust your preferred spiciness level - be it mild, medium or even suicidal level by adding some chopped chilli padi. Mine is just mild spicy. Max can't take too spicy food. And I kinda feels bored sometimes :(

Method

  1. Clean mid-joint wings, pat dry with kitchen towels. With a small and sharp utility knife, give a small cut at both end of the mid-joint. Carefully remove the bones from the mid-joint.
  2. Marinade the boneless mid-joint wings with corn flour, soy sauce, sesame oil and pepper for about 30mins. 
  3. Stuff the cocktail cheesy dogs into the mid-joint. 
  4. Dip marinated wings into lightly beaten eggs, and then coat the wings in flour until well coated. Do this one at a time. 
  5. Heat oil in a deep skillet or deep fryer. Deep fry wings until crispy and golden brown. Drain on paper towel. 
  6. In a large mixing bowl, mix Chilli sauce, Tomato sauce, Worcestershire sauce, Mayo and Honey together. Throw in the fried chicken wings and give it a good toss. Ensure all wings are evenly coated. 
  7. To serve, sprinkle some toasted white sesame, some parsley and a slice of lemon to squeeze on top of the wings to give the wings some tang before you eat. 


Removing bones from the mid-joint wings might not be the easiest task. But it's definitely worthwhile when you see your family eating them happily.


Marinade the chicken, and then stuff the cheesy dogs in it. You don't have to cut the cocktail cheesy dogs. The length of the cocktail dogs is about the same as mid-joint wings.


When wings are ready for frying. I'd prefer simple frying coating. Just flour and eggs. I don't even salt my flour, because I knew I'm gonna toss some spicy sauce on top of the fried chicken wings at the later part. If you intend to skip the spicy sauce, do add some salt and pepper on the flour.


By looking at the end result, I knew you would agree that this is definitely convincing :)


If you've tried this recipe at home, ask your kids for review. If your kids tells you they don't like it, they would be lying :)

I hope you like it!

Saturday, February 8, 2014

Fried Nian-Gao Balls / Sticky Rice Cake (炸年糕球)

Bored of eating the usual fried nian-gao every year? What about this new way of enjoying nian-gao? This is it... I make them into nian-gao balls!

It's great and addictive snack for Chinese New Year. It's crispy on the outside, soft and chewy on the inside. Max and my mother-in-law was impressed when I serve them this. Max even says "Ohhumm... I'm eating nian-gao like a boss! This is so good!".... this really makes me cracked up!


I fried nian-gao last year (See recipe here). I sandwiched the nian-gao with sweet potatoes and yam. That's the usual way of frying em'.

This time, I don't do it for a party or something. I just did it for our own consumption. And I'm looking into something something that is easy to eat, less messy and can be kept well. So, I improvised my Fried Sweet Potato Balls (炸番薯蛋) into fried nian-gao balls instead. One side is sweet potato dough, the other side is taro dough. Yummm!!!


This recipe makes 40 balls if it is at the size of a golf ball, or up to 50 balls if it is smaller. Depends on how big you want the nian-gao balls be. I got 50 pcs from this recipe.

Ingredients
(Source : Improvised from my Fried Sweet Potato Balls (炸番薯蛋) recipe)

  • about 500g Sticky Rice Cake 年糕 (use hardened sticky rice cake)
  • enough oil for deep-frying

Taro Dough
  • about 220g Taro 芋头 (I use Thai Taro)
  • 210g Glutinous Rice Flour 糯米粉
  • 1 tbsp Rice Flour 粘米粉
  • 15g Corn Flour 玉米粉
  • 65g Sugar 糖
  • 1/4 tsp Salt 盐 
  • 2 tbsp Corn Oil 油 
  • 2 tbsp Water 水

Sweet Potato Dough
  • about 220g Orange Sweet Potatoes 橙色番薯 
  • 210g Glutinous Rice Flour 糯米粉
  • 1 tbsp Rice Flour 粘米粉
  • 15g Corn Flour 玉米粉
  • 65g Sugar 糖
  • 1/4 tsp Salt 盐 
  • 2 tbsp Corn Oil 油
  • 2 tbsp Water 水

Additional Note : There are readers feedback that the dough is dry. It's very much depends on the moisture level of your steamed potatoes and steamed taro. If your dough is dry, just add more water and oil.

Method
  1. Cut nian-gao into desired cube size. 
  2. Skinned sweet potatoes and taro, cleaned, cut into big chunk. Steam both sweet potatoes and taro until soft. 
  3. In a big bowl, mash the potatoes. And in another bowl, mash the taro.  
  4. For Taro dough - Add in mashed taro and the rest of the taro dough ingredients into mixer bowl. Let the mixer do the work. If you are using hand, mix all ingredients together and knead lightly to form a smooth dough. If you think there's a need, do add another tablespoon of oil to make the dough more smooth.
  5. For Sweet Potato dough - Same. Add in mashed potato and the rest of the mashed potato dough ingredients into mixer bowl and let the machine do the work. If you are using hand, it is the same. Just knead lightly to form a smooth dough. 
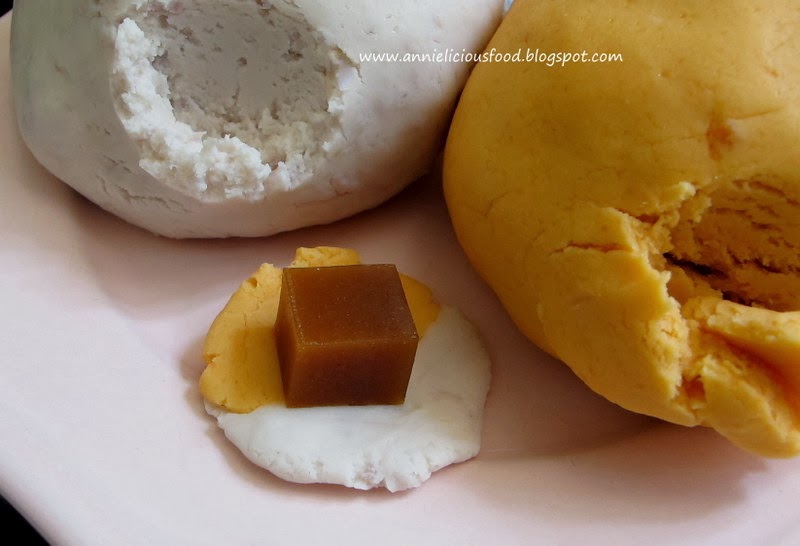
  6. Pinch a small piece of taro dough, and a small piece of sweet potato dough (about 1 tsp each).  Joint them together. With both palm, roll and form into a smooth ball. Flattened the dough and wrap a piece of nian-gao cube at the center. Roll into a ball. Pinch more dough to cover the holes if needed.
  7. Heat up oil in a wok, with low fire. Once fire is heated well, put the balls into the wok, estimate about 6 to 8 balls each time, slowly fry until it turned golden brown. This should take about 3 minutes.  Remove and drain on a paper towel.
  8. Repeat the frying process until all nian-gao balls are done. Serve immediately.
NOTE :
  • DO NOT discard the sides of the nian-gao cuts. I didn't waste any single piece of my nian-gao bits. They can be gathered and can be wrapped into balls too. This is how I make 50 nian-gao balls out of my 500g medium sized nian-gao :)
  • When wrapping the nian-gao with the dough, try to make sure that every corner of the nian-gao are well covered with dough. If not, the nian-gao might burst and leaked out of the dough during deep-frying process.
  • If you intend to make the nian-gao balls bigger, the deep-frying time will be longer. To ensure you are not eating half-cooked dough, do fry it slowly under low fire to let it slowly cook in the pool of oil.  
Here, get ready two sets of ingredients for two different dough.


Pinch a small piece of each dough and joint them together. 


Flattened the dough and wrap a piece of nian-gao cube at the center. 


With both palms, gently roll them into a ball. Pinch more dough to cover the holes if needed. And here, you will have taro and sweet potato flavor dough.


You can use one type of dough only if you think two flavor is too tedious. However, I felt that two flavors joint together makes great taste. I love this recipe and I like this way of eating nian-gao. The 'crust' stays crunchy quite long and it kept well too.

If you intend to make them in advance and store them, follow this method :
  1. Fry the nian-gao balls until cooked (pale golden color). Drain and set aside to let it cool. 
  2. Once nian-gao balls are cooled, pack them into a sandwich bag (preferably air-tight of course).
  3. Store them into the fridge if you are eating them in 2 to 3 days time OR if you are eating them after a week or so, store them into the freezer - Thaw it overnight before you reheat it. 
  4. To reheat : Deep-fry room temperature nian-gao balls under medium low fire until golden brown color. Serve immediately. For this step, you can use air-fryer to do the work if you don't want to deep-fry. It's just that the result of air-fry would be dryer and the crust will tend to turn harder.
Since you are going to reheat the nian-gao balls before serving, always remember that you only need to achieve pale golden color on the 1st fry. The 2nd fry (reheat) will then fry until golden brown and crispy.

For me, I prepared the whole batch, I serve 10pcs fresh, gave 20pcs away and and keep the balance 20pcs in the fridge for next time. Deep-fried food intake need to be controlled. This is a great way to prepare your nian-gao balls in advance. Just re-heat it before you bring them to the party as part of the party snacks. I'm sure your family and friends will love it.


This new way of eating nian-gao will definitely change the way you feel about eating sticky rice cake during Chinese New Year! Do give this auspicious traditional food a try! :)

Saturday, February 1, 2014

Superior Chicken Stock (鸡上汤)

When it comes to festive season that requires lots of cooking, I will prepare this. The broth produced by these simple ingredients could give you full flavor in almost every Cantonese cooking.

It's magical!


Some people called it superior stock, some called it chicken stock, some called it gou-tong (高汤) and some called it sheung-tong (上汤). Whatever. As long as you have this pot of goodness in your kitchen to standby, I bet you will be able to cook up some good Chinese food! :)


I shall cut this post really short. The trick is to use a good chicken and DO NOT opt out chinese ham. This ham gives the soup the superior taste!

Ingredients
  • 1 Kampung Chicken, preferably old hens (老母鸡)
  • 150g Chinese Ham (金华火腿) ** See Note
  • 2 to 3 Chicken carcass (鸡骨/鸡壳)
  • 15g Ginger, sliced (姜)
  • 3 parts Spring Onions, white part only (葱)
  • 4L Water
Note : You will have to prepare chinese ham in advance. When you purchase your chinese ham from the shop (usually shops that sells dried seafood), please ensure that you are using only the meat part. Those outer layer (skin and the dark surface part) need to be removed. Wash and blanch the ham with hot water to remove the oil. Put the ham into a bowl of hot water. Put two slices of ginger into the bowl. Steam the bowl of water with ham and ginger for 45mins or upto 1 hour. This is the preparation you need to do. If not, you will find that the chinese ham doesn't taste as pleasant as you expect. I always did mine way in advance. Steamed ham can be well kept in the freezer for 3 months or more. Try to prepare at least 400 grams at one time. If not, you waste your gas for steaming it for 1 hour. Hahaha...  When you need to use it, just take it out for your soup.

Method
  1. Clean chicken, and chicken carcass. You don't have to cut them into pieces. Just leave it whole. 
  2. Prepare ginger and spring onions accordingly.
  3. Using a big pot, put in all the ingredients and pour in 4L water. Bring to a boil.
  4. Scoop away the scums that float up, but do not scoop away the chicken oil. Those are flavors. 
  5. Let the soup boil for 10mins, and reduce to very low fire to let it slowly simmer for at least 4 hours.
  6. Once the soup is cooked for 4 hours, let it cool abit. Strain the liquid and discard all the soup ingredients, and keep only the broth. 
This is the result after 4 hours. It may looked pale and unattractive. But I tell you, this is magic broth for all Chinese cooking! I use this broth for stir-frying - noodles, vegetables, seafood. I use it to braise my mushrooms, radishes and alot more!

Divide the broth with plastic bags or small containers into portions. Remember to well seal them and air-tight. Freeze away. If you need to use them, just take it out, thaw and you have superior chicken stock!

You totally don't have to use any MSGs for your cooking!


Give it a try :)

Thursday, January 23, 2014

Melt-In-Your-Mouth Pineapple Tarts (黄梨酥挞)

Pineapple tarts is a must-have amongst many households during Chinese New Year, especially in Singapore. Baking pineapple tarts for Chinese New Year has become yearly affair ever since I picked up baking.


Baking pineapple tarts is a very laborious affair and it needs alot of patience and time. But I just couldn't help it. Shop-bought ones are either no good, or over-priced.Trust-worthy quality pineapple tarts are not easy to find. I might as well bake it then.

Max had been living with shop-bought pineapple tarts for the past 29 years. He has no complaint and he eat what his mom fed him. But after I started baking, I'm surprised to hear from him how precise he wants his pineapple tart to taste! He wanted buttery and melt-in-the-mouth pastry with some tang on the pineapple jam. For me, my personal requirement is flaky and NO to milky taste. So, I work based on that.


I did googled some recipes and flip some recipe books. I skipped those that uses milk or milk powder. I skipped those that ask for margarine or shortening. I tried baking using 3 to 4 recipes for the past three years. And I finally convinced and settled down with The Little Teochew's recipe, because I believe simplicity could deliver the best.

I baked 3 batches of pineapple tart last year. Used Lurpak and President butter for the first two batches. It was good. But my MIL complaint that the buttery taste is not what she's looking for. She said "That's not local taste!"

.... She makes my face turned green.

I had a sleepless night, thinking what she meant by local taste. And for the 3rd batch, I used SCS butter, as this is widely used especially for Chinese New Year baking. And the result, she says "This is local taste lah!".... I guessed it right! This is the buttery taste that she's looking for!

..... Duh!!! I keep calm and continue my baking. Hahaha...

This year, I used SCS for my pineapple tarts as well. And for the pineapple jam, I got myself some Morris pineapple, followed Wendy's home-made pineapple jam recipe and cook up a big batch from scratch.

Ingredients (for Pineapple Jam)
(Source : Wendyinkk)

  • 2 large Morris Pineapple
  • 400g Sugar
  • 1 small stick of Cinnamon
  • some lemon juice (optional, if you prefer more sourish taste)

Method (for Pineapple Jam)

  1. Peel the pineapple, cleaned, cut into large chunk, included the core. 
  2. Put half the pineapple chunks into a blender, add 1/3 water and blitz away. Pour 80% of the blended pineapple into a large pan or wok that has large evaporation surface. 
  3. With the remaining blended pineapple in the blender, add the rest of the pineapple chunks into the blender and blitz away. Always leave some blended liquid on the blender, so that you don't have to add water for the next blending process. 
  4. Cook pineapple paste with the cinnamon stick under medium heat until it turned pasty, like oatmeal kind of thickness. Stir it occasionally. 
  5. Add sugar and stir. The pineapple paste will turn watery when sugars are added. Stir once a while. 
  6. Increase the heat to high. Don’t stir and let the base take on some color. It will caramelize the jam. Stir once a while to check on the color. Stop when it almost reaches your preferred color.  Do take note that some pans will continue to caramelize even when the heat is off.
  7. Do take note that the jam will thicken further upon cooling. It is better to undercook the jam rather than overcook it. You can cool the jam and see the texture. If it is too wet, you can always cook it again to achieve dry texture.
  8. Once jam is kept in the fridge for a day, pre-roll pineapple jam into balls the night before your baking day. 
Note : You can prepare this way ahead. I did mine more than a week beforehand. Air-tight sealed and keep it well in the fridge. It's absolutely fine with. 


Ingredients (for Pastry)
(Source : The Little Teochew, with modification)

  • 400g Plain Flour
  • 50g Corn Flour
  • 1/2 tsp Fine Salt
  • 280g Cold, Unsalted Butter, cut into cubes. 
  • 3 Egg Yolks, beaten
  • 3 tbsp Ice-Cold Water
  • 6 tbsp Icing Sugar
  • 1/2 tsp Pure Vanilla Extract
  • For the pastry glaze, mix 1 Egg Yolk + 1 tbsp Water. 

Note : If you have lard at home, do add some. I did two batches of pastry. One using 280g Butter (follow recipe) for giveaway purpose. While the other batch that I want to keep it for own consumption, I used 250g butter + 30g lard oil. The result is seriously awesome! So, I'd highly encourage you guys to be more courageous and go ahead to do some experiment to find the right Oomph! taste for yourself :)

Method (for Pastry)

  1. Cut butter into small cubes. Put it back to the fridge. Take the butter cubes out when you are ready to use it. 
  2. Sift flour, icing sugar and salt together. Mix well. I keep mine in the fridge to keep my flour cold. The weather in Singapore is hot. I can't help it. 
  3. Using the pointed ends of a fork, rub the cubed cold butter into the flour until it looks like fine bread crumbs. If necessary, use fingertips to continue rubbing lightly on the bigger pieces of butter into finer pieces. 
  4. Beat together egg yolks, cold water and vanilla extract (and lard oil if you are using it). Add it into the butter flour mixture. Using finger tips, gently coax all the crumbs into one large dough ball. Do not knead the dough. As long as the crumbs comes together, you should stop working. 
  5. Divide dough into two balls. Wrap the dough using clingwrap, chill in the fridge for 10mins.
Note : The reason for dividing the dough into two balls is because the dough is very buttery and oily. It would be ideal to use a smaller portion at a time and keep the rest covered in the fridge, otherwise, the dough will ooze oil. 

Method (Baking)
  1. Take one dough ball out of the fridge, roll out to desired thickness. Cut out dough using tart cutter. Arrange neatly onto baking tray, with at least 1.5cm apart. 
  2. Glaze the tart shells (the entire tart pastry surface, not just the rims). Bake it at 175 oC for 5mins. 
  3. Take the tart shells out of the oven, glaze the tart shells one more time (but just the rims for this time). Place pre-rolled pineapple jam balls onto the centre of each tart shells.
  4. Bake the pineapple tart for another 15mins, or until the tart pastry looked golden brown. 

My butter is cold, and my flour is cold too. The task here is to coat the butter crumbs in flour, while doing your best to prevent the butter from melting. If your kitchen is air-conditioned, that would be the best! You might find it messy if you are doing this for the first time. But once you have the hang of it, it will be fine.


 I have pastry cutter to do the work, so, it is much easier compared to fork.


If you made shortbread pastry before, you will know how this should go about. Handling the dough is the key. If you overworked the dough, you will ruin everything. You have to be gentle to the dough, so as to achieve wonderful buttery, flaky texture.


.... my camera sucks. It doesn't bring out the color of the buttery dough. Sigh!

Okay. Move on.

You can choose not to glaze the tart. But I'd highly recommend you to do that. Because glazing the tart will makes the tart sturdier during baking. And glazing gives you a nicer orange-y festive looking tart too. Btw, Max says tarts without glaze looked like under-cooked tart. Hahaha... He and his very own logic.

Accomplishment! Alot of work, it sucks my energy dry. But definitely worth it.


Always remember that good food either comes with a price tag or it takes patience and effort to make it right. You can choose to buy shop-bought pineapple jam if you are not picky about it. It definitely save you alot of work. But if you are particular with that, like me, be prepared to do it from scratch. Cooking the pineapple jam can be quite strenuous.

So, if you wanna make some good pineapple tarts, you don't expect it to be easy. That's the simple rule. And no, my tart doesn't look like that on my 1st attempt 3 years back. Practice makes perfect. I need more of that for sure.


Will I make it again? Yes! This is indeed melt-in-your-mouth pastry and it taste really awesome!

I hope you like it! And I have to thank to the fellow ladies who shared the recipe and tips :)

Monday, January 13, 2014

Shrimp Roe Wanton Noodles / 虾籽云吞捞麺 - (AFF - HK / Macau #3)

I love shrimp roe noodles. I had this in Macau last month and I'm absolutely in love with it. The noodles itself has mild salty shrimp taste. And when I toss the noodles with the shrimp paste and soy sauce dressing.... Fwoh! Addictive!

Especially when it is cold weather, one serving might not be enough!


I stayed at 新马路 area when I was in Macau. Just walk down the road, I found 喜临门麺家 at 十月初五街38号. This shop sells authentic and traditional Shrimp Roe Noodles (虾籽麺) and some good quality Shrimp Roe (虾籽) as well.


Shrimp roe wanton noodles is common in Macau and also Hong Kong. I had a random chat with the noodles shop owner. I was told that this palm sized hard bundle of shrimp roe noodles is originated in Macau, and this delicious noodles then spread to Hong Kong. Whether it is originated in Hong Kong or in Macau, I didn't specifically do any research on that. I just listen to what the noodles owner say. However, it might be true, because the location of this shop is very near to the sea port. Getting shrimp roe should be easy I guess.


Since I knew Singapore seldom import good shrimp roe noodles and as far as I know, getting shrimp roe in Singapore is not so possible. Without even thinking, I immediately bought some shrimp roe noodles and shrimp roe. So that I could cook for AFF.

I walk down further. And I randomly walked into a noodle shop, and ordered a serving of Shrimp Roe Wanton Noodles (虾籽云吞捞麺). It is not difficult to identify what's in the noodles. Other than the wantons served, it has shallot oil, dark soy sauce, soy sauce, shrimp paste as dressing on the noodles, and then topped with shrimp roe and spring onions. This is the serving that I had in Macau.


Max is very excited to try this noodles. Less than 3 days after we are back to Singapore, he already kept telling me that he wanted to eat shrimp roe noodles. Looking at this piece of dried noodles. One of the special characteristic that distinguish this noodle from many other varieties of Chinese noodle is the salty shrimp roe forming tiny black spots on strips of the noodles.


You don't have to go Macau or Hong Kong just to get shrimp roe noodles. Cold Storage do sell. However, maybe the quality and taste might vary a little.

I also bought a bottle of shrimp paste from Macau. This shrimp paste taste like belacan (The usual shrimp paste found in Malaysia and Singapore), but this Macau shrimp paste is more fine and spread-ably soft texture. If you can't get this, I'd suggest you to use the ordinary belacan, mix with water until it achieve thick dripping consistency, just like dark soy sauce kind of thickness.


Because this noodle has mild saltiness on its own, the most common method of cooking is directly boiling the noodles and drizzle over some sauces for additional flavorings. This noodles is not difficult to replicate. All you need is to go to the Cold storage, buy shrimp roe noodles, get some belacan, and make some wanton to go along.

Ingredient (for Noodles)
  • 1 Shrimp Roe Noodles
  • ½ tsp Shrimp paste (or belacan), mix with water, until thick dripping consistency
  • ½ tsp Dark soy sauce
  • 1½ tsp Soy sauce
  • 1 tsp Shallot oil
  • 2 tsp Shrimp Roe as topping
  • some spring onions as garnishing
This makes one serving of noodle. For dressing wise, do play around with it to suit your taste. You may consider shrimp paste as an optional, as I know it is not easy to get. One serving of noodles only use a few drops of shrimp paste. So, don't stress yourself too much.

Ingredient (for Wanton) 
  • about 50g Minced Pork
  • 10 Fresh Prawn, deveined, shells removed, cleaned, pat dry, cut prawns into half.
  • Some store-bought Shanghainese wanton skin
  • ½ tbsp Soy Sauce
  • ½ tsp Sugar
  • ½ tsp Corn flour or Tapioca flour
  • a pinch of salt and dash of pepper to taste
This makes about 10 big wantons or more. It depends on the size of your wanton.

Method
  1. Put all wanton ingredients together. Using chopstick or fork, stir them vigorously until all ingredients are well mixed and the minced pork are well blended with condiments and looked gluey.
  2. Wrap wanton accordingly. Cook wanton in hot boiling water. Once they are done, remove from water. 
  3. Cook shrimp roe noodles in hot boiling water until noodles are soft. 
  4. Once noodles are cooked, drizzle over shrimp paste, dark soy sauce, soy sauce, shallot oil. And then top with shrimp roe and spring onion as garnishing.
  5. Serve noodles with wantons at the side. 

Look at the size of my wanton. They are big. I wrapped 1 prawns in each wanton. Hehe..


And shrimp roe wanton noodles done! Max says this taste really like the one we had in Macau!


Pretty straightforwared eh. As long as you get the ingredients right, I think this is not difficult to replicate. So, do go down to Cold Storage and buy some shrimp roe noodles and make some wantons today!


Do try it out!

I am submitting this post to Asian Food Fest ( Hong Kong + Macau ) – Jan+Feb Month hosted by Annie of Annielicious Food